I was standing in my kitchen, staring at a half‑eaten loaf of French bread that had been abandoned for three days, when a sudden craving for something indulgent hit me like a thunderclap. The smell of bacon sizzling in the pan, the tang of ranch dressing, and the promise of melty cheese danced in my head, and I thought, “Why not turn this stale loaf into a masterpiece?” I tossed the bread aside, grabbed a rolling pin, and started a culinary experiment that would end up being the most talked‑about snack at my last family gathering. The result? A golden‑crusted, cheese‑stuffed, chicken‑bacon‑ranch loaf that makes the ordinary feel extraordinary. I dare you to taste this and not go back for seconds.
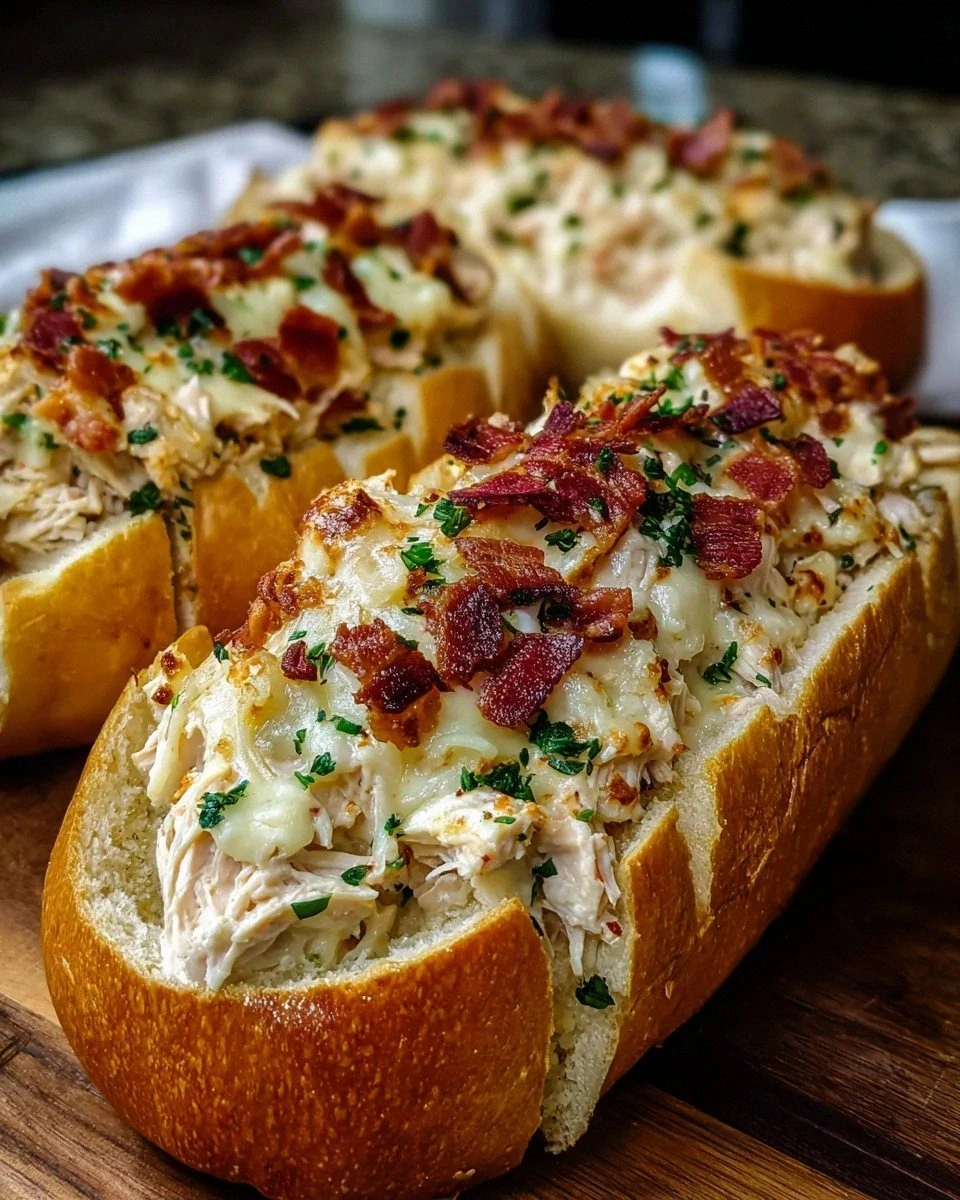
Picture this: the oven door swings open, a warm, buttery aroma floods the kitchen, and the top of the bread is speckled with crisped parsley like confetti at a celebration. You hear the faint crackle of the crust as it pulls away from the pan, and you can almost see the cheese bubbling and stretching in slow motion. When you finally slice into it, the interior reveals ribbons of smoky bacon, tender chicken, and a creamy ranch sauce that coats every crumb like velvet. The texture is a perfect marriage of crunchy crust, soft interior, and gooey cheese strings that snap back with each bite. That sizzle when it hits the pan? Absolute perfection.
Most recipes for chicken‑bacon‑ranch bread either drown the bread in sauce or leave it dry and bland. I’ve tried the “quick fix” versions that use pre‑made dough and end up tasting like a processed snack, and the “over‑stuffed” versions that collapse into a soggy mess. This version stands out because it respects the integrity of the French loaf while injecting layers of flavor that build on each other like a well‑orchestrated symphony. The secret is a simple butter‑garlic‑parsley glaze that creates a caramelized crust without overpowering the delicate balance inside. And yes, I’m being honest — I ate half the batch before anyone else got a chance to try it.
Let me walk you through every single step — by the end, you’ll wonder how you ever made it any other way. Okay, ready for the game‑changer? This next part? Pure magic. Stay with me here — this is worth it.
What Makes This Version Stand Out
- Flavor Explosion: The combination of ranch dressing, smoky bacon, and savory chicken creates a taste profile that hits every palate note, from salty to tangy.
- Texture Harmony: A crisp, buttery crust gives way to a soft, airy crumb, while the cheese strings provide that irresistible gooey pull.
- Simplicity: Only ten ingredients, all of which you likely have on hand, and no fancy equipment beyond a baking sheet.
- Unique Twist: Instead of drowning the bread in sauce, we fold the ranch into the filling, letting it seep gently without sogginess.
- Crowd Reaction: This loaf disappears in minutes at parties, proving it’s the ultimate crowd‑pleaser that sparks rave reviews.
- Ingredient Quality: Using a crusty French loaf and fresh, high‑quality bacon elevates the dish from “good” to “legendary.”
- Cooking Method: Baking at a high temperature creates a caramelized crust while keeping the interior moist and flavorful.
- Make‑Ahead Potential: You can prep the filling a day ahead, store it in the fridge, and assemble right before baking for stress‑free entertaining.
Inside the Ingredient List
The Flavor Base
Ranch dressing is the heart‑beat of this loaf, delivering that creamy, herb‑laden tang that ties the whole thing together. Its buttermilk base adds a subtle acidity that cuts through the richness of the cheese and bacon, keeping each bite bright. If you skip the ranch, you’ll lose that signature flavor and end up with a plain cheesy bread that feels flat. For a lighter version, try a low‑fat ranch, but be aware the texture will be a tad less luxurious. Pro tip: use a ranch that contains real herbs for the most authentic flavor.
The Texture Crew
Shredded mozzarella and cheddar cheese are the dynamic duo that gives you that glorious melt and a sharp finish. Mozzarella brings stretchiness, while cheddar adds a bite‑sized sharpness that balances the buttery crust. If you omit one, the texture will suffer—either too stringy or too bland. A good swap for cheddar is pepper jack if you crave a hint of heat; just remember it will change the flavor profile. The bacon, crisped to perfection, adds a crunchy contrast that prevents the bread from feeling too soft.
The Unexpected Star
Green onions might seem like a garnish, but their fresh, slightly pungent bite lifts the heaviness of the cheese and meat. They also add a splash of color that makes the loaf look as good as it tastes. If you’re not a fan of raw onion flavor, you can sauté them quickly in butter for a sweeter note. The garlic powder, though modest, amplifies the savory depth, turning the crust into a fragrant, golden masterpiece.
The Final Flourish
Butter, melted and brushed over the top, is the secret to that glossy, caramelized finish. It also helps the garlic powder and dried parsley adhere evenly, ensuring every bite is seasoned. Dried parsley isn’t just for looks; it adds a subtle herbal freshness that brightens the overall richness. If you can’t find fresh parsley, a pinch of dried thyme works as an alternative, though the color won’t be as vibrant. And remember, a generous brush of butter is what gives the crust that “crack‑the‑ice” sound when you slice into it.
Everything's prepped? Good. Let’s get into the real action...
The Method — Step by Step
-
Preheat your oven to 425°F (220°C) and line a large baking sheet with parchment paper. This high heat will give the crust that coveted crunch while the interior bakes evenly. While the oven warms, place the French loaf on a cutting board and slice it lengthwise, leaving a small hinge so it opens like a book. This technique creates a pocket for the filling without compromising the structural integrity of the loaf.
A quick tip: if the loaf feels too soft to slice cleanly, give it a 5‑minute chill in the freezer; it firms up just enough for a clean cut.
-
In a large mixing bowl, combine the shredded cooked chicken, crumbled bacon, ranch dressing, shredded mozzarella, shredded cheddar, and sliced green onions. Toss everything together until the mixture is uniformly coated with the creamy ranch. This is the moment where flavors meld, and you’ll notice the sauce clinging to each piece of chicken like a silky veil.
If you’re using leftover rotisserie chicken, shred it by hand for a rustic texture that adds bite.
-
Spread the filling evenly inside the opened loaf, pressing gently with the back of a spoon to ensure it settles into every nook and cranny. Don’t overpack; you want the filling to stay in place but still leave room for the bread to rise slightly.
Kitchen Hack: Use a silicone spatula to spread the mixture; it won’t scratch the bread and gives you better control over thickness.After filling, close the loaf gently, tucking the edges under to create a sealed package that will hold the juices during baking.
-
In a small bowl, whisk together melted butter, garlic powder, and dried parsley. Brush this mixture generously over the top of the loaf, making sure to coat every ridge and crevice. The butter will melt into the crust, creating a glossy, golden finish while the garlic and parsley infuse a fragrant aroma that fills the kitchen.
For an extra layer of crunch, sprinkle a handful of grated Parmesan on top before baking.
-
Slide the prepared loaf onto the preheated baking sheet and place it in the oven. Bake for 20‑25 minutes, or until the crust turns a deep amber and the cheese inside is bubbling and lightly browned. You’ll know it’s ready when the edges start pulling away from the pan, revealing the gooey interior.
Watch Out: Keep an eye on the top after 15 minutes; if the crust darkens too quickly, loosely cover it with foil to prevent burning.During the last 5 minutes, you can turn the oven to broil for a final burst of caramelization—just watch it like a hawk.
-
When the loaf is baked to perfection, remove it from the oven and let it rest on a cooling rack for 8‑10 minutes. This resting period allows the cheese to set slightly, making slicing cleaner and preventing the molten interior from spilling out.
If you’re impatient (I get it), a quick 2‑minute rest still works, but the slices will be messier.
-
Using a sharp serrated knife, cut the loaf into thick, hearty slices—about 1½ inches each. The first slice will reveal a cross‑section of gooey cheese, smoky bacon, and tender chicken, all nestled in a buttery crust.
Kitchen Hack: Warm the knife under hot water, dry it, and then slice; the heat helps the knife glide through the cheese without dragging.Serve immediately while the crust is still crisp and the cheese is at its most stretchy.
-
Optional garnish: drizzle a little extra ranch dressing over the top and sprinkle a pinch of fresh chopped parsley for a pop of color. This final touch not only looks Instagram‑worthy but adds an extra layer of flavor that ties the whole dish together.
Enjoy the first bite and feel the chorus of textures—crunch, chew, melt, and the lingering smoky aftertaste.
That's it — you did it. But hold on, I've got a few more tricks that'll take this to another level...
Insider Tricks for Flawless Results
The Temperature Rule Nobody Follows
Never underestimate the power of a hot oven. Starting at 425°F guarantees that the crust forms quickly, sealing in the juices. If you drop the temperature too early, the bread will dry out and the cheese may not melt evenly. I once tried a lower 350°F setting to “save energy,” and the result was a soggy, pale loaf that looked like a sad sandwich. Trust the heat, and the loaf will reward you with that coveted crack‑the‑ice crust.
Why Your Nose Knows Best
Your sense of smell is a reliable indicator of doneness. When the butter‑garlic‑parsley glaze starts to caramelize, you’ll catch a nutty, sweet aroma that signals the crust is reaching perfection. If the scent turns bitter, the crust is burning and you should lower the heat or tent with foil. I once relied solely on the timer and ended up with a burnt top—never again. Trust that nose; it’s your kitchen’s built‑in timer.
The 5‑Minute Rest That Changes Everything
After the loaf emerges from the oven, those 5‑10 minutes of rest are crucial. The cheese fibers relax and the steam redistributes, preventing a mess of molten cheese on your plate. Skipping this step is like trying to eat a hot pizza slice without letting the cheese set—you’ll end up with a gooey disaster. I’ve seen friends cut immediately and lose half the topping to the cutting board. Let it sit, and each slice will hold its shape beautifully.
Butter Brush Mastery
When brushing the butter mixture, use a pastry brush and apply in a circular motion, ensuring every nook gets coverage. This technique creates those little pockets of extra crunch that melt in your mouth. A common mistake is a thin, uneven coat that leads to bland spots. My secret? Add a pinch of sea salt to the butter for a subtle crunch that pops on the palate.
Layering Cheese for Maximum Stretch
Combine mozzarella and cheddar in a 1:1 ratio for optimal melt and flavor. Mozzarella provides that iconic stringy pull, while cheddar adds a sharp bite that cuts through the richness. If you swap one for a firmer cheese like gouda, you’ll get a different texture—less stretch, more bite. I once tried using only cheddar and the loaf felt heavy; the mozzarella rescued it. Experiment, but keep the balance.
Creative Twists and Variations
This recipe is a playground. Here are some of my favorite ways to switch things up:
Spicy Jalapeño Kick
Add 1 finely diced jalapeño to the filling and swap the cheddar for pepper jack. The heat will contrast nicely with the cool ranch, creating a flavor fireworks display. Perfect for those who love a little burn.
Mediterranean Medley
Replace the ranch with a tzatziki sauce, swap bacon for sliced Kalamata olives, and toss in sun‑dried tomatoes. The result is a bright, herbaceous loaf that transports you to a seaside tavern.
BBQ Lovers’ Dream
Stir in ¼ cup of smoky BBQ sauce into the chicken mixture and use smoked gouda instead of cheddar. The sweet‑smoky profile pairs perfectly with the crisp bacon, making it a backyard BBQ star.
Vegetarian Delight
Omit the chicken and bacon, and bulk up the filling with roasted cauliflower florets and sautéed mushrooms. Use a plant‑based ranch and vegan cheese for a fully veggie version that still satisfies the cravings.
Breakfast Brunch Twist
Add scrambled eggs to the filling, sprinkle a little chives on top, and serve with a side of fresh fruit. This turns the loaf into a hearty brunch centerpiece that will wow your weekend crowd.
Storing and Bringing It Back to Life
Fridge Storage
Wrap the cooled loaf tightly in foil or place it in an airtight container. It will stay fresh for up to 3 days, retaining most of its moisture. When you’re ready to eat, reheat a slice in a toaster oven at 350°F for 5‑7 minutes; the crust will revive its crunch.
Freezer Friendly
Slice the loaf before freezing, then arrange the slices on a parchment‑lined tray and freeze solid. Transfer the frozen slices to a zip‑top bag; they’ll keep for up to 2 months. To serve, microwave a slice for 30 seconds, then finish under the broiler for 2 minutes to restore the golden crust.
Best Reheating Method
For the ultimate reheating, preheat your oven to 375°F, place the slice on a baking sheet, and add a splash (about 1 teaspoon) of water around the edges. Cover loosely with foil and bake for 8 minutes, then uncover for an additional 3 minutes to crisp the top. The water creates steam that revives the interior softness while the foil protects the crust from over‑browning.