I was staring at a half‑cooked pot of plain tteokbokki, the kind that makes you wonder why you ever bothered with the bland version in the first place. The kitchen smelled like burnt onions and my patience was evaporating faster than the steam from the pot. Then a friend dared me, “Make it so cheesy that even a dairy lover would beg for the recipe,” and I thought, why not? I grabbed a bag of cashews, a splash of miso, and a handful of nutritional yeast, and the rest was a deliciously chaotic experiment that turned into the ultimate comfort food. This version is the love child of Korean street food and a vegan cheese sauce that clings to each rice cake like a velvety blanket, and trust me, it’s a game‑changer.
Imagine the first bite: the chewy rice cake gives way to a sauce that’s both tangy and nutty, with a subtle umami punch that makes your taste buds do a happy dance. The aroma hits you like a warm hug from a grandma who knows exactly how you like your food—spicy, creamy, and just a little sweet from the carrots and potatoes. You’ll hear the gentle hiss of the sauce as it simmers, and you’ll feel the heat of the pan radiating into your fingertips, reminding you that something magical is happening. The texture is a perfect contrast: the rice cakes stay springy while the sauce thickens into a glossy sheen that coats every curve.
Most tteokbokki recipes either drown the rice cakes in a watery broth or slap on a processed cheese sauce that tastes like a plastic wrapper. I’ve tried both, and both left me feeling underwhelmed and a bit cheated. The secret here is a blend of cashews, miso, and nutritional yeast that creates a depth of flavor you never expected from a plant‑based sauce. Add a dash of Korean red pepper flakes, and you’ve got a dish that sings louder than a karaoke bar on a Saturday night. I dare you to taste this and not go back for seconds.
Okay, ready for the game‑changer? I’m about to walk you through every single step — by the end, you’ll wonder how you ever made it any other way. Picture yourself pulling this out of the pan, the whole kitchen smelling incredible, steam swirling like a cozy blanket, and a plate of glossy, cheesy tteokbokki waiting for you. Let’s dive in, because the next part? Pure magic.
What Makes This Version Stand Out
- Taste: The combination of miso and nutritional yeast gives a savory depth that no store‑bought cheese can match.
- Texture: Cashew‑based sauce thickens without becoming gummy, hugging each rice cake like velvet.
- Simplicity: Only eight core ingredients, most of which you likely already have in your pantry.
- Uniqueness: The potato and carrot add natural sweetness and body, eliminating the need for heavy cream.
- Crowd Reaction: Even the most skeptical meat‑eaters rave, asking “What’s the secret?” before I spill the beans.
- Ingredient Quality: Using raw cashews ensures a clean, buttery flavor that roasted nuts can’t replicate.
- Cooking Method: A one‑pot approach means less cleanup and more flavor concentration.
- Make‑Ahead Potential: The sauce freezes beautifully, letting you prep ahead for a quick weeknight rescue.
Inside the Ingredient List
The Flavor Base
Miso paste is the unsung hero that brings a deep, fermented umami that makes the sauce feel luxurious. A single tablespoon is enough to turn a simple nut blend into something that tastes like it’s been simmering in a Korean kitchen for hours. If you’re allergic to soy, try a mushroom miso for a similar depth without the soy. The miso also helps stabilize the sauce, preventing it from separating when you add the starch later.
The Texture Crew
Cashews are the backbone of the creaminess. Their natural oils create a buttery mouthfeel, while the tapioca starch acts like a secret agent, giving the sauce that glossy sheen and preventing it from turning grainy. If you’re short on tapioca, cornstarch works as a decent stand‑in, though the finish will be slightly less elastic. The rice cakes (garaetteok) are the star of the show; they’re chewy, slightly sweet, and absorb the sauce like a sponge, ensuring every bite is packed with flavor.
The Unexpected Star
Nutritional yeast is the vegan cheese whisperer—its nutty, cheesy flavor is what makes the sauce sing. A quarter cup might sound modest, but it packs a punch that rivals real cheese. If you’re not a fan of its slightly bitter edge, toast it lightly before adding; the toasting mellows the bitterness and adds a subtle caramel note.
The Final Flourish
Seasonings, especially Korean red pepper flakes (gochugaru), bring the heat that balances the richness. Adjust the amount to match your spice tolerance; a teaspoon gives a gentle warmth, while two teaspoons turn up the fire. Don’t forget a pinch of salt and a splash of soy sauce for that savory backbone—just remember, “to taste” means you’re the boss of the flavor orchestra.
Everything's prepped? Good. Let's get into the real action…
The Method — Step by Step
Start by soaking the cashews. Place 1 cup of raw cashews in a bowl, cover with hot tap water, and let them sit for 10 minutes. This quick soak softens them enough to blend into a silky paste without a food processor overheating. While they’re soaking, peel and dice the potato and carrot into bite‑size cubes; the veggies will add natural sweetness and body to the sauce.
Drain the cashews and toss them into a high‑speed blender. Add 1 tablespoon of miso paste, 1/4 cup nutritional yeast, and a splash of water (about ¼ cup). Blend on high until the mixture is completely smooth, resembling a thick almond butter. Watch out: If the blender struggles, stop and scrape the sides; a smooth base is crucial for a velvety final texture.
In a large, deep skillet or wok, heat 2 tablespoons of neutral oil over medium heat. Add the diced potato and carrot, sautéing until they start to soften and develop a light caramel color—about 5‑6 minutes. You’ll hear a gentle sizzle, and the kitchen will fill with a sweet, earthy aroma that signals you’re on the right track.
Add the 200 grams of rice cakes to the pan, stirring gently to coat them with the oil and veggies. Let them toast for 2‑3 minutes, allowing the edges to turn a light golden brown. This step is crucial because it creates a toasty flavor that deepens the overall profile. The rice cakes should start to puff up slightly as they absorb the heat.
Pour the cashew‑miso sauce over the rice cakes and vegetables, stirring constantly to combine. Reduce the heat to low and let the mixture simmer for 8‑10 minutes. During this time, the sauce will thicken, and the starch from the potatoes will dissolve, giving the sauce a silk‑like consistency. Keep an eye on the pan; you want the sauce to coat the rice cakes without sticking to the bottom.
In a small bowl, whisk together 2 tablespoons of tapioca starch with 2‑3 tablespoons of cold water until fully dissolved. Slowly drizzle this slurry into the simmering sauce, stirring continuously. As soon as the starch hits the heat, the sauce will become glossy and cling to each rice cake like a mirror. This is the moment of truth—if the sauce is too thin, add a touch more slurry; if it’s too thick, thin with a splash of vegetable broth.
Season the dish with Korean red pepper flakes, a pinch of salt, and a splash of soy sauce. Taste and adjust the heat level; if you love fire, add a second teaspoon of gochugaru. Let the tteokbokki sit for a minute off the heat; the flavors will meld together, and the sauce will settle into a perfect, velvety coat.
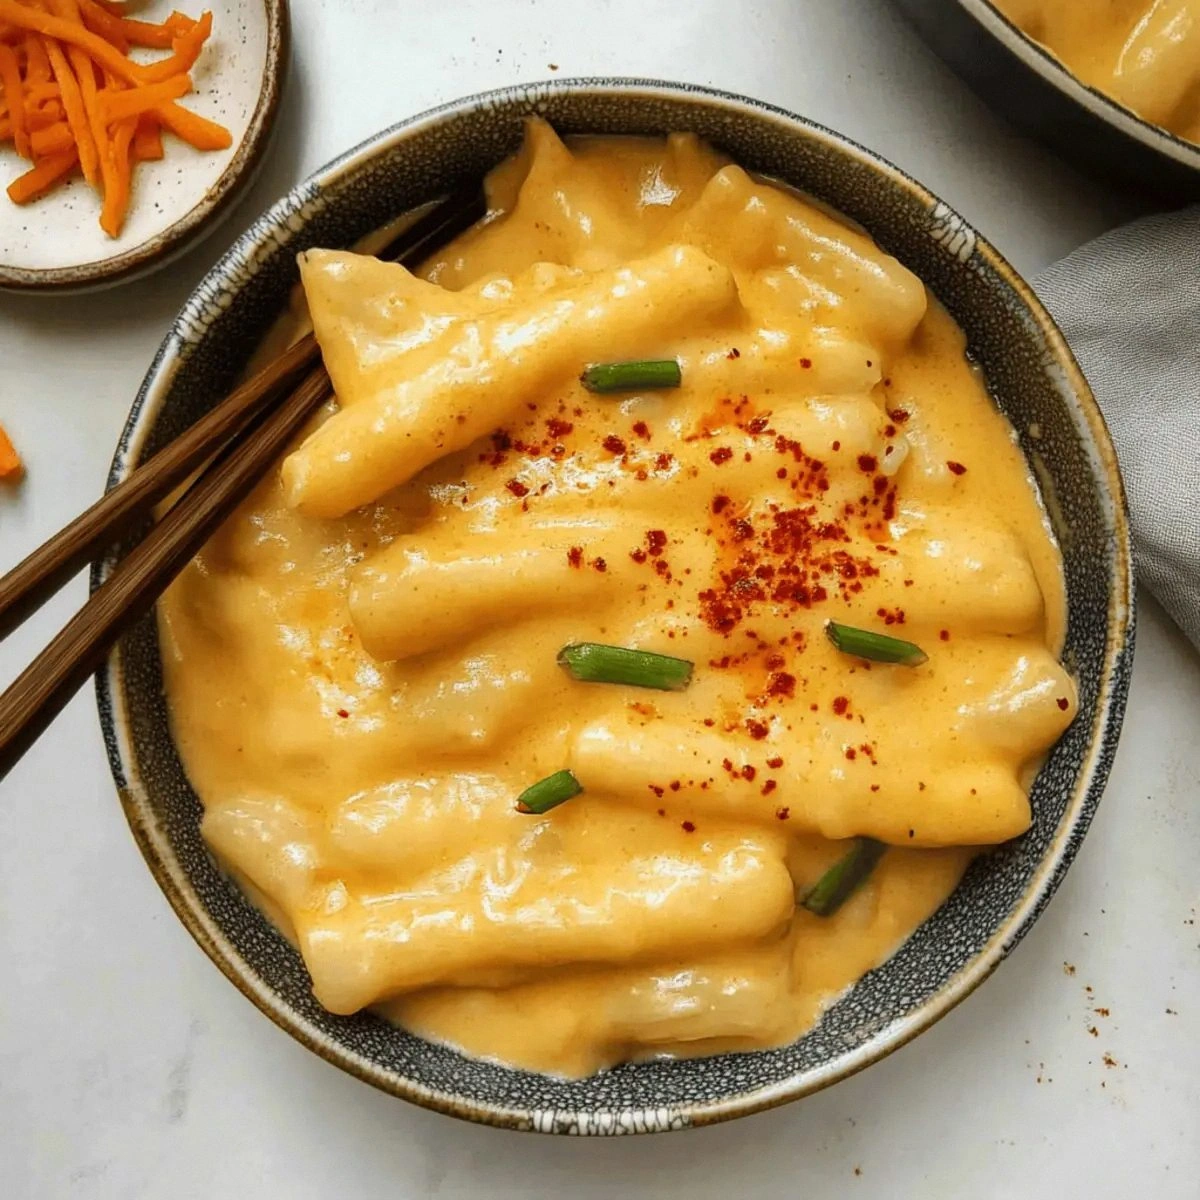
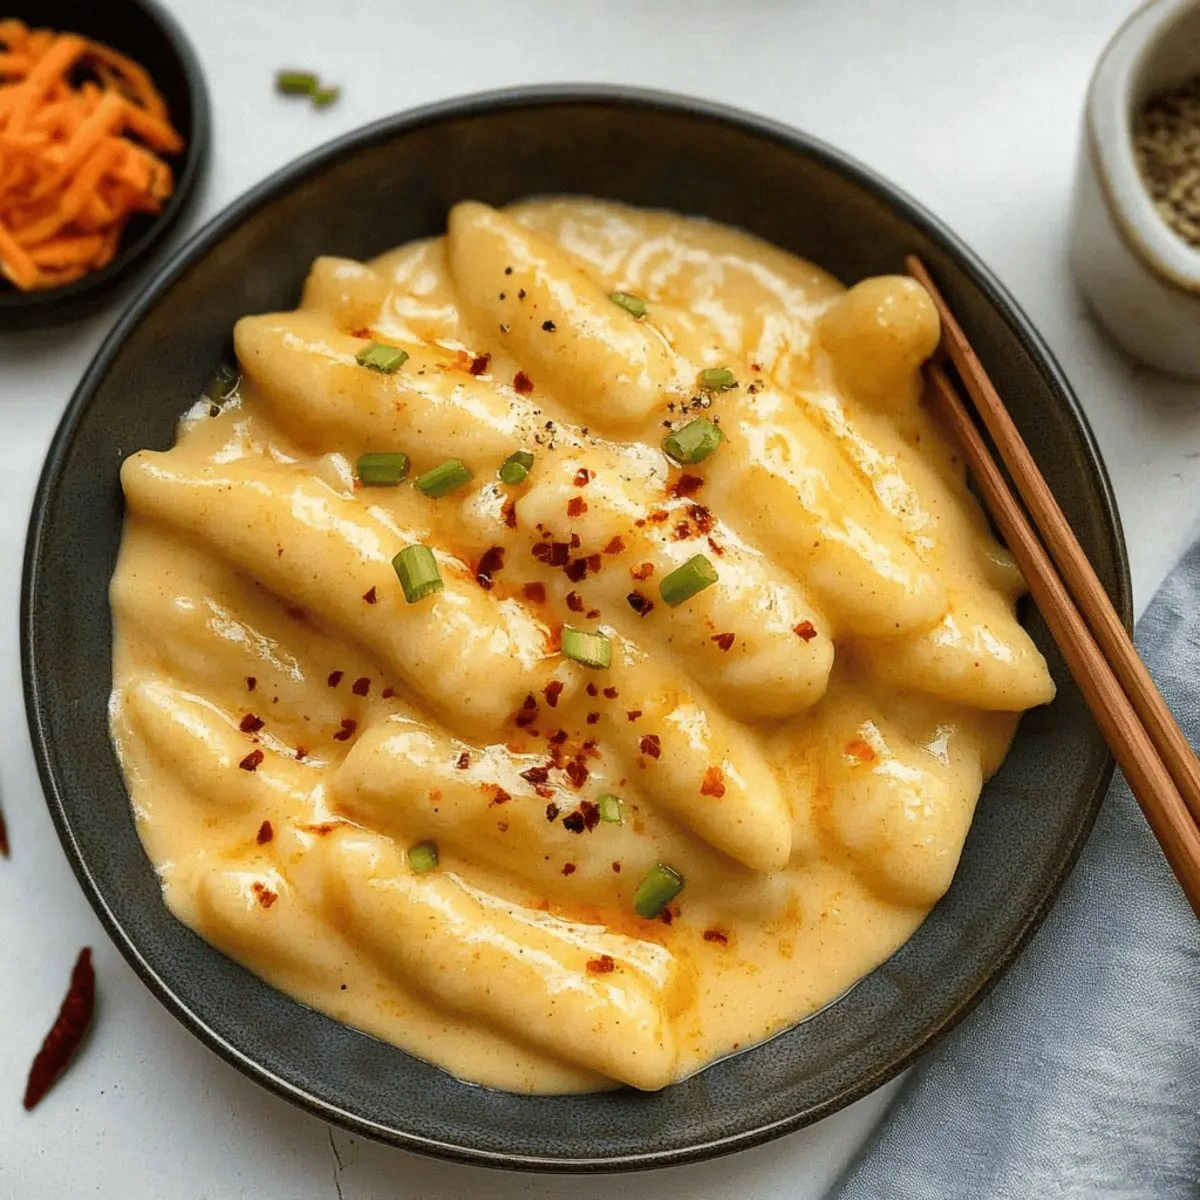
Serve immediately, garnishing with a sprinkle of extra nutritional yeast and a few chopped green onions for color. The sauce should be glossy, the rice cakes chewy, and the vegetables tender yet firm. That sizzle when it hits the pan? Absolute perfection. And now the fun part—dig in and watch everyone ask for seconds. I’ll be honest — I ate half the batch before anyone else got to try it.
That's it — you did it. But hold on, I've got a few more tricks that'll take this to another level…
Insider Tricks for Flawless Results
The Temperature Rule Nobody Follows
Keep the heat on medium‑low once the sauce is added. High heat can cause the cashew base to separate, resulting in a grainy texture that ruins the experience. I once cranked the stove to a boil and ended up with a watery mess; the sauce never thickened. A gentle simmer allows the starch to activate gradually, giving you that glossy finish without any lumps.
Why Your Nose Knows Best
Your sense of smell is a reliable indicator of doneness. When the sauce starts to emit a warm, nutty aroma with a hint of caramel, you’re close to perfection. If you detect a raw cashew scent, keep simmering for another minute. Trust your nose more than the timer; it’s the secret weapon of seasoned chefs.
The 5‑Minute Rest That Changes Everything
After you turn off the heat, let the tteokbokki rest for five minutes. This rest period lets the rice cakes absorb the sauce fully, turning each bite into a melt‑in‑your‑mouth experience. Skipping this step leaves the sauce on the surface, making the dish feel less cohesive. I once served it straight off the stove and got feedback that it felt “watery”; a short rest solved that problem instantly.
Stirring with a Wooden Spoon
A wooden spoon distributes heat evenly and prevents the sauce from sticking to the pan’s edges. Metal utensils can create hot spots that cause the starch to caramelize prematurely, leading to a burnt flavor. The wooden spoon also gives you a tactile feel for the sauce’s thickness, which is invaluable for adjustments.
Seasoning at the End
Add the final pinch of salt and gochugaru right before serving. Salt can draw out moisture from the vegetables if added too early, making them soggy. By seasoning at the end, you preserve the crispness of the potato and carrot while ensuring the sauce stays luscious. Kitchen Hack: Keep a small bowl of extra gochugaru at the table for those who want an extra kick.
Creative Twists and Variations
This recipe is a playground. Here are some of my favorite ways to switch things up:
Mushroom Medley
Swap half of the potato for sliced shiitake mushrooms. The earthy umami deepens the sauce, and the mushrooms add a meaty bite that satisfies even the most carnivorous palates. Perfect for a fall evening when you crave something hearty.
Spicy Coconut Fusion
Replace the miso with 2 tablespoons of coconut cream and increase the gochugaru. The coconut adds a tropical sweetness that balances the heat, creating a flavor profile reminiscent of Thai street food. A splash of lime juice at the end brightens the dish.
Cheesy Herb Delight
Stir in a handful of fresh basil and a teaspoon of dried thyme after the sauce thickens. The herbs infuse a fragrant layer that pairs beautifully with the nutty cheese base. This variation works well for a spring brunch.
Kimchi Kick
Add ½ cup of chopped kimchi during the final simmer. The fermented tang cuts through the richness, giving the dish a lively, tangy edge. It’s a bold move that will impress anyone who loves bold, fermented flavors.
Nut‑Free Version
If you have a nut allergy, replace cashews with silken tofu and increase the nutritional yeast to ½ cup for extra cheesiness. The tofu provides a creamy base, while the extra yeast ensures the sauce stays flavorful. This version still delivers that coveted stretchiness.
Storing and Bringing It Back to Life
Fridge Storage
Transfer leftovers to an airtight container and store in the refrigerator for up to 3 days. The sauce may thicken as it cools; simply stir in a tablespoon of water before reheating to restore its silky texture. Reheat gently on the stovetop over low heat, stirring constantly.
Freezer Friendly
Portion the cooked tteokbokki into freezer‑safe bags, squeezing out excess air. It freezes well for up to 2 months. When ready to eat, thaw overnight in the fridge, then reheat in a pan with a splash of broth or water, allowing the sauce to loosen back up.
Best Reheating Method
The secret to perfect reheating is steam. Add a tiny splash of water (about a tablespoon) to the pan before warming, cover with a lid, and let the steam work its magic for 3‑4 minutes. This prevents the sauce from drying out and keeps the rice cakes chewy.