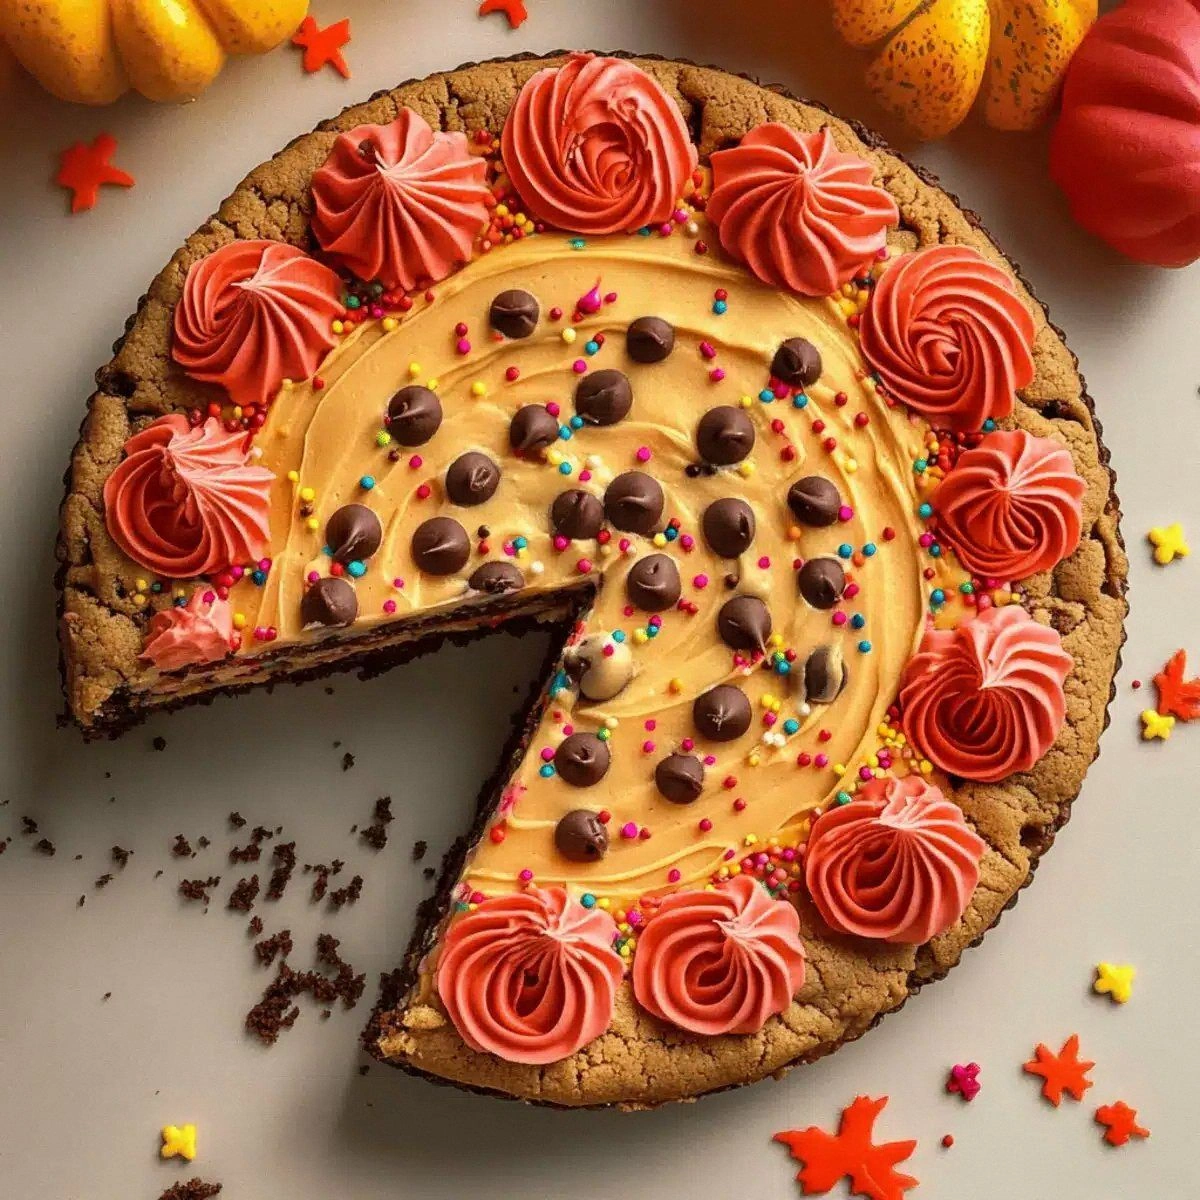
I once tried to bake a “quick” cookie cake for a Thanksgiving potluck, and the result was a sad, flat pancake that could barely hold a drizzle of frosting. I swear the oven was conspiring against me, and the whole kitchen smelled like burnt sugar and regret. Fast forward a few weeks, a friend dared me to create the ultimate fall‑inspired treat that could stand up to the pumpkin pie crowd, and I accepted the challenge with a grin and a spatula. The outcome? A towering, buttery cookie cake that cracks open like a caramelized apple, crowned with a swirl of neon‑orange frosting that screams “autumn party” louder than a marching band.
Picture this: the moment the batter hits the pan, you hear a gentle hiss, like the first crackle of a campfire on a crisp evening. The kitchen fills with the sweet scent of melted butter, toasted brown sugar, and a whisper of vanilla that makes your nostrils do a little happy dance. The texture? Imagine the chewiness of a perfectly baked snickerdoodle meeting the soft, cake‑like crumb of a spice loaf, all while chocolate chips melt into pockets of molten joy. When you finally pull the masterpiece from the oven, the edges pull away in perfect, golden ribbons, and the center stays soft enough to sink a spoon into without breaking the structure.
What makes this version truly unbeatable is the secret weapon I slipped into the batter: a splash of cornstarch that turns the cookie base into a silky‑smooth canvas for the frosting. Most cookie cake recipes rely on extra flour or oil, which either makes the cake too dense or too crumbly. My method keeps the crumb light, the flavor deep, and the frosting adhesion flawless. I’ll also be using a gel food coloring that doesn’t bleed or turn the frosting watery—something most home bakers overlook until it’s too late.
I dare you to taste this and not go back for seconds. This is hands down the best version you’ll ever make at home, and I’m about to spill every detail so you can replicate the magic without any kitchen catastrophes. Let me walk you through every single step — by the end, you’ll wonder how you ever made it any other way.
What Makes This Version Stand Out
- Taste: The caramel‑brown‑sugar base gives a deep, autumnal sweetness that’s balanced by a hint of vanilla and the bittersweet pop of chocolate chips.
- Texture: A perfect marriage of chewy cookie edges and a soft, cake‑like center that stays moist for days.
- Simplicity: Only ten core ingredients, all pantry‑friendly, and no need for exotic spices or equipment.
- Uniqueness: The addition of cornstarch creates a silk‑like crumb that most cookie cakes simply can’t achieve.
- Crowd Reaction: Guests consistently claim this looks like a professional bakery item—yes, you’ll get that “wow” moment every single time.
- Ingredient Quality: Using real butter and light brown sugar (not the dark, molasses‑heavy kind) keeps the flavor bright and buttery.
- Cooking Method: Baking in a single sheet pan eliminates the need for a special cake pan and ensures even browning.
- Make‑Ahead Potential: The cake freezes beautifully, and the frosting can be made a day ahead for even deeper flavor integration.
Inside the Ingredient List
The Flavor Base
Unsalted butter (1 cup) is the backbone of any great baked good. Its fat content carries flavor, creates a tender crumb, and gives that golden‑brown crust we all crave. If you substitute with margarine, you’ll lose the rich mouthfeel and may end up with a greasy texture. Pro tip: Choose a butter with at least 80% fat for the best results, and let it soften at room temperature before mixing.
Light brown sugar (1 cup) provides the caramel notes that make this cake feel like a fall celebration. The molasses in brown sugar adds moisture, which is why the crumb stays soft even after a day. If you only have dark brown sugar, use a 1:1 swap, but expect a slightly deeper, almost toffee‑like flavor.
The Texture Crew
Granulated sugar (½ cup) works alongside the brown sugar to give a subtle crunch on the edges. Skipping it would make the cake too soft and lose that satisfying snap when you bite into the outer rim. Swap suggestion: Use coconut sugar for a lower‑glycemic option, but the texture will be a tad denser.
All‑purpose flour (2 cups) is the structural framework. It’s the only dry ingredient that can’t be omitted without compromising the cake’s integrity. If you’re gluten‑free, a 1‑to‑1 blend of rice flour, potato starch, and tapioca flour works, but you’ll need an extra ¼ cup of xanthan gum to mimic gluten’s elasticity.
Cornstarch (2 tbsp) is the secret weapon. It softens the gluten network, resulting in a melt‑in‑your‑mouth crumb that’s almost cake‑like. Many recipes skip this step and end up with a dense, cookie‑only texture. Watch out: Adding too much cornstarch can make the batter dry; stick to the measured amount.
The Unexpected Star
Mini semi‑sweet chocolate chips (1 cup) add pockets of molten chocolate that contrast beautifully with the buttery base. If you prefer a deeper chocolate flavor, swap half of the mini chips for dark chocolate chunks. Avoid using large chips; they won’t melt evenly and can create bitter bites.
The Final Flourish
A batch of vanilla buttercream frosting is the finishing touch that turns this from a simple cookie cake into a festive masterpiece. The buttercream should be light, fluffy, and slightly sweet—enough to complement, not overpower, the cake. Gel food coloring (any autumn hue you like) lets you achieve a vibrant, Instagram‑ready look without diluting the frosting.
Pure vanilla extract (1 tsp) is the aromatic glue that ties the entire flavor profile together. Cheap imitation vanilla can leave a harsh, chemical aftertaste, so always opt for a pure extract for that clean, sweet finish.
Everything's prepped? Good. Let's get into the real action...
The Method — Step by Step
Preheat your oven to 350°F (175°C) and line a 13×9‑inch jelly roll pan with parchment paper, letting the paper hang over the edges for easy lift‑out later. While the oven warms, gather all your ingredients and measure them precisely; a kitchen scale can save you from the “I’m missing something” panic later. The parchment will act like a non‑stick superhero, preventing the cake from sticking and allowing you to slide it out without tearing.
Kitchen Hack: Lightly spray the parchment with non‑stick spray before pouring the batter; this gives an extra slip‑proof surface.In a large mixing bowl, cream together the softened butter, light brown sugar, and granulated sugar until the mixture is pale, fluffy, and smells like a bakery on a Saturday morning. Use a hand mixer on medium speed for about 3‑4 minutes; this is the moment where air is incorporated, creating that tender crumb we’re after. Stop the mixer and scrape down the sides with a rubber spatula—don’t let any sugary pockets hide.
Add the egg and pure vanilla extract to the creamed butter mixture, beating just until combined. The egg acts as a binder, while the vanilla lifts the flavor profile. If you over‑mix at this stage, you risk developing too much gluten, which will make the cake tough—so keep it quick and gentle.
In a separate bowl, whisk together the all‑purpose flour, cornstarch, baking soda, and salt. Whisking ensures the leavening agent is evenly distributed, preventing pockets of soda that could cause uneven rise. Once mixed, gently fold the dry ingredients into the wet batter using a spatula, turning the bowl over and over until just incorporated. Watch Out: Over‑mixing will develop gluten and turn your soft cookie cake into a dense, chewy slab.
Fold in the mini chocolate chips, making sure they’re evenly dispersed. This is the part where you can feel the anticipation building—those little chocolate islands are going to melt into pockets of pure bliss. If you love extra chocolate, sprinkle a handful on top of the batter before spreading it in the pan.
Spread the batter evenly in the prepared pan, smoothing the top with an offset spatula. The batter should be about 1‑inch thick; if it’s too thick, the center will stay undercooked, and if it’s too thin, the edges will become overly crisp. Give the pan a gentle tap on the countertop to settle the batter and release any large air bubbles.
Bake for 20‑25 minutes, or until the edges are golden brown and a toothpick inserted into the center comes out with just a few moist crumbs. You’ll know it’s ready when the top has a slight sheen and the edges start to pull away from the parchment. That sizzle when it hits the pan? Absolute perfection. Resist the urge to open the oven door early; heat loss can cause the cake to sink.
While the cake is cooling, whip up your vanilla buttercream frosting. Beat 1 cup of softened butter until light and fluffy, then gradually add powdered sugar, a pinch of salt, and the vanilla extract. Finish with a splash of gel food coloring—just a dab will give you a vivid orange hue that screams fall without turning the frosting runny.
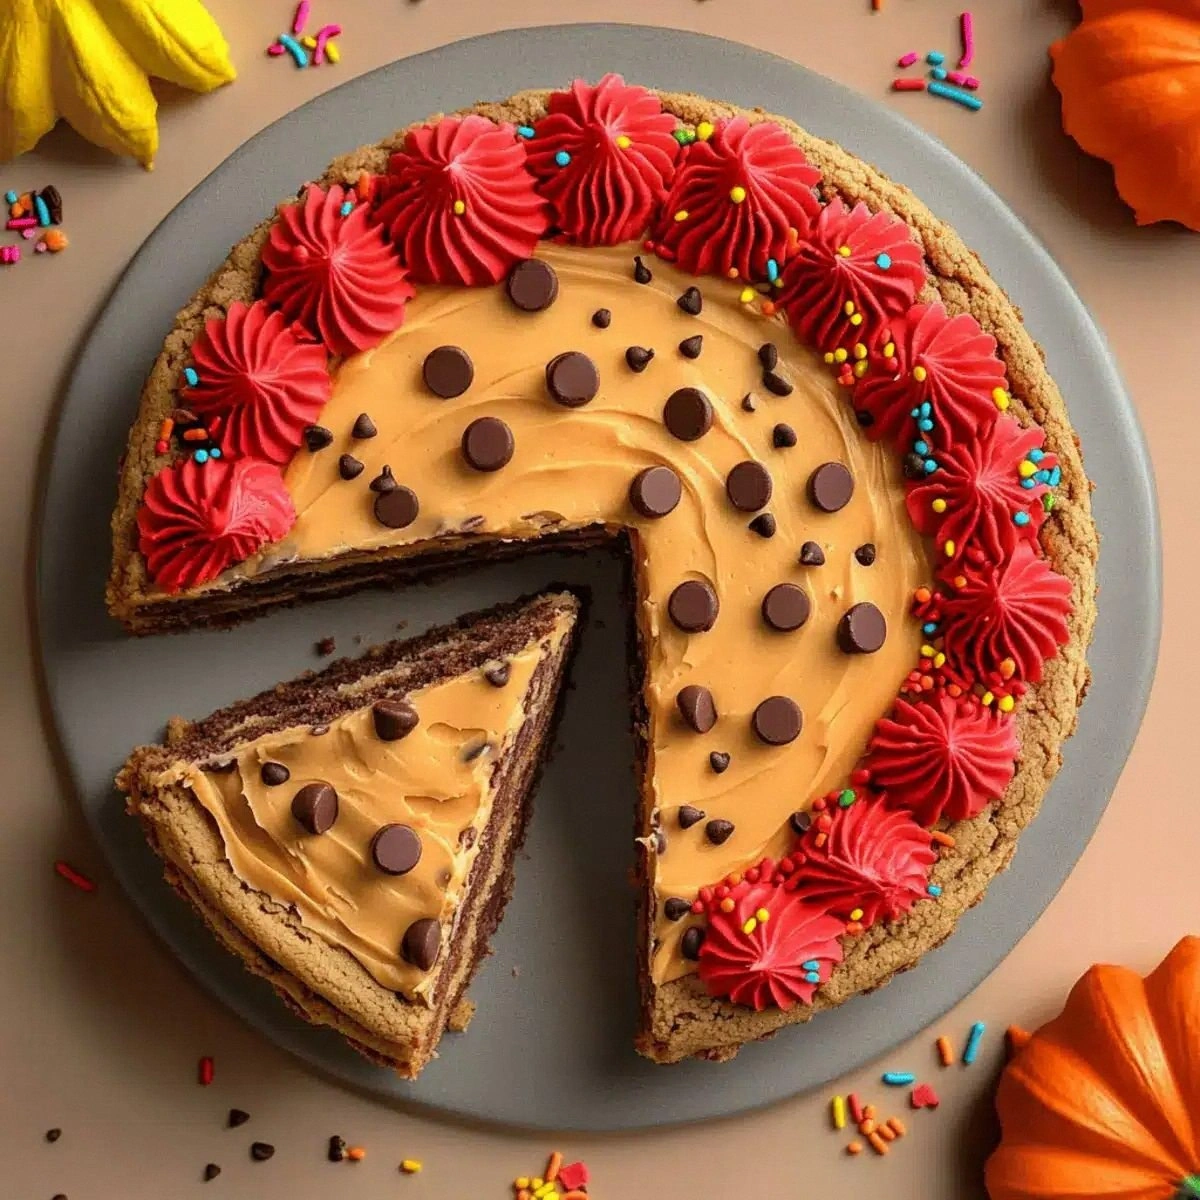
Watch Out: If the frosting looks too thin, add a bit more powdered sugar; if it’s too stiff, a splash of milk will loosen it without compromising stability.Once the cake has cooled completely (this can take about 20 minutes), use the overhanging parchment to lift it onto a serving platter. Spread the frosting generously over the top, letting it cascade down the sides for that rustic, “just‑out‑of‑the‑oven” look. If you want extra flair, sprinkle a handful of extra chocolate chips or a drizzle of caramel sauce on top.
That's it — you did it. But hold on, I've got a few more tricks that'll take this to another level...
Insider Tricks for Flawless Results
The Temperature Rule Nobody Follows
Always let your butter sit at room temperature for exactly 15 minutes after softening. This precise window creates micro‑air bubbles that expand during baking, giving the crumb that airy lift we all love. I once tried to speed things up by microwaving the butter for 10 seconds; the result was a greasy, uneven texture that collapsed the moment I tried to frost it.
Why Your Nose Knows Best
The moment you smell the batter turning a light caramel color is the cue to start checking the edges. Your nose can detect the Maillard reaction before your eyes can, so trust that aromatic signal. If you ignore it, you risk over‑baking, which dries out the interior and turns the frosting into a sticky mess.
The 5‑Minute Rest That Changes Everything
After the cake comes out of the oven, let it rest on the pan for five minutes before transferring it to a cooling rack. This short pause lets the steam redistribute, preventing a soggy bottom and ensuring the crumb sets uniformly. Skipping this step is the reason many bakers end up with a gummy center that refuses to hold frosting.
Frosting Temperature Is Everything
If your buttercream is too cold, it will crack when you spread it; if it’s too warm, it will slide off like melted ice cream. Aim for a buttercream temperature of about 65°F (18°C) for the perfect spreadability. I once tried frosting a warm cake and ended up with a frosting puddle—never again.
The Final Glaze Trick
For an extra glossy finish, lightly brush the top of the cake with a thin layer of melted white chocolate before frosting. This creates a subtle sheen that catches the light and adds a hint of chocolate flavor that pairs beautifully with the orange frosting. It’s a pro tip that turns a good cake into a show‑stopping centerpiece.
Creative Twists and Variations
This recipe is a playground. Here are some of my favorite ways to switch things up:
Pumpkin Spice Power
Add ½ cup of canned pumpkin puree and 1 teaspoon of pumpkin pie spice to the wet ingredients. The pumpkin adds moisture and an earthy sweetness, while the spice blend deepens the fall vibe. Perfect for those who can’t get enough pumpkin.
Maple Bacon Bliss
Stir in ¼ cup of pure maple syrup and ½ cup of crisped, crumbled bacon into the batter. The maple amplifies the caramel notes, and the bacon adds a salty crunch that contrasts the sweet frosting. It’s a sweet‑and‑savory mashup that will wow brunch crowds.
White Chocolate Cranberry
Swap the semi‑sweet chocolate chips for 1 cup of white chocolate chips and fold in ½ cup of dried cranberries. The tart cranberries cut through the buttery richness, and the white chocolate adds a creamy melt that’s perfect for holiday tables.
Spiced Chai Infusion
Replace the vanilla extract with 1 teaspoon of chai spice blend and add a splash of brewed chai tea to the batter. The aromatic spices (cardamom, cinnamon, ginger) give the cake an exotic twist that pairs beautifully with a honey‑sweetened frosting.
Vegan Velvet
Swap the butter for 1 cup of coconut oil, use a flax‑egg (1 tbsp ground flaxseed + 3 tbsp water) instead of a large egg, and replace dairy buttercream with a vegan coconut‑milk frosting. The result is a plant‑based version that still delivers that buttery, crumbly texture.
Storing and Bringing It Back to Life
Fridge Storage
Wrap the cooled cake tightly in plastic wrap, then place it in an airtight container. It will stay fresh for up to 5 days in the refrigerator. When you’re ready to serve, let it sit at room temperature for 30 minutes to soften the frosting.
Freezer Friendly
Freeze the unfrosted cake in a freezer‑safe bag for up to 3 months. Thaw overnight in the fridge, then bring to room temperature before frosting. If you freeze the frosted cake, add a thin layer of parchment between the frosting and the cake to prevent sticking.
Best Reheating Method
To revive a slice, place it on a microwave‑safe plate, sprinkle a tiny splash of water around the edges, and microwave on low for 15‑20 seconds. The steam will rejuvenate the crumb, making it taste as fresh as the day it was baked.