Picture this: it’s a crisp October evening, the wind is whispering through the trees, and you’re standing in your kitchen with a pot that looks like it belongs in a witch’s cauldron. I was halfway through a marathon of spooky movies when a sudden craving hit me harder than a jack‑o‑lantern’s grin. I wanted something sweet, something crunchy, something that would make my friends scream “more!” in the best possible way. I tried a few candy recipes, but they either turned out soggy, bland, or required a dozen gadgets I didn’t even own. That night, I dared myself to create a treat that could survive a night of trick‑or‑treaters and still be the star of the dessert table the next day.
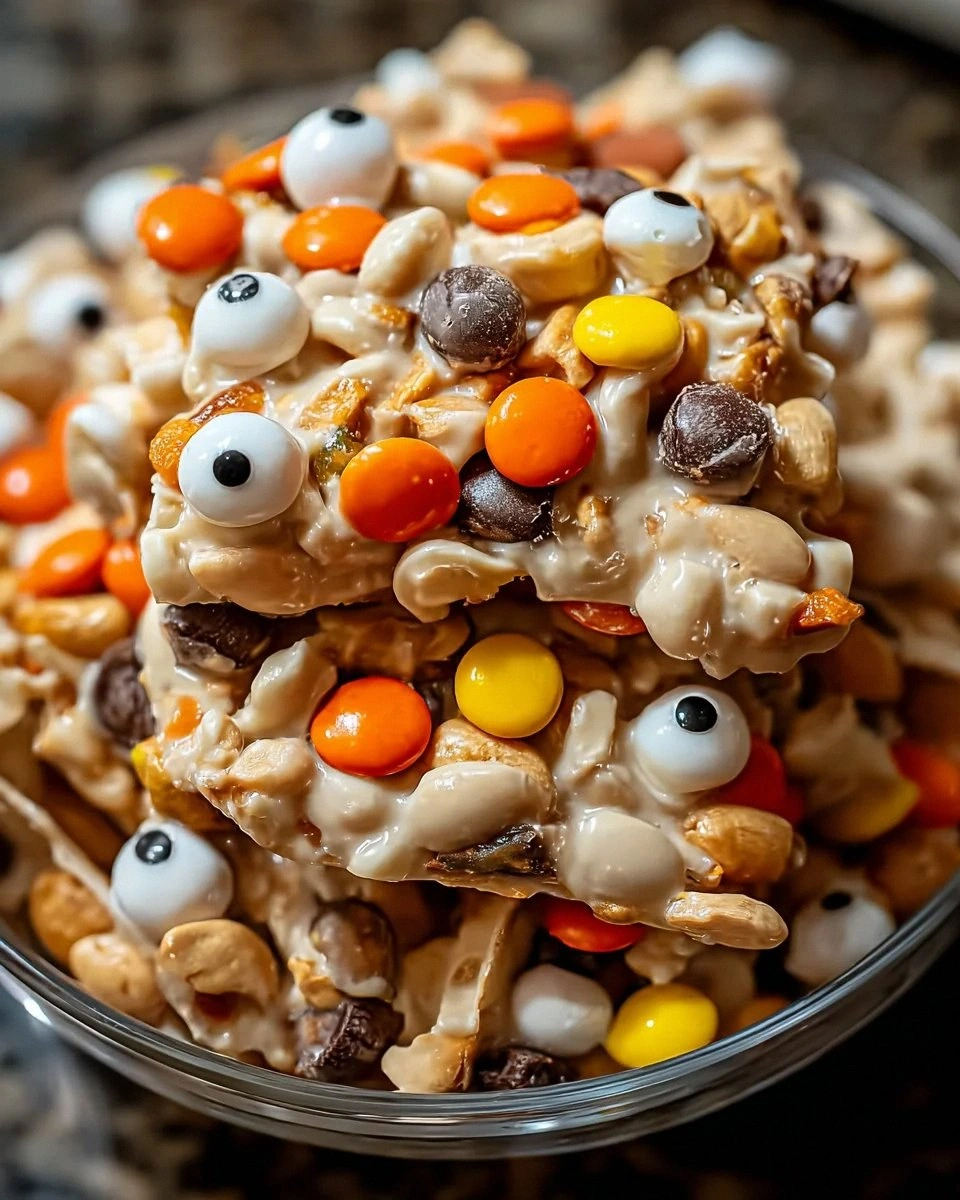
The moment I opened the pantry and saw a bag of white chocolate melting wafers, I knew I was onto something. The glossy, ivory sheets melted like a silky waterfall, promising a buttery richness that would coat every bite. I tossed in a generous handful of dry roasted peanuts, their salty crunch echoing the rustle of autumn leaves. Then came the Reese’s Pieces, those tiny orange‑gold nuggets that burst with peanut‑butter flavor, followed by a shower of neon Halloween sprinkles that looked like confetti from a candy‑filled parade. The whole kitchen filled with a scent that was part buttery, part nutty, and entirely irresistible – a fragrance that made my stomach do somersaults.
Most recipes get the texture completely wrong. They either end up as a sticky mess or a dry crumble. This version, however, strikes the perfect balance: the chocolate forms a glossy, pliable coating while the peanuts stay delightfully crunchy, and the sprinkles stay vibrant without melting away. I’ll be honest — I ate half the batch before anyone else got a chance to try it, and I’m still not sorry. The secret? A low‑and‑slow crockpot technique that lets the chocolate melt evenly, preventing scorching, and a quick chill that sets everything into bite‑size perfection.
Let me walk you through every single step — by the end, you’ll wonder how you ever made candy any other way. Okay, ready for the game‑changer? This next part? Pure magic. Stay with me here — this is worth it.
What Makes This Version Standout
- Flavor Fusion: The buttery white chocolate melds with salty peanuts, creating a sweet‑salty symphony that dances on your palate like a well‑rehearsed duet.
- Texture Contrast: Crunchy peanuts and chewy chocolate give each bite a satisfying snap followed by a melt‑in‑your‑mouth finish.
- Simplicity: Only five core ingredients, a crockpot, and a handful of minutes of active prep – no fancy equipment required.
- Visual Wow‑Factor: Halloween sprinkles and optional edible eyeballs turn ordinary candy into a spooky masterpiece that looks as good as it tastes.
- Crowd Reaction: I dare you to taste this and not go back for seconds; even the toughest candy critics beg for more.
- Ingredient Quality: Using premium white chocolate wafers ensures a smooth melt, while dry‑roasted peanuts add depth you won’t get from raw nuts.
- Low‑Heat Cooking: The crockpot’s gentle heat prevents scorching, guaranteeing a glossy finish every single time.
- Make‑Ahead Potential: Once set, these treats keep for weeks, so you can prep them early and still wow guests on the big night.
Inside the Ingredient List
The Flavor Base
White chocolate melting wafers: These creamy delights form the sweet base of your candy, melting beautifully for that indulgent flavor. The high cocoa butter content ensures a glossy coat that hardens just right. If you skip them, you’ll end up with a grainy texture that no amount of stirring can fix. Swap tip: High‑quality couverture chocolate works, but you’ll need to shave it finely to mimic the wafer’s melt rate.
The Texture Crew
Dry roasted peanuts: Salty and crunchy, they provide a perfect contrast to the sweetness of the chocolate and add a satisfying texture. Their roasted depth brings a subtle earthiness that balances the candy’s bright colors. Skipping peanuts makes the treat feel one‑dimensional, like a party without music. Swap tip: Almonds or cashews work, but toast them lightly for that same roasted punch.
The Unexpected Star
Reese’s Pieces: These little gems bring a delightful pop of color and a burst of peanut buttery goodness that’s simply irresistible. They melt slightly during cooking, creating pockets of caramelized peanut butter that surprise the palate. Without them, you lose the iconic orange‑gold flecks that scream Halloween. Swap tip: If you’re allergic to peanuts, try soy‑based “nut” candies for a similar crunch.
The Final Flourish
Halloween sprinkles: Brightly colored and festive, they add that fun, spooky touch to your treats, making them perfect for the season! They stay crisp because they’re added after the candy sets, preserving that satisfying snap. Forget them, and you lose the visual pop that makes these treats Instagram‑ready. Swap tip: Use edible glitter for a shimmering effect, but keep the sprinkles for texture.
Optional edible eyeballs: For an extra layer of fun, these playful toppings will surely thrill any little trick‑or‑treater. They’re purely decorative, adding a creepy‑cute vibe without altering flavor. If you skip them, the candy is still delicious, just a bit less theatrical. Swap tip: Candy-coated chocolate chips can stand in for eyeballs if you’re short on supplies.
Everything's prepped? Good. Let's get into the real action...
The Method — Step by Step
First, set your crockpot to the “low” setting, which typically hovers around 190°F (88°C). While the pot warms, break the white chocolate melting wafers into bite‑size pieces and place them in the inner pot. Add a teaspoon of neutral oil – this is the secret that prevents the chocolate from seizing and gives it that glossy sheen. Stir gently with a silicone spatula; you’ll hear a faint sizzle as the chocolate begins to melt, and the aroma will already start to whisper promises of decadence.
Once the chocolate is mostly melted, sprinkle in the dry roasted peanuts and stir until they’re fully coated. This is the moment where the peanuts start to release their roasted oils, deepening the flavor profile. Keep the heat low; you want the peanuts to toast lightly without burning. Power transition: Okay, ready for the game‑changer? Add the Reese’s Pieces now, and watch them tumble like tiny, buttery fireworks.
Kitchen Hack: If the mixture looks too thick, drizzle a little more oil (no more than a teaspoon) to keep it fluid for pouring.Continue stirring for another two minutes, allowing the Reese’s Pieces to soften just enough to meld with the chocolate without losing their shape. You’ll notice the mixture turning a richer, slightly amber hue – that’s the caramelized peanut butter seeping out. Taste a tiny spoonful; it should taste sweet, buttery, with a hint of salty crunch. If it feels too thick, add a splash of whole milk (about a tablespoon) to loosen it.
While the mixture is still warm, prepare a large baking sheet lined with parchment paper. This will be your cooling station. Using a spatula, spread the chocolate mixture in an even layer about half an inch thick. The surface should be smooth but not glossy; you’re aiming for a satin finish that will set into a firm bite.
Now comes the fun part: sprinkle the Halloween sprinkles over the still‑wet chocolate. Press them lightly with the back of a spoon so they adhere. If you’re using edible eyeballs, place them strategically – a few per bite works best. Watch Out: Don’t over‑sprinkle, or the candy will become too sweet and lose its savory balance.
Watch Out: If the chocolate begins to set before you finish sprinkling, gently re‑warm the crockpot for 30 seconds to keep it fluid.Once the toppings are in place, cover the crockpot and let the candy set for about 20 minutes on the “low” setting. The gentle heat will continue to firm the chocolate without melting the sprinkles. You’ll notice the edges pulling away from the parchment – that’s the tell‑tale sign it’s ready to be lifted.
After the 20‑minute rest, turn off the crockpot and carefully slide a large spatula under the chocolate sheet. Lift it onto a cutting board and, using a sharp, heated knife, cut it into bite‑size squares or fun shapes with a cookie cutter. The cuts should glide through like a hot knife through butter, leaving clean edges that sparkle with sprinkles.
Kitchen Hack: Warm the knife under hot water, dry it, and then slice – this prevents the chocolate from cracking.Transfer the cut pieces onto a serving platter. Let them cool completely at room temperature for another 10 minutes; this final set ensures they hold together when you pick them up. The result is a glossy, crackly surface that shatters gently under the bite, releasing a burst of peanut‑butter‑laden chocolate.
That’s it — you did it. But hold on, I’ve got a few more tricks that'll take this to another level. For instance, drizzle a thin ribbon of dark chocolate over the top for a sophisticated contrast, or dust a pinch of sea salt just before serving to amplify the sweet‑salty dance.
Insider Tricks for Flawless Results
The Temperature Rule Nobody Follows
The key to a perfect glossy coat is never exceeding 190°F (88°C) in the crockpot. Higher heat can cause the cocoa butter to separate, resulting in a grainy texture. Keep the lid slightly ajar if your crockpot runs hot; this lets excess steam escape and maintains a stable temperature. I once tried a “high” setting and ended up with chocolate that looked like melted wax – a total disaster.
Why Your Nose Knows Best
Never rely solely on a timer; trust the aroma. When the chocolate starts to emit a nutty, buttery scent, you know the peanuts have toasted enough. If the smell is still raw or waxy, give it another minute. Your nose is the ultimate kitchen sensor, especially for candy where visual cues can be deceptive.
The 5‑Minute Rest That Changes Everything
After spreading the chocolate, let it rest for exactly five minutes before adding sprinkles. This short pause allows the surface to form a thin skin, which helps the sprinkles cling without sinking. Skipping this step leads to a soggy top layer that loses its crunch. I once rushed this part and ended up with a soggy mess that clumped together – never again.
Cold Water Bath for a Snap
When cutting the set candy, briefly dip the knife in ice water before each slice. The cold metal creates a clean cut, preventing the chocolate from cracking or crumbling. It’s a tiny detail that makes a huge difference in presentation, especially when you’re aiming for Instagram‑worthy squares.
Seasonal Spice Twist
If you want to amp up the autumn vibe, add a pinch of ground cinnamon or pumpkin spice to the chocolate melt. The spice melds subtly with the sweet base, giving the candy an extra layer of warmth that pairs perfectly with the Halloween theme. Just a dash – you don’t want to overpower the delicate white chocolate.
Creative Twists and Variations
This recipe is a playground. Here are some of my favorite ways to switch things up:
Spooky Spider Web
After the candy sets, drizzle dark chocolate in a web pattern and place a few candy‑capped “spiders” made from pretzel sticks and chocolate chips. The contrast of dark and white chocolate looks eerie, and the pretzel legs add an extra crunch.
Caramel Swirl
Before the chocolate sets, swirl in a thin ribbon of caramel sauce. The caramel adds a buttery depth and creates a marbled effect that looks as luxurious as it tastes.
Nut‑Free Version
Swap the peanuts for toasted pumpkin seeds and replace Reese’s Pieces with soy‑based “nut” candies. The flavor profile stays rich, and the texture remains satisfying, making it perfect for guests with nut allergies.
Double‑Chocolate Delight
Mix half the white chocolate wafers with an equal amount of milk chocolate wafers for a creamy, two‑tone finish. The milk chocolate adds a richer flavor that balances the sweetness of the white chocolate.
Glow‑In‑The‑Dark
Add a few drops of edible glow‑in‑the‑dark food coloring to the melted chocolate. The candy will emit a faint luminescence under low light, perfect for late‑night Halloween parties.
Storing and Bringing It Back to Life
Fridge Storage
Place the finished candies in an airtight container lined with parchment paper. Store them in the refrigerator for up to two weeks. The cool environment keeps the chocolate firm and prevents the sprinkles from melting.
Freezer Friendly
For longer storage, wrap individual pieces in wax paper and seal them in a zip‑top freezer bag. They’ll stay fresh for up to three months. When you’re ready to serve, let them thaw at room temperature for 15 minutes – no microwave needed.
Best Reheating Method
If the candy has hardened too much, add a tiny splash of water (about a teaspoon) to the bottom of the crockpot and set it to “low” for 5 minutes. The steam will gently re‑soften the chocolate, restoring that melt‑in‑your‑mouth texture without compromising the crunch.