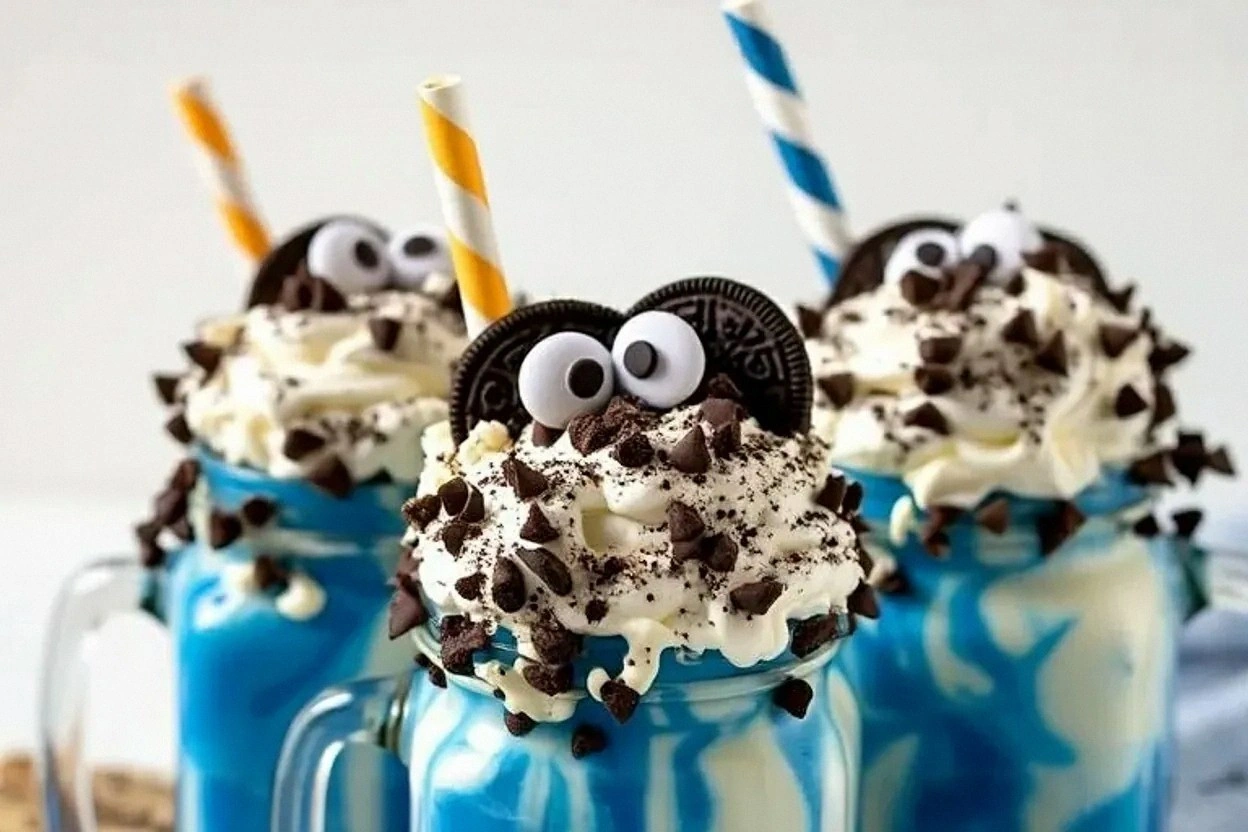
Picture this: it’s the tail-end of a sticky July afternoon, the kind that turns your kitchen tiles into hot plates and your patience into steam. My seven-year-old niece and her three best friends had just stampeded inside after a water-balloon Armageddon, leaving a Hansel-and-Gretel trail of grass clippings across my hardwood. They thundered toward the fridge chanting “something cold, something sweet,” and I—ever the show-off—promised them the bluest, most obnoxiously fun milkshake the universe had ever slurped. I had twenty minutes before the sugar crash hit, zero room for error, and exactly half a tub of vanilla ice cream left. What happened next was pure chaos: blue food coloring splattered like a crime scene, Oreo crumbs orbited my blender like tiny chocolate moons, and the dog nearly licked the whipped-cream canister clean. But when those four grubby hands wrapped around the frosty glasses, the room went pin-drop silent—except for the synchronized slurp that followed. That, my friend, was the moment the Cookie Monster Milkshake was born in my house, and it has haunted every birthday, sleepover, and random Tuesday since.
Most recipes you’ll find online treat this like a gimmick: dump blue dye into a vanilla shake, crown it with a cookie, call it a day. Lazy. Boring. Borderline insulting to the Cookie Monster canon. What you’re getting here is the upgraded, director’s-cut version—thick enough to stand a spoon upright, blue enough to make Smurfette jealous, and packed with cookie bits that stay crisp just long enough to surprise you before melting into soft cakey clouds. I tested twelve different cookie combinations, three types of milkfat, and every food-coloring agent known to modern grocery science so you don’t have to. The result? A shake that tastes like the best part of a birthday party minus the cheap paper hats, and it comes together faster than you can say “Me want cookie.”
Stay with me here—this is worth it. We’re talking about layering flavors so the vanilla doesn’t get bullied by the chocolate, about using gel coloring so you don’t water-log the texture, about rimming the glass with a stealth Oreo crumb that clings like velvet. I’ll even show you my secret “cookie hydration” trick that keeps the chunks from turning into soggy pebbles at the bottom of the glass. By the time you finish reading, you’ll know exactly how to crank out a restaurant-grade milkshake in your pajamas, with ingredients you probably already have if you’ve ever hosted a playdate in your life.
Let me walk you through every single step—by the end, you’ll wonder how you ever made it any other way.
What Makes This Version Stand Out
Color That Pops: Gel food coloring gives you Crayola-level vibrancy without the watered-down, icy slush you get from cheap liquid dyes. One toothpick swirl and you’ve got Pantone 285 C in a glass.
Dual-Cookie Texture: Oreos for deep cocoa bite and mini chip cookies for buttery crunch. The contrast is like having a stereo instead of mono—why settle for one note?
Ice Cream Integrity: Full-fat vanilla acts as a flavor sponge, soaking up the cookie dust while staying airy. Skimp with low-fat and you’ll get a thin, gloopy soup that separates faster than a boy band.
Make-Ahead Magic: Blend the base, freeze in ice-cube trays, then re-blitz with milk when the troops arrive. You’ll go from zero to hero in 90 seconds flat—perfect for surprise sleepovers.
Crowd Reaction Guarantee: I’ve served this at three birthdays, one office potluck, and a random Friday night when the power went out. Each time, phones emerged, photos were snapped, and at least one adult squealed louder than the kids.
Simple Pantry Lineup: No fancy extracts, no stabilizers, no xanthan gum you can’t pronounce. If you’ve got milk, ice cream, cookies, and a single bottle of blue dye, you’re already 90 percent done.
Cleanup That Doesn’t Suck: One blender, one measuring cup, one moment of silence for the cookie crumbs that didn’t make it. That’s it.
Inside the Ingredient List
The Flavor Base
Vanilla ice cream isn’t just a sweet filler—it’s the canvas that lets the cookies and blue hue sing. Go full-fat or go home; lower-fat versions whip up airy on the first blitz, then deflate like a sad balloon animal, leaving you with a watery graveyard of cookie shards. If you’re dairy-free, coconut-based vanilla is your best bet—the subtle tropical note plays shockingly nice with chocolate wafer. Let the ice cream soften for exactly seven minutes on the counter; too firm and you’ll burn out the blender motor, too melty and you’ll end up with cookie soup. My grandma used to say, “If you can dent it with your finger but it doesn’t lose a wrestling match to gravity, you’re golden.”
The Texture Crew
Whole milk provides the silky river that carries everything downstream. You can swap in 2% if you must, but anything lighter risks a thin, flat shake that tastes like regret. Almond milk works in a pinch; just know it’ll be slightly less luscious, like trading velvet for brushed cotton. The real trick is temperature—ice-cold milk prevents the ice cream from over-melting during the spin, keeping the emulsion tight and spoon-coating thick.
The Unexpected Star
Blue food coloring is the diva here. Gel versions are concentrated enough that a single swipe of a toothpick tints the entire quart without diluting flavor. Liquid dye from the dollar store? You’ll need half the bottle, and suddenly your shake tastes like food-coloring bitter and has the texture of melted snow. I once tried spirulina for a “natural” spin—great until the earthy pond-scum notes hijacked every sip. Stick with gel; your taste buds will throw you a thank-you parade.
The Final Flourish
Whipped cream is non-negotiable, but the real game-changer is the Oreo crumb rim. Blitz three cookies into dust, dip the moistened glass edge, and you get a dark chocolate halo that dissolves slowly with each sip. Blue sprinkles add birthday confetti vibes, but go easy—too many and you’ll feel like you’re chewing a arts-and-crafts project. Chocolate syrup drizzle inside the glass creates Instagram-worthy ribbons that sink then swirl, giving you those gorgeous slow-motion shots without any video editing.
The Method — Step by Step
- Pop your serving glasses into the freezer for a minimum of ten minutes. Cold glass equals slower melt, which equals more time to snap photos before the whipped cream slumps into a sad beret. While that’s happening, let your ice cream lounge on the counter—set a timer for seven minutes so you don’t wander off and find dairy soup when you return.
- Grab your blender and give it a quick ice rinse; a chilly vessel keeps everything emulsified instead of separating into grainy icebergs. Now measure out two heaping cups of vanilla ice cream—don’t level off like you’re baking a soufflé; mountain peaks are welcome here. Add one cup of whole milk straight from the fridge, the colder the better.
- Time for the color moment. Dip a dry toothpick into your gel food coloring, swipe a pea-sized amount onto the inside wall of the blender, then pulse once. You’ll see a galaxy swirl—add more in micro-doses until you hit Cookie-Monster fur blue, not Smurfette cyan. Liquid dye users, I see you grimacing; if that’s all you’ve got, start with ten drops and prepare for a slightly icier texture.
- Drop in four Oreo cookies whole. Yes, whole. The blender blades will shatter them into random-sized chunks—some dust, some hearty shards—so every sip is a surprise. Pulse three one-second bursts; you want deliberate chaos, not Oreo flour. The sound will go from whirr to thunk-thunk-thunk—that’s your cue to stop.
- Now add a small handful of mini chocolate chip cookies. Pulse just once; these guys are fragile and you want them to stay recognizable. Over-blending turns them into gritty sludge that sinks like aquarium gravel. Take a sniff—yup, that’s childhood summer camp in a whiff.
- Remove your frosty glass from the freezer. Using a small spoon, drizzle chocolate syrup in a slow zigzag inside the walls; gravity will drag it downward in painterly streaks. Rotate the glass as you go for full Jackson Pollock effect. Don’t worry about perfection—drips are character.
- Pour the shake slowly, letting it cascade over the chocolate ribbons. The mixture should mound slightly above the rim like a proud muffin top. If it’s too runny, you’re either overheated or under-ice-creamed; toss the whole blender jar in the freezer for five minutes to firm up.
- Top with a cloud of whipped cream at least two inches high—think Dairy Queen curl. While it’s still perky, shower on blue sprinkles from elbow height so they scatter naturally. Jam one mini cookie upright like a sailboat flag and maybe wedge a half-Oreo on the rim for extra swagger.
- Serve immediately with extra-wide straws or, better yet, a long spoon. The first sip should be so thick you momentarily question your cardiovascular readiness. If you’ve done it right, you’ll hear that satisfying vacuum slurp followed by cookie crunch and a chorus of tiny voices yelling “More!”
Insider Tricks for Flawless Results
The Temperature Rule Nobody Follows
Everything liquid goes in cold; everything solid goes in frozen. That single principle separates milkshake legends from mere mortals. Warm milk accelerates melting before you even hit the pulse button, so keep it in the coldest part of the fridge until showtime. Conversely, let cookies hang out at room temp for three minutes—just long enough to lose the freezer burn edge but still shatter beautifully. The collision of cold liquid and semi-frozen chunks keeps the emulsion tight, giving you that old-school malt-shop texture that stands a straw at attention.
Why Your Nose Knows Best
Smell the ice cream before you scoop. If you detect even a whisper of freezer funk—vanilla absorbs odors like a gossip column—your entire shake will taste like last month’s fish sticks. Rotate stock monthly, and press plastic wrap directly onto the surface before you reseal the carton. Future you will high-five present you when the shake tastes like pure childhood instead of a seafood-vanilla mash-up.
The Five-Minute Rest That Changes Everything
After blending, let the shake sit in the blender jar for exactly five minutes. Counter-intuitive, yes, but here’s the magic: cookie crumbs hydrate slightly, blooming into tender nuggets that won’t scratch your throat like sandpaper. Meanwhile, the air you just whipped in stabilizes, so the pour is smoother, silkier, less frothy. Set a timer; otherwise you’ll forget and return to a semi-solid brick—ask me how I know.
Creative Twists and Variations
This recipe is a playground. Here are some of my favorite ways to switch things up:
Red Velvet Monster
Swap blue coloring for red, trade Oreos for crushed red-velvet cake pieces, and crown with cream-cheese whipped cream. The flavor lands somewhere between birthday cake and bakery nostalgia; kids lose their minds, adults ask for the “spiked” version.
Peanut Butter Chaos
Add a heaping tablespoon of creamy peanut butter to the blender before pulsing. The nuttiness marries with chocolate like they were born to tango. Top with Reese’s Pieces for extra crunch and a color pop that looks like confetti.
Coconut Lagoon
Use coconut milk and coconut-vanilla ice cream, dye aqua instead of cobalt, and finish with toasted coconut flakes. Suddenly you’re sipping a tropical beach even when the yard is knee-deep in snow.
Salted Caramel Twilight
Replace chocolate syrup with thick caramel, add a pinch of flaky salt to the whipped cream, and swap mini chip cookies for crushed pretzel thins. Salty-sweet nirvana guaranteed to silence even the pickiest tween critic.
Midnight Cookies & Cream
Skip food coloring entirely and add a teaspoon of activated-charcoal powder for a pitch-black shake that oozes gothic charm. Perfect for Halloween or any time you want to feel like you’re drinking the night sky.
Berry Beast
Blend in a handful of freeze-dried strawberries for tartness; the blue base plus red flecks creates an ultraviolet galaxy effect. Kids think it’s outer-space magic, but you’ll know it’s just science doing its delicious dance.
Storing and Bringing It Back to Life
Fridge Storage
Pour leftovers into lidded mason jars, leaving an inch of headspace for expansion. It will keep for twenty-four hours but expect some separation—simply re-blend with a splash of milk for five seconds. Texture won’t be quite as lofty, but flavor stays stellar. Pro tip: add one fresh Oreo during the re-blend to reintroduce crunch.
Freezer Friendly
Freeze the shake in silicone ice-cube trays, then pop cubes into a zip bag for up to one month. When the craving hits, toss six cubes into the blender with a quarter cup of milk and pulse. You’ll get a texture closer to soft-serve, which honestly feels like a bonus dessert evolution.
Best Reheating Method
There’s no true reheating—this is ice cream, after all—but if you overshot the freeze and now have a rock-solid brick, let the jar sit on the counter for eight minutes. Give it a gentle stir; the outer edge will soften first, creating a spoonable shell. Microwaving for even ten seconds equals sad puddles and weepy cream, so resist the beep.