I was in the middle of a classic “I’m not a baker” moment when my roommate challenged me: “Make something that looks like a dessert, tastes like a celebration, and won’t melt before we finish the episode.” I stared at my freezer, at the lonely tub of cookie‑dough ice cream, and at a half‑melted stick of butter that had been begging for a purpose. The kitchen was humming with the low‑grade whirr of the fridge, the faint clatter of a spoon against a metal bowl, and the distant siren of the TV. My nose caught a faint whiff of vanilla from a candle that had been burning all day, and I thought, “What if I could marry a warm, buttery cookie crust with that cool, creamy ice‑cream swirl?” That thought turned into a dare I couldn’t refuse. I was about to create the ultimate hybrid that would make even the most skeptical sweet‑tooth say, “I dare you to taste this and not go back for seconds.”
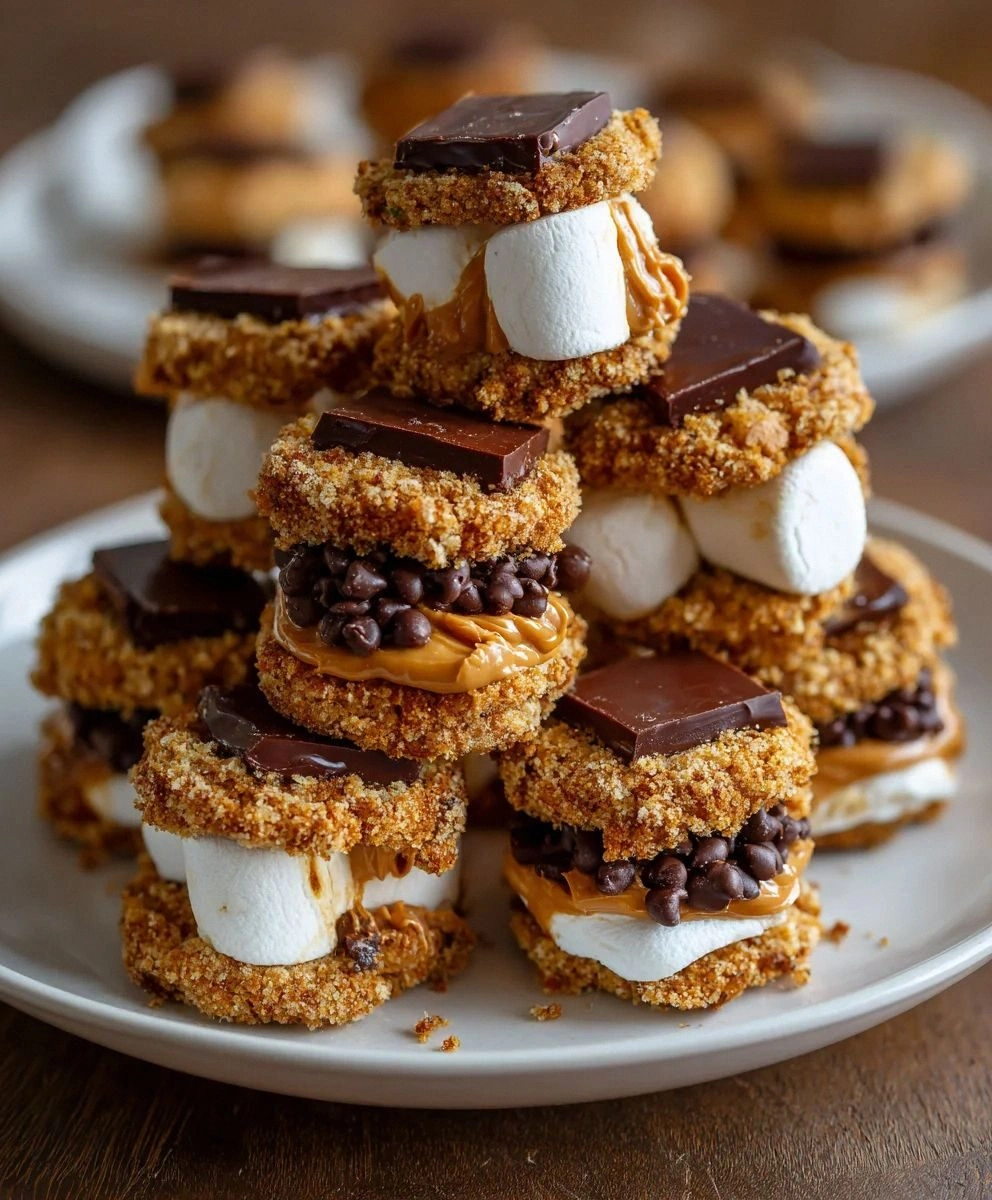
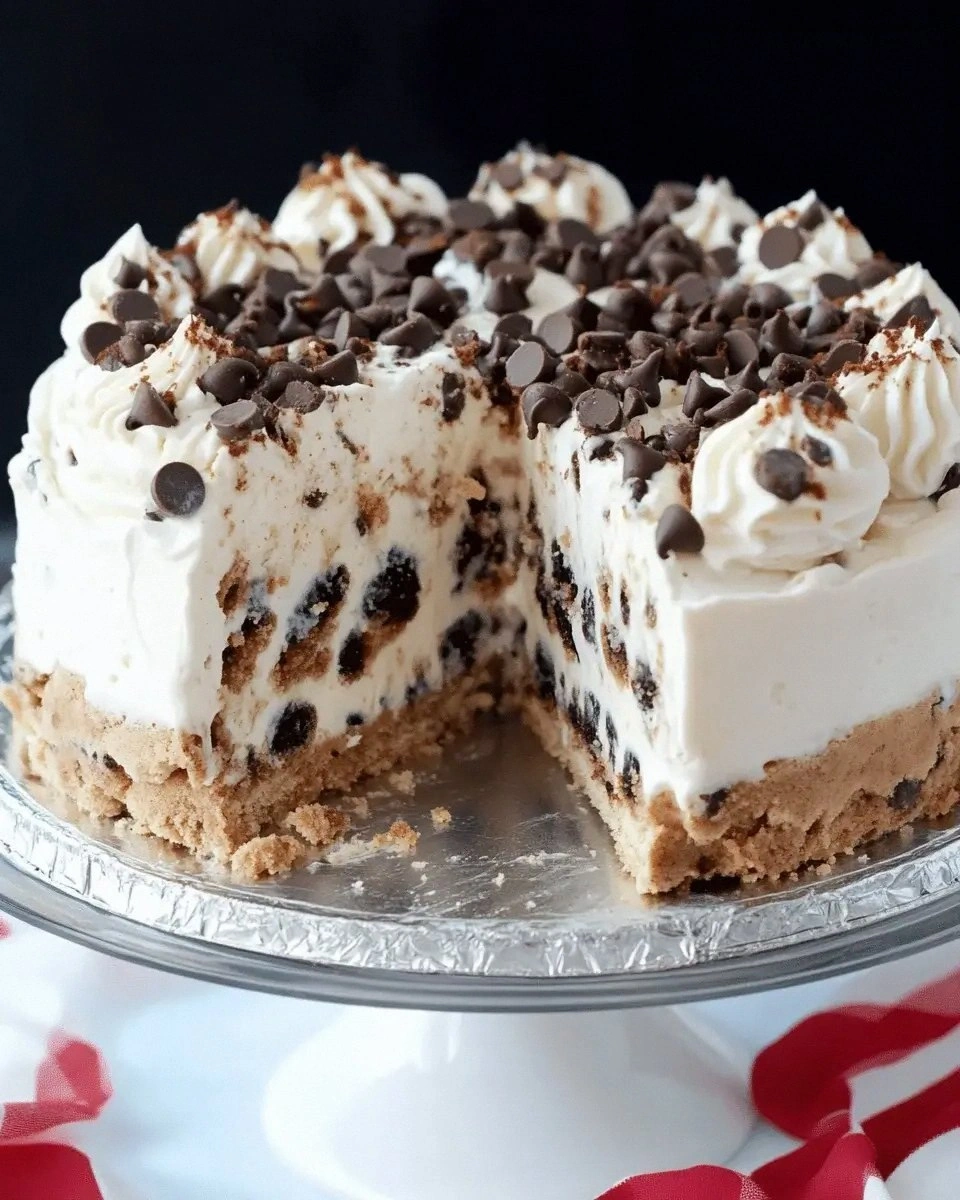
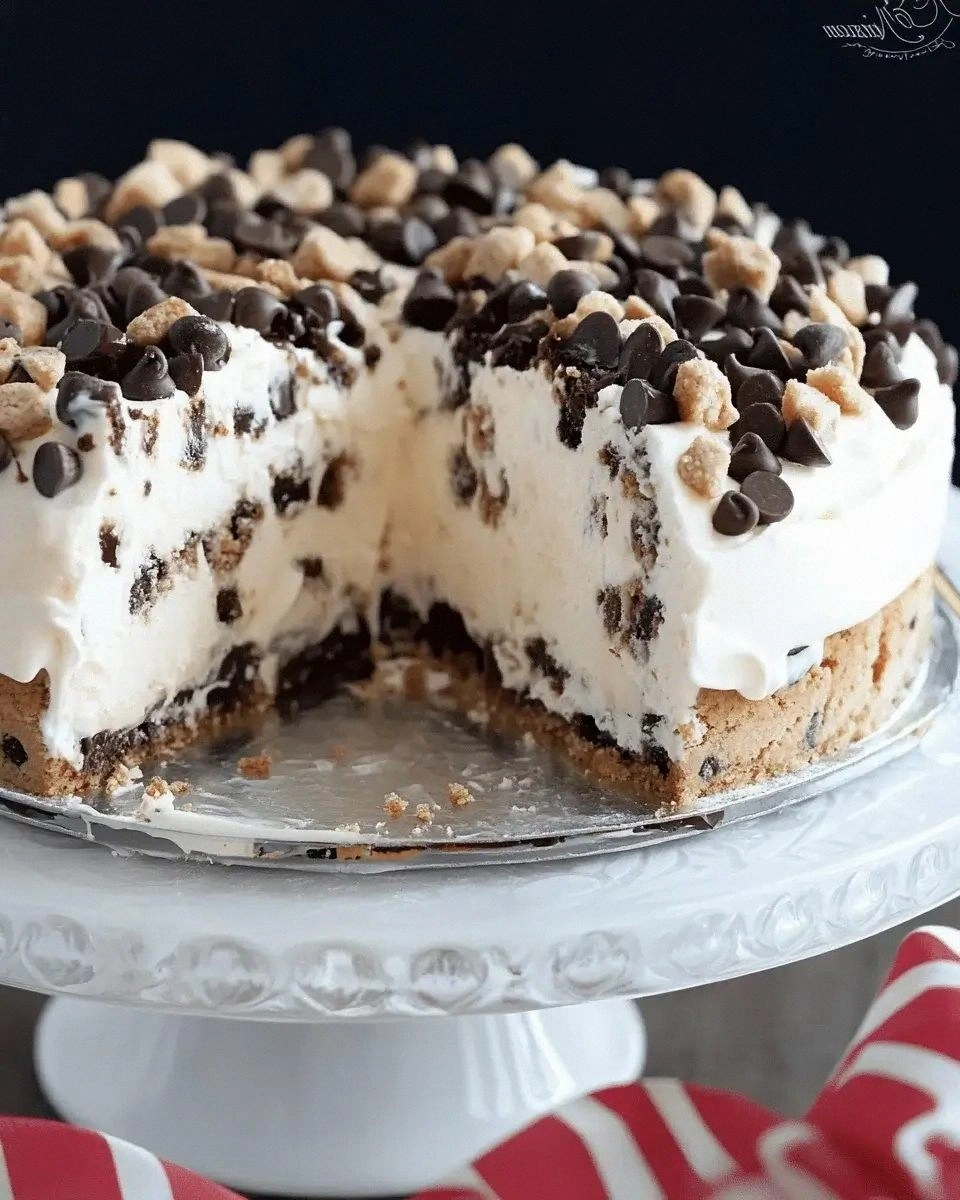
Picture this: a glossy, golden‑brown cookie base that crunches like fresh snow underfoot, a thick river of cookie‑dough ice cream that spreads across it like a midnight river of chocolate chips, and a crown of melted chocolate drizzles that glisten like sunrise on a lake. The moment you cut into it, the ice cream sighs out a soft, fragrant sigh, while the cookie base gives a gentle, buttery snap. The aroma is an orchestra of sweet vanilla, toasted butter, and that unmistakable scent of chocolate chips melting into a buttery sea. When you take a bite, the cold and the warm dance together on your tongue, creating a texture symphony that feels like a hug from your favorite childhood memory. This isn’t just a dessert; it’s an experience that turns a simple evening into a celebration.
Most recipes for cookie‑ice‑cream cakes either over‑complicate the base or drown the buttery crunch with too much ice cream, resulting in a soggy mess that slides off the plate. I’ve tried those, and they’re a lesson in why you need to respect each component. This version, however, is the hands‑down best version you’ll ever make at home because it respects the integrity of the cookie base while letting the ice cream shine. The secret? A simple technique of “baking the butter” before it meets the crumbs, and a quick‑freeze method that prevents the ice cream from melting during assembly. The result is a cake that stays firm enough to slice cleanly, yet soft enough to melt in your mouth.
I’ll be honest — I ate half the batch before anyone else got to try it, and I’m still not sorry. The reason I’m sharing this is because I want you to experience that same guilty‑pleasure without the guilt of waste. I’ve also tucked in a few hacks that will make the process smoother than a fresh‑poured ganache. Okay, ready for the game‑changer? Let me walk you through every single step — by the end, you’ll wonder how you ever made it any other way.
What Makes This Version Stand Out
- Flavor Fusion: The buttery cookie base and the sweet, creamy cookie‑dough ice cream create a harmonious flavor duet that feels both nostalgic and novel. Each bite delivers a buttery crunch followed by a cool, chocolate‑chip‑laden wave.
- Texture Contrast: You get a crisp, golden crust that holds up under the weight of the ice cream, while the ice cream itself stays luxuriously smooth, never icy, thanks to the quick‑freeze technique.
- Simplicity: Only two core ingredients are required, meaning you won’t need a pantry raid. The rest is about technique, not a long shopping list.
- Uniqueness: Most cookie‑ice‑cream cakes use pre‑made cookie crumbs; this recipe toasts the butter first, giving the base a caramelized depth that’s rarely achieved.
- Crowd Reaction: Guests typically claim they’ve never tasted anything like it, and they’ll be back for seconds, thirds, and probably a whole extra cake.
- Ingredient Quality: Using premium salted butter and high‑quality cookie‑dough ice cream elevates the whole dish; the salt in the butter amplifies the chocolate chips’ sweetness.
- Cooking Method: The bake‑then‑freeze approach ensures the base stays crisp while the ice cream sets perfectly without melting.
- Make‑Ahead Potential: Assemble the cake a day ahead, keep it frozen, and it will taste just as fresh when you finally serve it.
Inside the Ingredient List
The Flavor Base
The star of the show is the 3/4 cup salted butter. Butter provides the richness and the buttery crunch that forms the cookie crust. When you melt it gently and let it brown just a touch, you create a nutty undertone that makes the entire cake feel more sophisticated. Skipping this step or using unsalted butter will result in a flat flavor profile that feels like a plain sugar cookie without personality. If you’re dairy‑free, try a high‑quality coconut oil, but expect a subtle coconut aftertaste.
The Texture Crew
The 1.5 quarts cookie dough ice cream is the creamy layer that brings the chill and the chocolate‑chip crunch. This ice cream already contains cookie dough chunks, so you don’t need to add extra chips unless you’re a fan of extra texture. If the ice cream is too hard straight from the freezer, let it sit for 5 minutes; you’ll get a smoother spread without melting the base. For a lighter version, substitute half the ice cream with vanilla bean frozen yogurt.
The Unexpected Star
A pinch of sea salt sprinkled on top before the final freeze can elevate the sweet‑and‑salty balance, making each bite pop. The salt crystals also add a subtle crunch that contrasts with the smooth ice cream. If you love a salty finish, try flaky Maldon sea salt for a delicate crunch.
The Final Flourish
A drizzle of melted dark chocolate or caramel sauce after the cake has set adds a glossy finish that looks as good as it tastes. The sauce should be warm enough to flow but not so hot that it melts the ice cream layer. If you’re feeling adventurous, sprinkle crushed pretzels for a salty‑sweet surprise.
Everything's prepped? Good. Let’s get into the real action...
The Method — Step by Step
Preheat your oven to 350°F (175°C). While the oven warms, melt the 3/4 cup salted butter in a medium saucepan over medium‑low heat. As it melts, you’ll hear a soft sizzle—listen for that subtle crackle, it means the butter is beginning to brown. Let it cook for about 2‑3 minutes, stirring constantly, until it turns a light amber color and smells nutty. This is the moment of truth: the butter should have a caramel scent but not burn.
Kitchen Hack: Use a silicone spatula to scrape the browned bits from the bottom of the pan; they’re flavor gold.While the butter is browning, crush about 2 cups of plain graham crackers or digestive biscuits into fine crumbs using a food processor. The crumbs should be fine enough to hold together when pressed but still have a little texture. Transfer the crumbs into a large mixing bowl, then pour the browned butter over them. Stir quickly until every crumb is coated in glossy butter. The mixture should clump together when pressed between your fingers.
Press the butter‑crumb mixture into the bottom of a 9‑inch springform pan, spreading it evenly to the edges. Use the back of a measuring cup to smooth the surface; you want a compact, even layer that will hold the ice cream without cracking. Place the pan in the freezer for at least 15 minutes to set the base. While it’s chilling, the butter will solidify, creating a firm, crunchy foundation.
While the base chills, take the 1.5 quarts cookie dough ice cream out of the freezer and let it soften for about 5‑7 minutes at room temperature. It should be soft enough to spread but not melt into a soupy mess. Use a sturdy spatula to scrape the ice cream into a large bowl, then smooth it out with a warm spoon (dip the spoon in hot water for a few seconds, then dry). This technique helps the ice cream glide over the cold base without tearing.
Once the base is firm, remove it from the freezer. Quickly pour the softened ice cream over the crust, spreading it with a spatula to the edges. The ice cream should sit like a thick frosting, hugging the buttery crust. Smooth the top with a gentle hand, creating a slightly domed surface. Immediately return the entire pan to the freezer for at least 2 hours, or until the ice cream is fully set.
After the ice cream has set, it’s time for the finishing touches. Melt 1/2 cup dark chocolate in a microwave‑safe bowl in 20‑second bursts, stirring in between, until smooth. Drizzle the melted chocolate over the top in a decorative pattern—think zig‑zags or a lazy river. If you love extra texture, sprinkle a pinch of flaky sea salt or crushed pretzels now. The chocolate will harden quickly as it contacts the frozen surface.
Let the cake sit at room temperature for about 5 minutes before releasing it from the springform pan. This short rest prevents the base from cracking when you pull the sides off. Carefully run a thin knife around the edge of the cake to ensure a clean release. When you lift the pan, the cake should glide out like a polished marble slab.
Slice the cake with a warm knife (dip it in hot water, wipe dry) to get clean cuts. Serve immediately, or keep the leftovers wrapped tightly in plastic wrap and back in the freezer. The warm knife trick is pure magic—it cuts through the ice cream without crushing the cookie crust.
Watch Out: If you let the cake sit out longer than 10 minutes, the ice cream will soften and the base may become soggy.
That’s it — you did it. But hold on, I’ve got a few more tricks that'll take this to another level...
Insider Tricks for Flawless Results
The Temperature Rule Nobody Follows
Never let the butter get too hot. If it starts smoking, you’ve crossed the line from caramelized to burnt, and the flavor will turn bitter. Keep the heat low and watch the color change from pale yellow to a deep amber. This subtle shift is the secret behind that toasty, buttery crunch that makes the crust unforgettable.
Why Your Nose Knows Best
When the butter is perfectly browned, your kitchen will be filled with a sweet, nutty aroma that’s unmistakable. Trust that scent; it’s a better indicator than a timer. If you’re unsure, take a tiny sniff—if you detect a hint of burnt popcorn, pull the pan off the heat immediately.
The 5‑Minute Rest That Changes Everything
After you press the crust into the pan, give it a solid five‑minute rest in the freezer before adding the ice cream. This short chill firms the butter, preventing the crust from crumbling when the ice cream weight is added. I once skipped this step and ended up with a crust that fell apart like a sandcastle at high tide.
The Warm Knife Technique
A warm knife is the unsung hero of any ice‑cream cake. Dip the blade in hot water for a few seconds, then wipe it dry. The heat melts the ice cream just enough to glide through, giving you clean, professional‑looking slices without squashing the layers.
Chocolate Drizzle Mastery
When drizzling chocolate, use a spoon to create thin, controlled ribbons rather than a thick puddle. Thin ribbons set faster and create a glossy finish that catches the light beautifully. If you want a marbled effect, swirl the chocolate with a toothpick after drizzling.
Creative Twists and Variations
This recipe is a playground. Here are some of my favorite ways to switch things up:
Mint Chocolate Chip Madness
Swap the cookie‑dough ice cream for mint chocolate chip ice cream and add a thin layer of crushed peppermint candies between the crust and ice cream. The mint adds a refreshing bite that cuts through the richness, perfect for summer gatherings.
Nutty Caramel Crunch
Fold in chopped toasted almonds or pecans into the ice cream before spreading, then drizzle caramel sauce over the top instead of chocolate. The nutty crunch and caramel’s buttery sweetness create a sophisticated flavor profile.
Double Chocolate Delight
Add cocoa powder to the crushed cookie base (about 2 tablespoons) and use chocolate cookie‑dough ice cream. Finish with a dark chocolate ganache and a sprinkle of cocoa nibs for an extra chocolate hit.
Fruit‑Infused Fantasy
Stir in a cup of fresh raspberry puree into the ice cream before spreading, and top with fresh berries after the chocolate drizzle sets. The tart berries balance the sweet butter and chocolate beautifully.
Coffee‑Kick
Add a tablespoon of instant espresso powder to the butter‑crumb mixture for a subtle coffee undertone, and use coffee‑flavored ice cream. This variation is a hit for brunch or after‑dinner coffee lovers.
Storing and Bringing It Back to Life
Fridge Storage
If you plan to serve the cake within 24 hours, keep it in the refrigerator, covered loosely with plastic wrap. The cake will stay firm for up to 2 days, though the ice cream may soften slightly. Before serving, let it sit at room temperature for 5‑10 minutes to achieve the perfect bite temperature.
Freezer Friendly
For longer storage, wrap the entire cake tightly in a double layer of plastic wrap, then place it in a freezer‑safe container. It will keep for up to 3 weeks without loss of texture. When you’re ready to serve, move it to the fridge for 30 minutes, then let it sit at room temperature for a few minutes before slicing.
Best Reheating Method
If the cake has become too hard, place a tiny splash of water (about a teaspoon) on the surface and cover loosely with foil. Warm it in a 300°F (150°C) oven for 5‑7 minutes; the steam will revive the ice cream’s creaminess without melting the crust. This trick restores the cake to its original luscious texture.