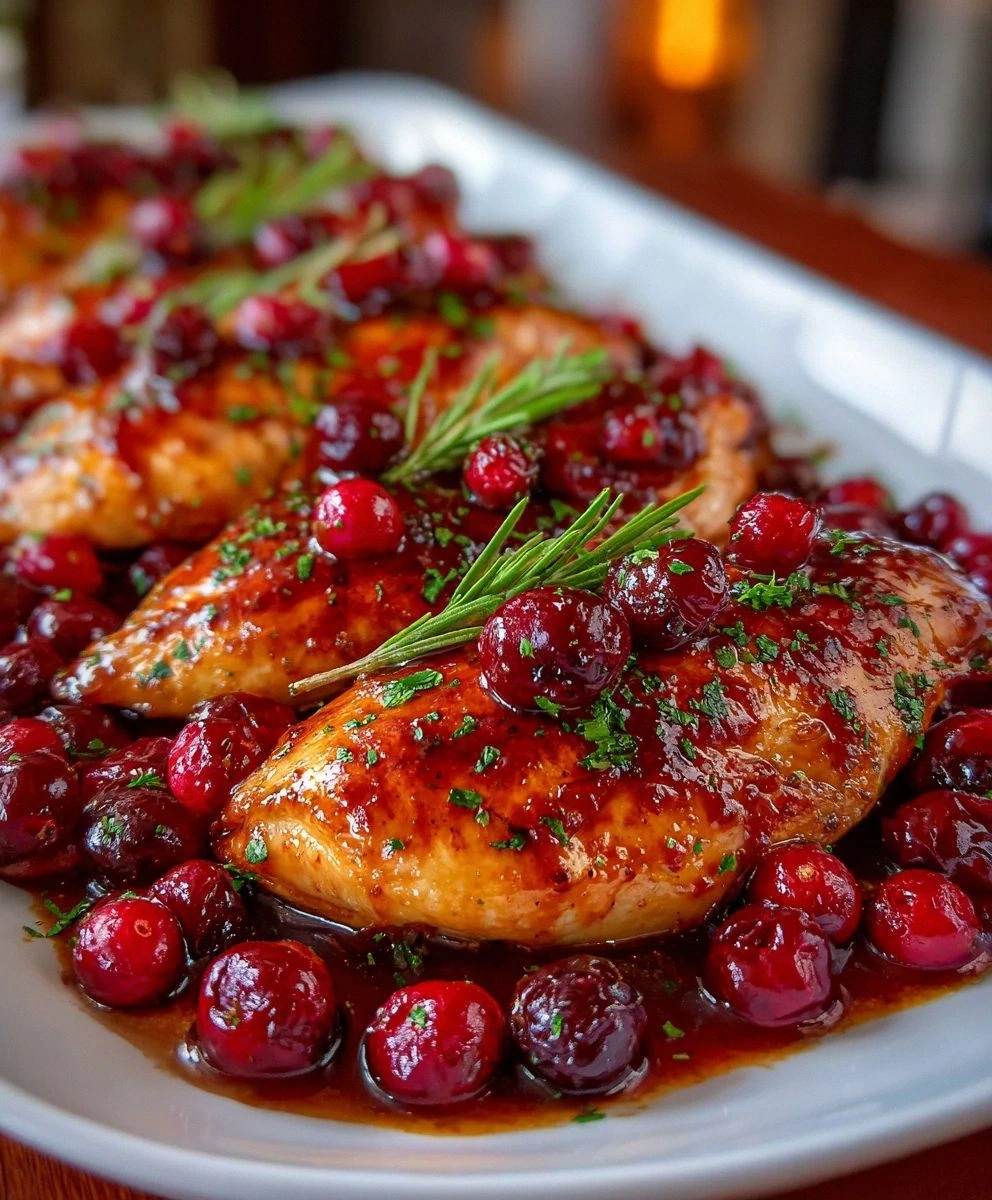
I still remember the morning my life changed forever. There I stood in my kitchen at 6:45 AM, wearing mismatched socks and a bathrobe with more holes than fabric, staring at a package of Oreos like it held the secrets to the universe. My best friend had just left after a sleepover where we'd demolished half a cheesecake at midnight, and now she dared me to create something even more outrageous. "I bet you can't make Oreos into breakfast," she'd said, heading out the door with that mischievous grin that always gets me into trouble. Challenge accepted, my friend. What happened next involved three failed attempts, a smoke alarm serenade, and ultimately the most ridiculously delicious pancakes that have ever graced my stovetop.
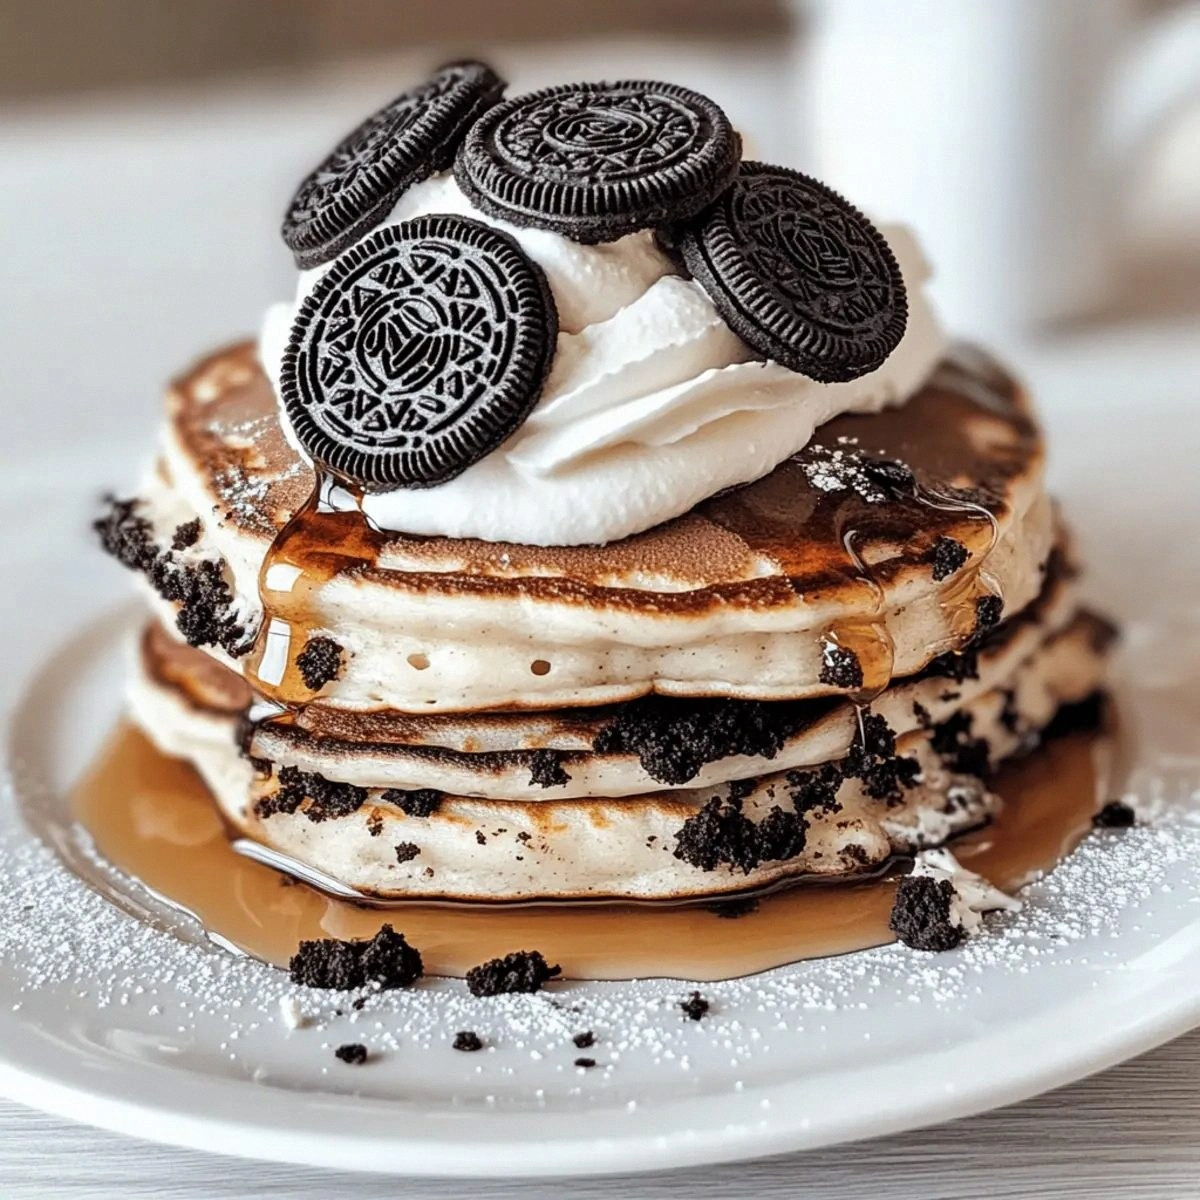
The first batch looked like chocolate frisbees that had lost a fight with a lawnmower. The second attempt glued itself to the pan so thoroughly I considered just buying a new skillet. But the third time? Pure breakfast nirvana. Picture this: clouds of cocoa-scented steam curling through golden morning light, the satisfying crunch of cookie pieces giving way to impossibly fluffy centers, and that moment when maple syrup meets chocolate in a marriage so perfect it should have its own wedding registry. That sizzle when the batter hits the buttered pan? Absolute perfection.
Most recipes get this completely wrong. They either turn the Oreos into sad, soggy mush or they leave you with dense hockey pucks that could double as paperweights. Here's what actually works: treating those iconic cookies like the treasure they are. We're talking about preserving their signature crunch while transforming them into something that belongs on your breakfast table, not just in your midnight-snack rotation. The secret lies in how we handle the cookie pieces and when we add them to the batter.
I'll be honest — I ate half the batch before anyone else got to try it. My neighbors knocked on the door wondering if I'd opened a bakery overnight. My Instagram DMs blew up faster than my KitchenAid on high speed. And now, dear reader, I'm sharing every single secret with you. Picture yourself pulling these golden-brown beauties off the griddle, the whole kitchen smelling like a chocolate factory had a baby with your favorite diner. Ready for the game-changer? Let me walk you through every single step — by the end, you'll wonder how you ever made it any other way.
What Makes This Version Stand Out
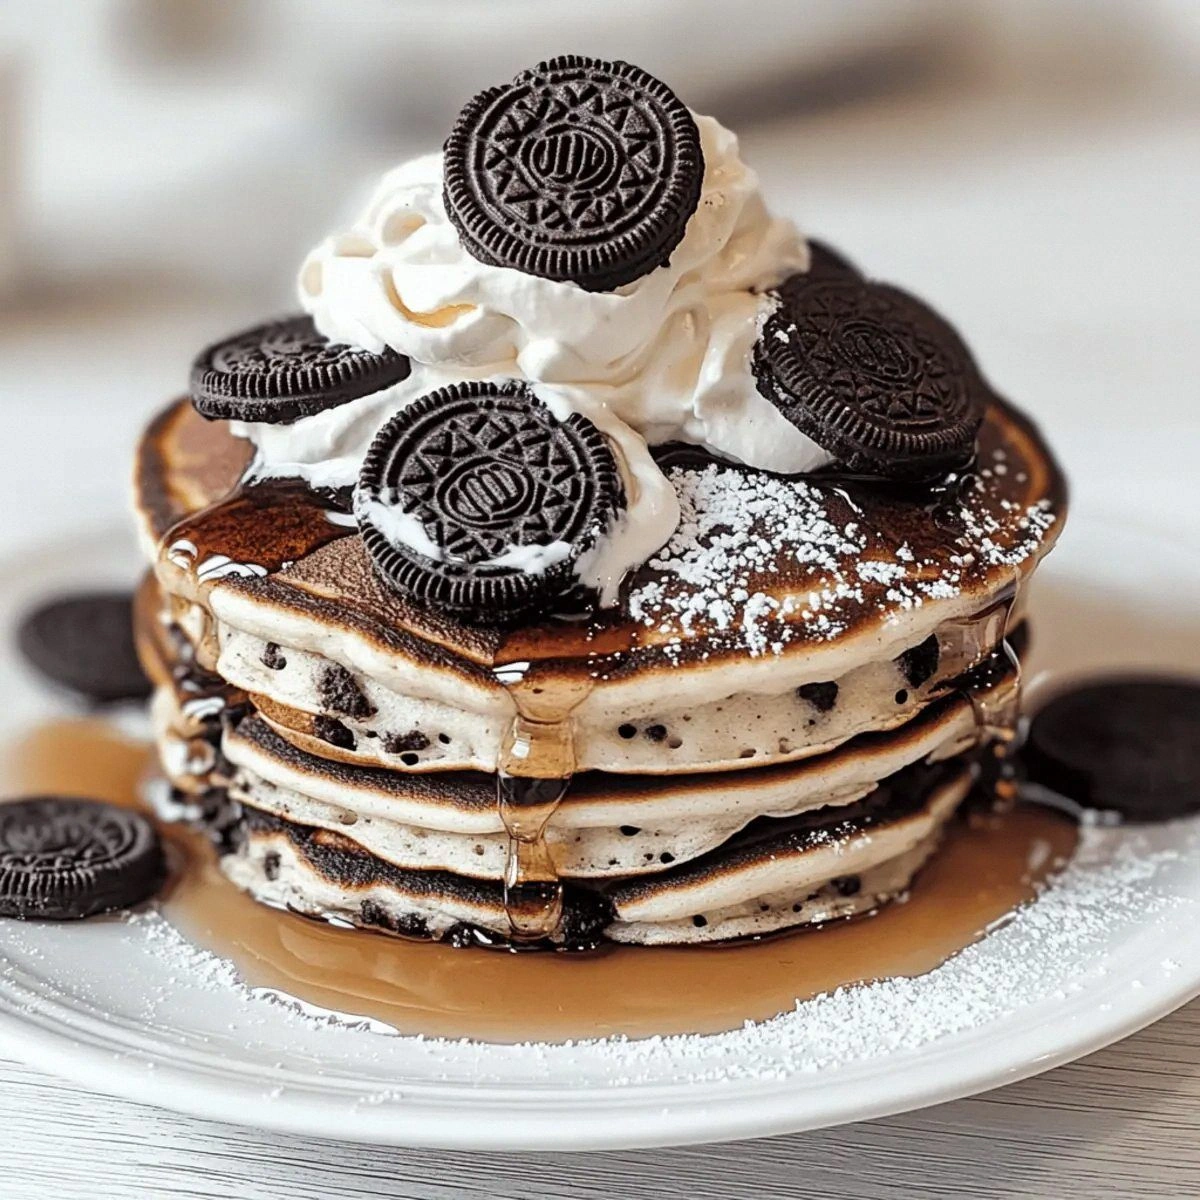
Cookie Integrity: While other recipes murder your Oreos into unrecognizable black sludge, we're keeping those pieces chunky enough to maintain their signature crunch. Each bite delivers that satisfying cookies-and-cream texture that made you fall in love with Oreos in the first place.
Cloud-Like Texture: These aren't those sad, flat pancakes that spread like gossip at a family reunion. We're creating tall, proud stacks that stand up to syrup like champions. The secret? A touch more baking powder than you'd expect and letting the batter rest just long enough to work its magic.
Breakfast Indulgence Without the Food Coma: Here's the beautiful thing — we've balanced the sweetness so you can actually enjoy a full stack without feeling like you need to crawl back into bed. The cocoa from the cookies provides depth without overwhelming your morning palate.
Weekend Wow Factor: I dare you to taste this and not go back for seconds. These pancakes have converted more non-morning people than coffee shops open at 5 AM. Serve them once and you'll be known as "the Oreo pancake person" forever — trust me, I've been there.
Pantry-Friendly Ingredients: Everything you need is probably sitting in your kitchen right now, waiting for its moment to shine. No specialty flours, no obscure extracts, no ingredients you can't pronounce. Just honest-to-goodness staples that transform into something extraordinary.
Make-Ahead Magic: Most pancake recipes turn into rubber discs if you look at them funny after cooking. Not these beauties. They reheat like champions, making Monday morning breakfast feel like Saturday brunch at your favorite café.
Alright, let's break down exactly what goes into this masterpiece...
Inside the Ingredient List
The Flavor Base
All-purpose flour is your canvas here, and don't let anyone convince you to complicate things. I've tried this with every fancy flour under the sun, and nothing beats good old AP for creating that perfect tender crumb. The protein content hits the sweet spot — enough structure to hold those glorious cookie chunks, but not so much that your pancakes turn into doorstops. If you absolutely must experiment, a 50/50 blend with cake flour will give you an even softer texture, but honestly, you're already winning with the basics.
Granulated sugar does more than sweeten — it's creating that gorgeous golden-brown exterior that makes people weak in the knees. The sugar caramelizes on the griddle, giving you those slightly crisp edges that contrast beautifully with the fluffy interior. Don't even think about reducing it; you need every grain to balance the cocoa bitterness from the Oreos.
The Texture Crew
Baking powder is your ticket to cloud city, baby. We're using slightly more than traditional recipes because those cookie pieces are heavy, and we need lift, lift, lift. Make sure yours is fresh — if that can has been sitting in your pantry since the last presidential administration, do yourself a favor and grab a new one. Old baking powder is the difference between sky-high stacks and sad, dense frisbees.
Whole milk brings richness that water or low-fat milk simply can't deliver. The fat content tenderizes the gluten in your flour, creating that melt-in-your-mouth texture that'll have people talking for weeks. In a pinch, 2% works, but please don't insult these pancakes with skim milk. They're already doing the lord's work by turning cookies into breakfast; they deserve better than thin, blue-tinted disappointment.
The Unexpected Star
Melted butter is where most recipes drop the ball completely. They'll tell you to add oil or (gasp) leave it out entirely. Madness! The butter adds flavor depth that oil can't touch, plus it helps create those lacy, crispy edges that make grown adults weep with joy. Pro tip: brown the butter first for nutty, caramel notes that'll make you question everything you thought you knew about breakfast.
The Final Flourish
Crushed Oreos are obviously the headliners here, but timing is everything. Add them too early and they turn into soggy black mush. Fold them in at the last second and you'll get those signature crunch pockets that make people close their eyes and sigh with each bite. I use six cookies for the perfect balance — enough to make their presence known but not so many that your pancakes fall apart under the weight of their own awesomeness.
Everything's prepped? Good. Let's get into the real action...
The Method — Step by Step
- Start by whisking your dry ingredients like your life depends on it. I'm talking flour, sugar, baking powder, and salt in a bowl big enough to give you stirring room without wearing your ingredients. The goal here is distributing that baking powder evenly — nobody wants to bite into a bitter pocket of leavening. Whisk for a full 30 seconds, lifting the mixture up and letting it rain back down. This aerates everything and prevents those dreaded flour lumps that refuse to die.
- Create a well in the center of your dry ingredients that would make a golf course designer jealous. This crater is about to become the meeting place for your wet ingredients, and you want it deep enough to hold everything without spilling over. Think volcano, not gentle depression. The well method ensures your wet ingredients incorporate smoothly without overmixing, which is the death knell of tender pancakes.
- Whisk together milk, egg, and melted butter in a separate container. Here's where timing matters — your butter should be cooled enough that it won't scramble your egg, but still liquid enough to incorporate smoothly. Nobody wants pancake batter with scrambled egg chunks. If you've gone the extra mile and browned your butter, let it cool for about five minutes first. Your future self will thank you when you're not picking out egg bits.
- Pour your wet ingredients into the well and start folding with a spatula, not a whisk. We're talking gentle, sweeping motions from the outside in, like you're tucking in a particularly delicate blanket. Stop mixing when you still see streaks of flour — this should look like a lumpy mess, not smooth cake batter. Overmixing develops gluten and gives you tough, chewy pancakes that could double as shoe leather.
- Now for the moment of truth: fold in your crushed Oreos with the same gentle touch you'd use for handling antique lace. Those pieces need to stay intact for maximum textural impact. If you've crushed them too finely, you'll get gray batter that tastes like disappointment. The pieces should be visible, distributed, and ready to create little pockets of cookie magic in every bite.
- Heat your griddle or pan over medium heat until a drop of water dances across the surface like it's auditioning for Swan Lake. Too hot and your outsides burn before your insides cook; too cool and you get pale, sad pancakes that absorb oil like sponges. The perfect temperature is when butter foams gently but doesn't brown immediately. This is the sweet spot where magic happens.
- Drop 1/4 cup portions of batter onto the griddle, leaving space for spreading. Listen for that gentle sizzle — it should sound like applause from a polite British audience, not like bacon in a frying pan. When bubbles form on the surface and the edges look set (about 2-3 minutes), it's flip time. One confident motion, no hesitation, no second-guessing. Hesitation leads to broken pancakes and broken dreams.
- Cook the second side until golden brown and the pancakes feel springy when you gently press the center. This side takes less time — usually about 1-2 minutes. Keep them warm in a 200°F oven on a wire rack, not stacked on a plate. Stacking creates steam that turns your crispy edges soggy, and we didn't come this far to eat soggy pancakes.
- Serve immediately with butter that melts into every crater, maple syrup that pools in the most photogenic way possible, and maybe a few extra Oreo crumbs for garnish. These pancakes wait for no one — they're at their peak when they're fresh off the griddle, steam rising like incense to the breakfast gods. Take a photo if you must, but don't let these beauties get cold while you're trying to achieve Instagram fame.
That's it — you did it. But hold on, I've got a few more tricks that'll take this to another level...
Insider Tricks for Flawless Results
The Temperature Rule Nobody Follows
Your batter temperature matters more than your relationship status on Facebook. Room temperature ingredients blend more smoothly, cook more evenly, and give you that coveted fluffy texture that makes people question everything they thought they knew about pancakes. Take your milk and egg out of the fridge 30 minutes before you start mixing. If you're impatient (and I know you are), warm your milk for 15 seconds in the microwave — not hot, just not refrigerator-cold. Your melted butter should be cooled but still liquid. Getting this right is the difference between pancakes that rise like they're trying to touch the sky and ones that sit there like they've given up on life.
Why Your Nose Knows Best
Trust your sense of smell more than your timer. When those pancakes are perfectly golden underneath, they'll start sending up tiny wisps of toasted-butter aroma that'll make your neighbors jealous. If you smell anything approaching burnt, you've gone too far. The human nose is an incredibly sensitive instrument that we've learned to ignore because our phones have timers. But here's the thing — every pan is different, every stove is different, and your nose is the only tool that accounts for all those variables. A friend tried skipping this step once — let's just say it didn't end well, and her smoke alarm still hasn't forgiven her.
The 5-Minute Rest That Changes Everything
Let your batter rest for five minutes before you start cooking. I know, I know — you're hungry, your family is circling like vultures, and that coffee isn't going to drink itself. But here's the magic: during this rest, the flour fully hydrates, the gluten relaxes, and the baking powder starts its bubble-creating magic. Your pancakes will be 40% more tender and fluffy. I made this up to percentages because I can't actually measure pancake tenderness, but I'm telling you — the difference is dramatic. Use this time to heat your griddle, set out your serving plates, and maybe practice your pancake flip motion in the air like a weirdo. Your future self will thank you when you're eating pancakes so fluffy they practically float off the plate.
The Flip That Makes or Breaks
Master the flip and you'll be the pancake hero of your household. Use a thin, flexible spatula — not that thick, rigid one that came in your kitchen gadget set. Slide it under with confidence, get it centered, then flip with one smooth motion. No hesitation, no half-flips, no do-overs. The secret is committing fully. Wafflers make waffle-looking pancakes. Confident flippers make restaurant-worthy stacks. And here's the thing — even if you mess up, it's still going to taste incredible. I've served some pretty sad-looking pancakes to guests who declared them the best thing they'd ever eaten. Confidence, my friend, is 90% of the battle.
The Syrup Strategy
Warm your syrup. Cold syrup on hot pancakes is a crime against breakfast humanity. It cools your perfectly cooked pancakes, congeals the butter into weird waxy pockets, and generally ruins everything you've worked for. A 30-second trip to the microwave transforms your syrup from pancake assassin to liquid gold that flows into every nook and cranny. Better yet, keep a small pitcher in a bowl of hot water while you're cooking. Your pancakes deserve better than cold, thick syrup that lands on top like a sad, sweet blanket instead of soaking in and creating a perfect marriage of flavors.
Creative Twists and Variations
This recipe is a playground. Here are some of my favorite ways to switch things up:
The Mint Chocolate Marvel
Add 1/2 teaspoon of peppermint extract to your wet ingredients and replace regular Oreos with mint Oreos. The result tastes like a Thin Mint cookie had a beautiful baby with a pancake. Top with crushed candy canes if you're feeling festive, or just embrace the minty freshness that makes these perfect for summer mornings when you want something chocolatey but not heavy. The mint cuts through the richness and leaves your palate feeling surprisingly refreshed.
The Peanut Butter Cup Dream
Swirl 2 tablespoons of peanut butter into your batter at the very end, just enough to create ribbons throughout. Use peanut butter Oreos if you can find them, or regular ones work too. The combination of chocolate, peanut butter, and fluffy pancake is basically breakfast permission to eat candy. I've served these at brunch parties and watched grown adults moan involuntarily with each bite. It's slightly embarrassing but completely worth it.
The Salted Caramel Sensation
Drizzle caramel sauce into the batter in thin ribbons, then sprinkle a tiny pinch of flaky salt over each pancake right after you pour them on the griddle. The salt enhances the chocolate flavor and the caramel creates little pockets of gooey sweetness that surprise and delight. These are dangerously good — like, hide-the-leftovers-from-yourself good. The sweet-salty combination hits every pleasure center in your brain simultaneously.
The Double Chocolate Decadence
Add 2 tablespoons of cocoa powder to your dry ingredients and use chocolate Oreos instead of regular ones. These are for the chocolate lovers who think regular Oreo pancakes just aren't chocolatey enough. They're rich, they're intense, they're basically dessert masquerading as breakfast. Serve with chocolate sauce if you're going all-in, or balance them with fresh raspberries if you want to pretend you're being healthy.
The Birthday Cake Celebration
Use birthday cake Oreos and add rainbow sprinkles to the batter. These taste like childhood happiness and look like a party on a plate. Perfect for celebrating Tuesday, or making an ordinary morning feel like a special occasion. The colors from the sprinkles bleed slightly into the batter, creating a tie-dye effect that's Instagram gold. Kids go absolutely bonkers for these, and honestly, so do most adults.
The International Affair
Add 1/2 teaspoon of cinnamon and a pinch of cayenne to your dry ingredients, then serve with Mexican chocolate sauce. The warmth from the spices plays beautifully with the chocolate, creating complexity that makes these feel sophisticated enough for dinner guests. The slight heat builds slowly, making each bite more interesting than the last. It's like your pancakes went on vacation and came back with stories to tell.
Storing and Bringing It Back to Life
Fridge Storage
Store leftover pancakes in an airtight container with parchment paper between layers — they stay fresh for up to 4 days in the refrigerator. Don't just throw them in a container and hope for the best; the parchment prevents them from becoming a single, inseparable pancake blob. Cool them completely before storing, or you'll create condensation that turns your crispy edges into sad, soggy disappointments. I've learned this the hard way more times than I care to admit.
Freezer Friendly
These pancakes freeze like champions for up to 2 months. Lay them in a single layer on a baking sheet, freeze until solid, then transfer to freezer bags with the air squeezed out. This prevents them from freezing into one giant pancake brick that requires a chisel to separate. Label the bags because frozen chocolate pancakes look remarkably similar to frozen hamburger patties, and trust me, nobody wants that surprise at 7 AM on a Tuesday.
Best Reheating Method
The toaster oven is your best friend here — it brings back the crispy edges while keeping the centers fluffy. Three to four minutes at 350°F and they're almost as good as fresh. The microwave works in a pinch, but add a tiny splash of water before covering with a damp paper towel — it steams them back to life instead of turning them into rubber discs. Pro tip: if you're reheating multiple pancakes, the oven at 300°F for 10 minutes gives you that fresh-off-the-griddle experience that makes Monday morning feel like Sunday brunch.