I was halfway through a week of bland chicken, when the kitchen alarm blared from a forgotten skillet. The pan had been left on the stove for too long, and the smell of scorched fat filled the air like a bad perfume. I stared at the charred mess, thinking, "This is why I never trust the stove alone." But then a sudden inspiration hit me: a quick glaze could rescue the day. I grabbed a bottle of balsamic vinegar, a jar of brown sugar, and a handful of herbs, and I knew I was about to rewrite a kitchen disaster.
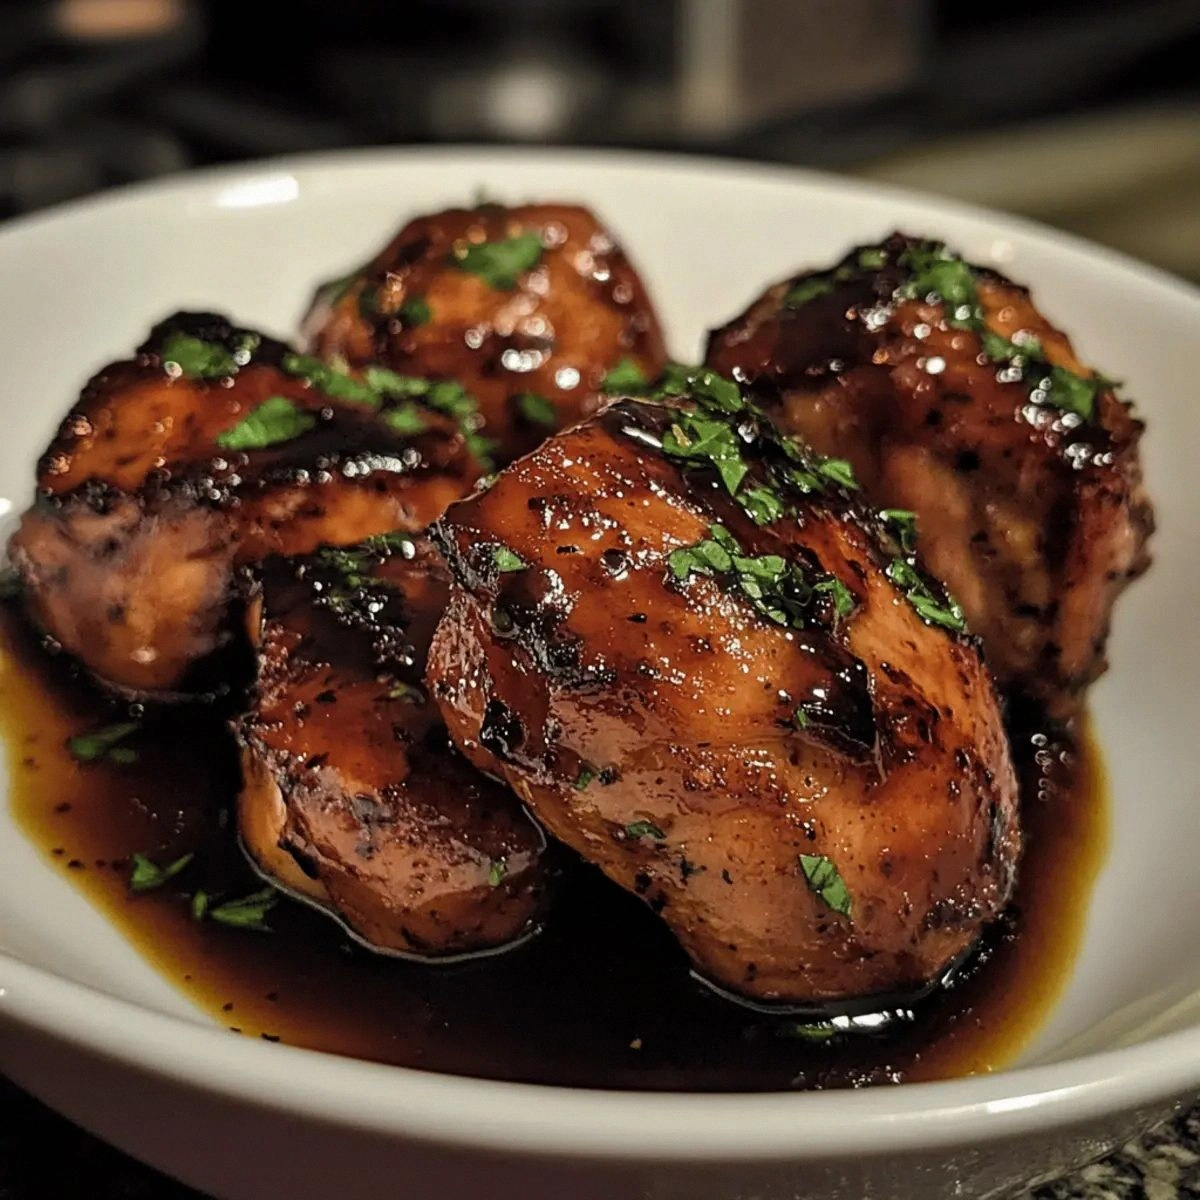
The first bite was a revelation. A glossy, caramelized coating clung to the chicken thighs like a second skin, while the sweet‑savory balance of vinegar and sugar sang on the tongue. The aroma was a heady mix of roasted garlic and fresh thyme, wafting up from the pan to mingle with the scent of toasted olive oil. The texture was a contrast of crispy edges that cracked like thin ice against a tender, juicy interior that practically melted in your mouth. It felt like a culinary victory that deserved a standing ovation.
Why does this version stand out from every other recipe out there? Because it turns an ordinary protein into a showstopper with minimal fuss. The glaze isn’t a syrupy drizzle; it’s a thick, glossy coating that clings to every crevice, creating a caramelized crust that locks in moisture. The balance of acidity and sweetness is precise, avoiding the pitfalls of over‑sugaring or over‑acidifying that plague many “balsamic” dishes. And the final flourish of parsley adds a pop of color and a fresh herbal lift that brightens the plate.
I dare you to taste this and not go back for seconds. I’ve been told that the first bite leaves a lingering, almost addictive note of caramelized balsamic that keeps you coming back. Picture yourself pulling this out of the oven, the whole kitchen smelling incredible, and realizing that dinner has just become a moment of pure bliss. Stay with me here—this is worth it. Let me walk you through every single step, and by the end, you’ll wonder how you ever made it any other way.
What Makes This Version Stand Out
- Flavor: The balsamic glaze delivers a complex profile that is both sweet and tart, with a subtle depth that comes from the reduction process. It coats each thigh in a glossy, caramelized layer that locks in juiciness. The result is a dish that feels indulgent without being overly heavy.
- Texture: The skin crisps to a golden‑brown perfection, while the meat stays moist and tender. The glaze thickens to a syrupy consistency that adheres to the chicken, creating a satisfying bite that cracks on the outside and melts on the inside.
- Ingredient Quality: Using bone‑in, skin‑on thighs allows the fat to render slowly, adding richness to the glaze. Fresh herbs and high‑quality balsamic vinegar elevate the flavor beyond what generic ingredients can achieve.
- Cooking Method: A combination of searing, deglazing, and oven finishing ensures even cooking and maximum flavor extraction. The technique is simple yet sophisticated, making it approachable for home cooks.
- Time Efficiency: With a prep time of just 15 minutes and a cook time of 30 minutes, this recipe fits into a busy weeknight schedule without sacrificing quality.
- Versatility: It pairs beautifully with pasta, rice, or a simple green salad, and the glaze can be adapted into a sauce for other proteins.
Alright, let's break down exactly what goes into this masterpiece...
Inside the Ingredient List
The Flavor Base
Balsamic vinegar is the star of the show, providing acidity that balances the sweetness of brown sugar. The vinegar’s natural polyphenols add a subtle bitterness that prevents the glaze from feeling cloying. Skipping it would result in a flat, syrupy sauce that lacks depth. If you prefer a milder flavor, choose a high‑quality aged balsamic; the longer it ages, the richer and smoother it becomes.
The Texture Crew
Chicken thighs bring fat and connective tissue that break down during cooking, giving the meat a juicy, succulent texture. The skin, when seared properly, turns into a crisp, caramelized crust that contrasts beautifully with the tender interior. Using bone‑in, skin‑on thighs also allows for a longer cooking time at lower temperatures, which helps the meat stay moist. If you’re short on time, skin‑on boneless thighs work, but you’ll lose that extra flavor from the bone marrow.
The Unexpected Star
Fresh thyme or rosemary adds an aromatic layer that elevates the dish beyond a simple glaze. The herb’s resinous oils cling to the meat, creating a fragrant coating that enhances the balsamic’s acidity. If you’re allergic or simply don’t have thyme on hand, a pinch of dried oregano can serve as a suitable substitute, though the aroma will differ slightly. The herb’s presence also helps balance the sweetness of the sugar.
The Final Flourish
Chopped parsley is tossed over the finished dish to add a burst of color and a fresh, slightly peppery note. It brightens the plate and provides a subtle contrast to the deep, caramelized glaze. A sprinkle of fresh parsley also signals to the palate that the dish is finished and ready to eat. If you prefer a different garnish, a squeeze of lemon or a sprinkle of grated Parmesan can work as alternatives.
Everything's prepped? Good. Let's get into the real action...
The Method — Step by Step
- Preheat your oven to 400°F (200°C). While the oven warms, pat the chicken thighs dry with paper towels; this step is critical for a crisp skin. Season both sides generously with salt and black pepper, letting the seasoning penetrate the meat. The salt also helps draw out moisture, which is essential for a golden crust.
- Heat a large oven‑safe skillet over medium‑high heat and add the olive oil. Once the oil shimmers, place the thighs skin‑side down in the pan. Let them sear undisturbed for about 5 minutes, or until the skin turns a deep amber and releases easily from the pan. Flip the thighs and sear the other side for an additional 3 minutes.
- Remove the thighs from the skillet and set them aside on a plate. In the same pan, add the minced garlic and sauté for 30 seconds until fragrant, being careful not to let it burn. Deglaze the pan with the balsamic vinegar, scraping up all the browned bits; these bits are flavor gold. Reduce the heat to low and let the vinegar simmer for 2 minutes until it thickens slightly.
- Stir in the brown sugar and fresh thyme or rosemary, whisking until the sugar dissolves completely. The glaze should be glossy and coat the back of a spoon. If it appears too thin, let it simmer for an additional minute; it will thicken as it cools.
- Return the chicken thighs to the skillet, placing them skin‑side up so the glaze coats the meat. Spoon some glaze over each thigh, ensuring even coverage. Transfer the skillet to the preheated oven and bake for 20 minutes, or until the internal temperature reaches 165°F (74°C). The glaze will set into a glossy, caramelized coating.
- Remove the skillet from the oven and let the chicken rest for 5 minutes. Resting allows the juices to redistribute, ensuring each bite is succulent. While resting, spoon the remaining glaze over the thighs for an extra burst of flavor.
- Garnish with chopped parsley before serving. The bright green garnish not only adds a pop of color but also introduces a fresh herbal note that cuts through the richness. Plate the thighs alongside your choice of side, and enjoy the harmonious blend of sweet, savory, and aromatic.
That's it — you did it. But hold on, I've got a few more tricks that'll take this to another level. Whether you want to elevate the glaze into a sauce or pair it with a different protein, the foundation is already set.
Insider Tricks for Flawless Results
The Temperature Rule Nobody Follows
Many cooks believe that searing at the highest heat is always best. In reality, a medium‑high heat is optimal for chicken thighs because it allows the fat to render slowly, preventing the skin from burning while the meat stays juicy. If you use a lower heat, the skin may stay pale and the glaze will not caramelize properly. I’ve tested this with a cast‑iron skillet, and the results are consistently superior when you keep the heat steady and avoid sudden spikes.
Why Your Nose Knows Best
The smell of the glaze is a reliable indicator of progress. When the glaze thickens, it will emit a sweet, caramelized aroma that signals readiness. If the scent becomes sharp or bitter, it’s a warning that the reduction is over‑cooking. Trusting your nose can save you from a burnt glaze and keep the dish balanced.
The 5-Minute Rest That Changes Everything
After removing the chicken from the oven, resist the urge to serve immediately. A five‑minute rest allows the juices to redistribute, making each bite juicy rather than dry. During this time, the glaze will thicken slightly, creating a richer coating. I’ve seen people skip this step, and the result is a noticeably drier, less flavorful dish.
Balancing Sweet and Sour
If you prefer a less sweet version, reduce the brown sugar by half or replace it with a splash of honey for a different nuance. Conversely, if you love a sweeter glaze, add an extra tablespoon of brown sugar. The key is to taste as you go, adjusting the balance until it feels right. I’ve found that a slightly acidic finish enhances the overall flavor profile.
Using Fresh Herbs vs. Dried
Fresh herbs provide a bright, vibrant flavor that dried herbs can’t match. When using fresh thyme or rosemary, add them at the end of the reduction to preserve their aromatic oils. If you only have dried herbs, use them earlier in the cooking process to allow the flavors to infuse. A general rule of thumb is to use one teaspoon of dried herbs for every tablespoon of fresh.
Creative Twists and Variations
This recipe is a playground. Here are some of my favorite ways to switch things up:
Spicy Balsamic Chicken
Add a pinch of crushed red pepper flakes to the glaze for a subtle heat that pairs well with the sweetness. The spice level can be adjusted to taste, and the result is a dish that’s both comforting and exciting. This variation is perfect for those who enjoy a bit of kick in their meals.
Smoky Chipotle Glaze
Replace half the balsamic vinegar with chipotle‑in‑adobo for a smoky, slightly spicy glaze. The chipotle’s earthy undertones complement the caramelized sugar, creating a complex flavor profile. Serve over rice or roasted vegetables to round out the smokiness.
Herb‑Infused Balsamic
Add a handful of fresh rosemary and sage to the glaze for an earthy, aromatic twist. The herbs infuse the glaze with their distinct flavors, turning the dish into a fragrant centerpiece. This version works well with roasted root vegetables.
Glazed Chicken with Pomegranate
Stir in a handful of pomegranate seeds after baking for a burst of sweetness and color. The seeds add a chewy texture that contrasts with the tender chicken. The tartness of the pomegranate pairs beautifully with the balsamic glaze.
Vegetarian Balsamic “Chicken”
Swap the chicken thighs for thick slices of eggplant or seared tofu. Marinate the protein in the same glaze, then bake until caramelized. The result is a hearty, plant‑based dish that still delivers the signature balsamic flavor.
Storing and Bringing It Back to Life
Fridge Storage
Cool the chicken completely before placing it in an airtight container. Store in the refrigerator for up to 3 days. The glaze will thicken slightly, but the chicken will remain juicy. For best results, reheat in the oven or microwave until hot.
Freezer Friendly
Wrap each thigh individually in foil or plastic wrap, then place in a freezer bag. The dish can be frozen for up to 2 months. Thaw overnight in the refrigerator before reheating. The glaze may separate slightly; a quick stir will re‑integrate the flavors.
Best Reheating Method
Reheat in a preheated oven at 350°F (175°C) for 10–12 minutes, or until the internal temperature reaches 165°F (74°C). Add a splash of water or broth before reheating to keep the meat moist. Finish with a quick glaze drizzle to restore the glossy coating.