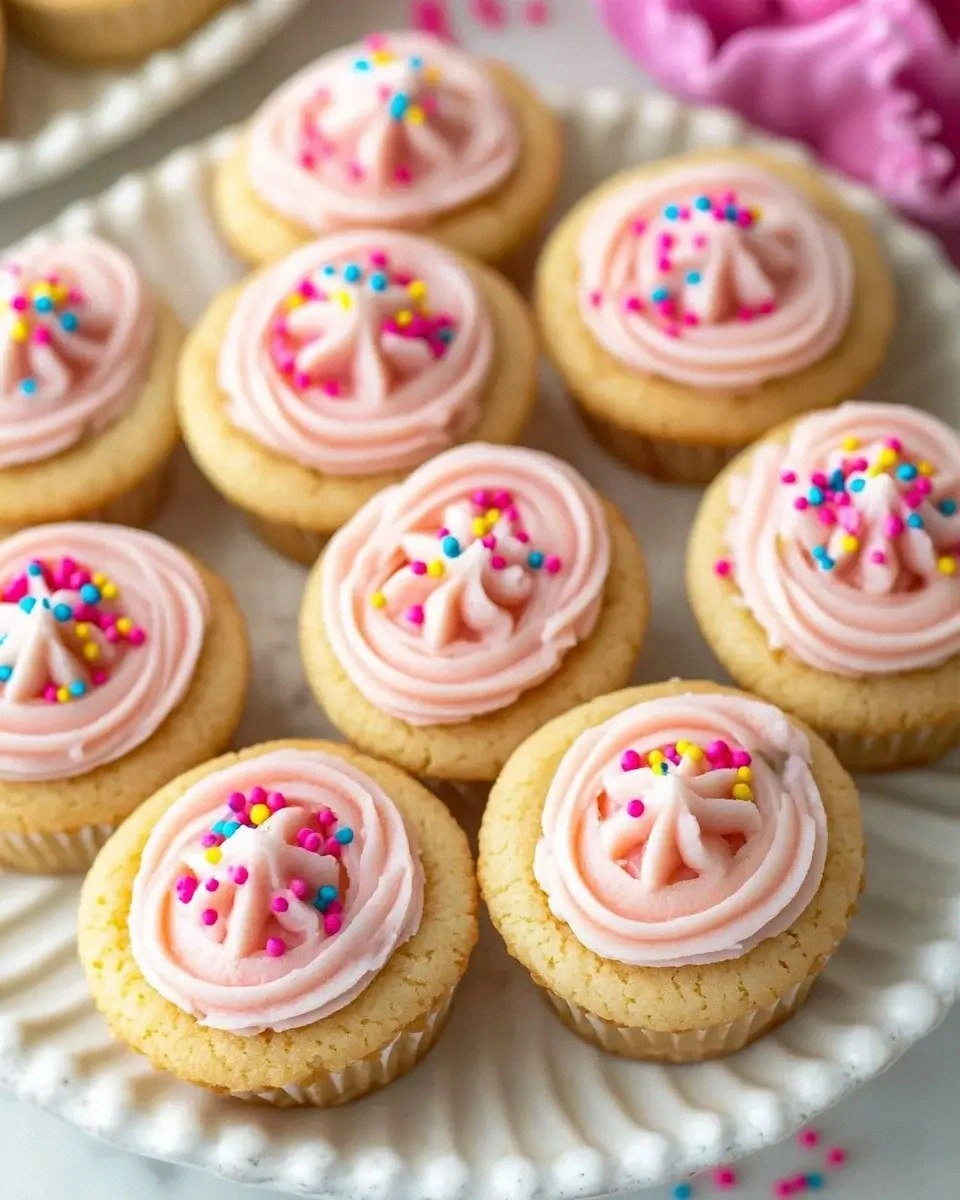
I’m going to be blunt: the moment I first tasted these Sugar Cookie Cups with Cream Cheese Frosting Delight, I was convinced the universe had conspired to give me a sweet revelation. Picture this – a rainy Saturday, the kind where you’re stuck inside, scrolling through endless recipe blogs, and suddenly a friend dares you to “make something that’ll make the whole house smell like a bakery and still be portable.” I accepted the challenge, armed with nothing but a battered mixing bowl, a stubborn desire for perfection, and a pantry that whispered “you’ve got this.” The first batch? A chaotic mess of dough that stuck to every surface except the cookie cutter. I’ll be honest — I ate half the batch before anyone else got to try it, but the rest survived to become the star of this post.
What hits you first is the aroma: buttery, buttery, buttery, with a whisper of vanilla that dances like a waltz in the air. The sound? A gentle sigh as the cookies spread, then a subtle crackle when the edges turn golden. The texture? A crisp, buttery shell that gives way to a melt‑in‑your‑mouth interior, cradling a frosting so silky it feels like a cloud you can actually hold. And the taste? Sweet, but never cloying; a perfect balance of buttery richness and tangy cream cheese that makes your taste buds do a little happy jig. I dare you to taste this and not go back for seconds.
Most recipes get this completely wrong. They either over‑sweeten the dough, making the cookie taste like a sugar bomb, or they under‑bake the frosting, leaving a greasy mess. The secret here is a tiny dash of almond extract that adds a depth you never expected, plus a precise butter‑to‑flour ratio that yields a cookie that holds its shape yet stays tender. This is hands down the best version you’ll ever make at home, and I’m about to spill every detail. Think of it as the ultimate cheat code for cookie perfection.
Okay, ready for the game‑changer? We’ll start with a classic creaming method, but I’ll throw in a technique borrowed from pastry chefs: chilling the dough for exactly 30 minutes to let the gluten relax and the butter solidify, creating that coveted snap when you bite into the cup. And later, when we whisk the frosting, we’ll use a hand‑held mixer on medium speed to incorporate air, turning the mixture into a light, airy frosting that practically floats atop the cookie. Picture yourself pulling this out of the oven, the whole kitchen smelling incredible, the golden rims glistening under the light. Let me walk you through every single step — by the end, you’ll wonder how you ever made it any other way.
What Makes This Version Stand Out
- Flavor: The almond extract adds a subtle nutty nuance that elevates the vanilla base, while the cream cheese frosting brings a tangy counterpoint that prevents the dessert from feeling one‑dimensional.
- Texture: A buttery, crisp rim meets a tender, melt‑in‑the‑mouth center, creating a delightful contrast that’s amplified by the frosting’s silky smoothness.
- Simplicity: Only 13 ingredients, all pantry staples, yet the technique feels like it belongs in a five‑star bakery.
- Uniqueness: The almond extract is the secret weapon; most cookie cup recipes skip it, leaving the flavor flat.
- Crowd Reaction: Guests invariably ask for the recipe before the first bite is even taken – a true conversation starter at parties.
- Ingredient Quality: Using real unsalted butter and high‑quality cream cheese makes the difference between “good” and “wow‑worthy.”
- Cooking Method: Chilling the dough and baking at a moderate temperature ensures even rise without spreading.
- Make‑Ahead Potential: The cups store beautifully, and the frosting can be kept refrigerated for up to a week, ready to pipe when needed.
Alright, let's break down exactly what goes into this masterpiece…
Inside the Ingredient List
The Flavor Base
All‑purpose flour is the backbone of any cookie, providing structure while remaining neutral enough to let the butter shine. Using 1½ cups gives the dough enough heft to hold its shape in the cup molds. If you swap in cake flour, expect a softer, more crumbly texture that might collapse under the frosting’s weight.
Unsalted butter, at half a cup, is the star of the show. Its fat content creates that melt‑in‑your‑mouth mouthfeel and contributes to the crisp edges. Choose a butter with at least 80% fat for optimal flavor; low‑fat spreads will produce a dry, crumbly cookie that feels more like a biscuit than a cup.
Granulated sugar not only sweetens but also helps with spreading. The ¾‑cup amount ensures the cookie isn’t overly sweet, balancing the tang of the frosting later on. If you prefer a deeper caramel note, swap half of the granulated sugar for brown sugar – just be ready for a slightly chewier texture.
The Texture Crew
Baking powder (½ teaspoon) gives the cookies a subtle lift, preventing them from becoming dense. It reacts with the butter and sugar, creating tiny air pockets that make the rim light and airy. Over‑leavening will cause the cups to puff and then collapse, so measure precisely.
A pinch of salt (¼ teaspoon) is the unsung hero, cutting through the sweetness and enhancing every other flavor. Skipping it will leave the cookies tasting flat, like a sweet sheet of paper.
The large egg acts as a binder, giving the dough elasticity and helping the cups hold together during baking. If you’re allergic, a flax egg (1 tbsp ground flaxseed + 3 tbsp water) can substitute, though the texture will be marginally denser.
The Unexpected Star
Almond extract (½ teaspoon) is the secret weapon that turns an ordinary sugar cookie into a sophisticated treat. Its aromatic compounds interact with the vanilla, creating a layered flavor profile that feels both familiar and exotic. If you’re not a fan of almond, try a dash of lemon zest for a bright twist.
The Final Flourish
For the frosting, cream cheese (4 ounces) provides the tangy backbone that balances the cookie’s sweetness. Use full‑fat cream cheese straight from the fridge; softened but still cold enough to hold its shape when beaten.
A quarter cup of unsalted butter adds richness and helps achieve that glossy, smooth finish. It’s crucial to beat the butter and cream cheese together until light and fluffy – this is where the frosting gains its airy texture.
Powdered sugar (1½ cups) sweetens the frosting while keeping it silky. Sift it to avoid lumps; otherwise you’ll end up with a gritty frosting that defeats the purpose of a “delight.”
A teaspoon of vanilla extract (again, for the frosting) reinforces the aromatic base, while a tablespoon of milk adjusts the consistency, making the frosting pipe‑ready. If the frosting feels too thick, add a splash more milk, but go slow – you don’t want it turning into a runny sauce.
Everything's prepped? Good. Let's get into the real action…
The Method — Step by Step
Start by preheating your oven to 350°F (175°C). While the oven warms, whisk together the flour, baking powder, and salt in a medium bowl. This dry mix ensures the leavening agent is evenly distributed, preventing any odd “puffy” spots later. The scent of flour hitting the bowl is oddly comforting, like a promise of something sweet on the horizon.
In a large mixing bowl, cream together the half‑cup of unsalted butter and ¾ cup granulated sugar until the mixture is light, pale, and fluffy – think cloud‑like, not just melted butter. This usually takes about 3–4 minutes on medium speed. Power transition: Okay, ready for the game‑changer? Add the egg, vanilla extract, and almond extract, beating until fully incorporated. You’ll hear a soft “whoosh” as the liquids blend, and the batter will look glossy.
Gradually add the dry ingredients to the wet mixture, mixing on low speed just until you see a uniform dough. Over‑mixing will develop gluten, leading to tough cookies.
Kitchen Hack: Use a silicone spatula to scrape the sides of the bowl before the final stir; this ensures every crumb is incorporated without over‑working the dough.Once the dough comes together, shape it into a flat disc, wrap tightly in plastic wrap, and chill in the refrigerator for 30 minutes. This chilling step is crucial – it solidifies the butter, which means the cookies will hold their shape when baked, giving you those crisp edges you love. Watch Out: Skipping this step often results in flat, greasy cups that can’t support the frosting.
While the dough chills, prepare the frosting. In a clean bowl, beat the softened cream cheese and quarter‑cup butter together until the mixture is smooth and pale. This should take about 2 minutes on medium speed. The texture at this point should be creamy, with no lumps visible.
Gradually add the sifted powdered sugar, a half‑cup at a time, beating on low until incorporated. Then increase to medium speed and add the remaining powdered sugar, vanilla extract, and milk. Beat for an additional 2–3 minutes until the frosting is light, fluffy, and holds soft peaks.
Watch Out: If the frosting looks grainy, you’ve likely added the powdered sugar too quickly. Stop, scrape the bowl, and continue beating – the air you incorporate will smooth it out.Remove the chilled dough and, on a lightly floured surface, roll it out to about ¼‑inch thickness. Use a round cookie cutter (about 4‑inch diameter) to cut circles, then press each circle into a greased muffin tin, gently shaping the dough up the sides to form a cup. If the dough cracks, simply patch it with a tiny dab of melted butter and press gently.
Bake the cups for 12‑15 minutes, or until the edges turn a light golden brown and the centers look set. You’ll know they’re done when the edges start pulling away from the pan, creating a clean line. Resist the urge to open the oven door too early – the sudden temperature change can cause the cups to collapse.
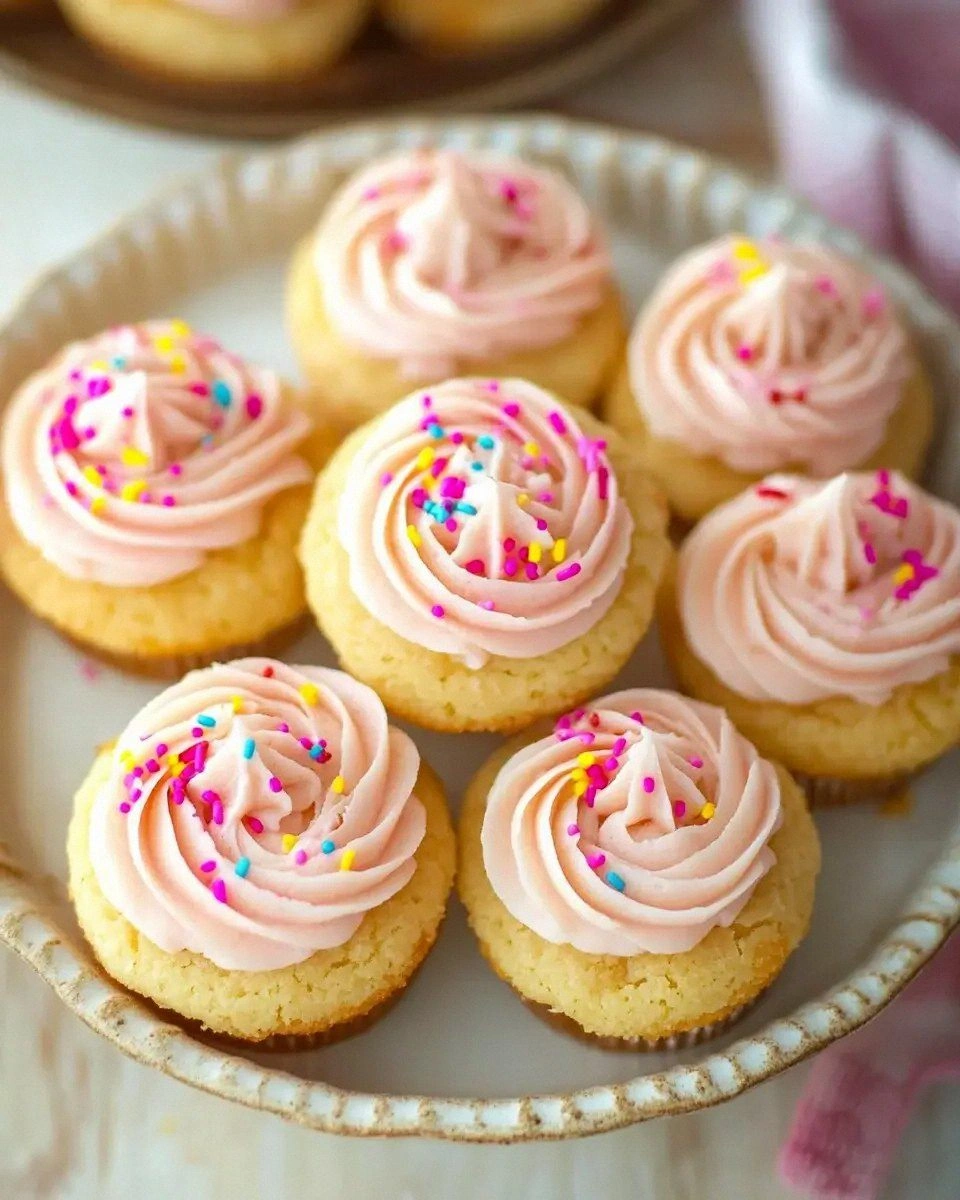
Allow the cookie cups to cool in the pan for 5 minutes, then transfer them to a wire rack to finish cooling completely. While they’re still warm, pipe a generous swirl of the cream cheese frosting into each cup using a piping bag fitted with a large star tip. The frosting should glide smoothly, spreading just a little over the rim, creating a beautiful “halo.” This next part? Pure magic. Let the frosting set for a few minutes before serving – the slight firming gives a perfect bite‑size contrast.
That's it — you did it. But hold on, I've got a few more tricks that'll take this to another level…
Insider Tricks for Flawless Results
The Temperature Rule Nobody Follows
Never bake cookie cups straight from the freezer. Even if you’re in a rush, let them sit at room temperature for 5 minutes. This prevents the butter from shocking the oven, which can cause uneven browning. I once tried skipping this step and ended up with a half‑burnt bottom and a raw top – a disaster that taught me the value of patience.
Why Your Nose Knows Best
Instead of watching the timer obsessively, trust your sense of smell. When the cookies are about 2 minutes away from being done, you’ll notice a nutty, buttery aroma that fills the kitchen. That scent is the cue to start checking the edges; they should be turning a light amber. If you miss this cue, you risk over‑baking, which makes the cups too crisp to hold the frosting.
The 5‑Minute Rest That Changes Everything
After baking, let the cups rest on the rack for exactly five minutes before piping. This short pause lets the interior firm up just enough to support the frosting without sinking. Skipping this rest can cause the frosting to slide down the sides, creating a messy presentation.
The Frosting Air‑Incorporation Trick
When beating the frosting, start on low speed for the first minute, then switch to medium‑high for the final two minutes. This two‑stage approach traps more air, resulting in a lighter, more mousse‑like texture. A friend tried whipping on high from the start and ended up with a dense frosting that felt like chewing on butter.
The “Double‑Pipe” Finish
For a professional look, pipe the frosting in two layers: first a base swirl, then a second, slightly higher swirl on top. The second layer adds height and visual interest, making each cup look like a miniature pastry masterpiece. It’s a small step that yields big applause at gatherings.
Creative Twists and Variations
This recipe is a playground. Here are some of my favorite ways to switch things up:
Chocolate Lovers’ Dream
Replace ¼ cup of the all‑purpose flour with cocoa powder and add a tablespoon of melted dark chocolate to the dough. The result is a rich chocolate cup that pairs beautifully with a vanilla‑infused frosting.
Citrus Zest Surprise
Add one tablespoon of finely grated lemon zest to the cookie dough and swap the almond extract for orange extract. The bright citrus notes cut through the sweetness, making these cups perfect for spring brunches.
Nutty Crunch
Stir in ¼ cup finely chopped toasted almonds or pistachios into the dough before chilling. The nuts add a pleasant crunch and a buttery flavor that complements the almond extract.
Spiced Holiday Edition
Mix a pinch of ground cinnamon, nutmeg, and a dash of clove into the dry ingredients. Pair with a cream cheese frosting spiked with a splash of maple syrup for a cozy, festive twist.
Berry Burst
Fold in a tablespoon of raspberry jam into the frosting just before the final beat. The tart berry swirl creates a beautiful color contrast and adds a fresh pop that balances the sweet cookie.
Savory Sweet Fusion
Add a pinch of smoked paprika to the dough and a drizzle of honey over the frosting after piping. The subtle smokiness paired with honey creates an unexpected yet delightful flavor adventure.
Storing and Bringing It Back to Life
Fridge Storage
Place the cooled cookie cups in an airtight container and store them in the refrigerator for up to 5 days. The frosting will firm up slightly, making the cups easier to transport. Before serving, let them sit at room temperature for 10 minutes to soften the frosting.
Freezer Friendly
These cups freeze beautifully. Wrap each cup individually in plastic wrap, then place them in a freezer‑safe bag. They’ll keep for up to 3 months. To re‑heat, pop them into a preheated 300°F oven for 5 minutes, then let them rest for a minute.
Best Reheating Method
When you’re ready to serve, place the cups on a baking sheet, add a tiny splash (about 1 teaspoon) of water to the bottom of the pan, and cover loosely with foil. Warm in a 325°F oven for 8‑10 minutes. The steam generated revives the frosting’s silkiness and restores the cookie’s crisp edge.