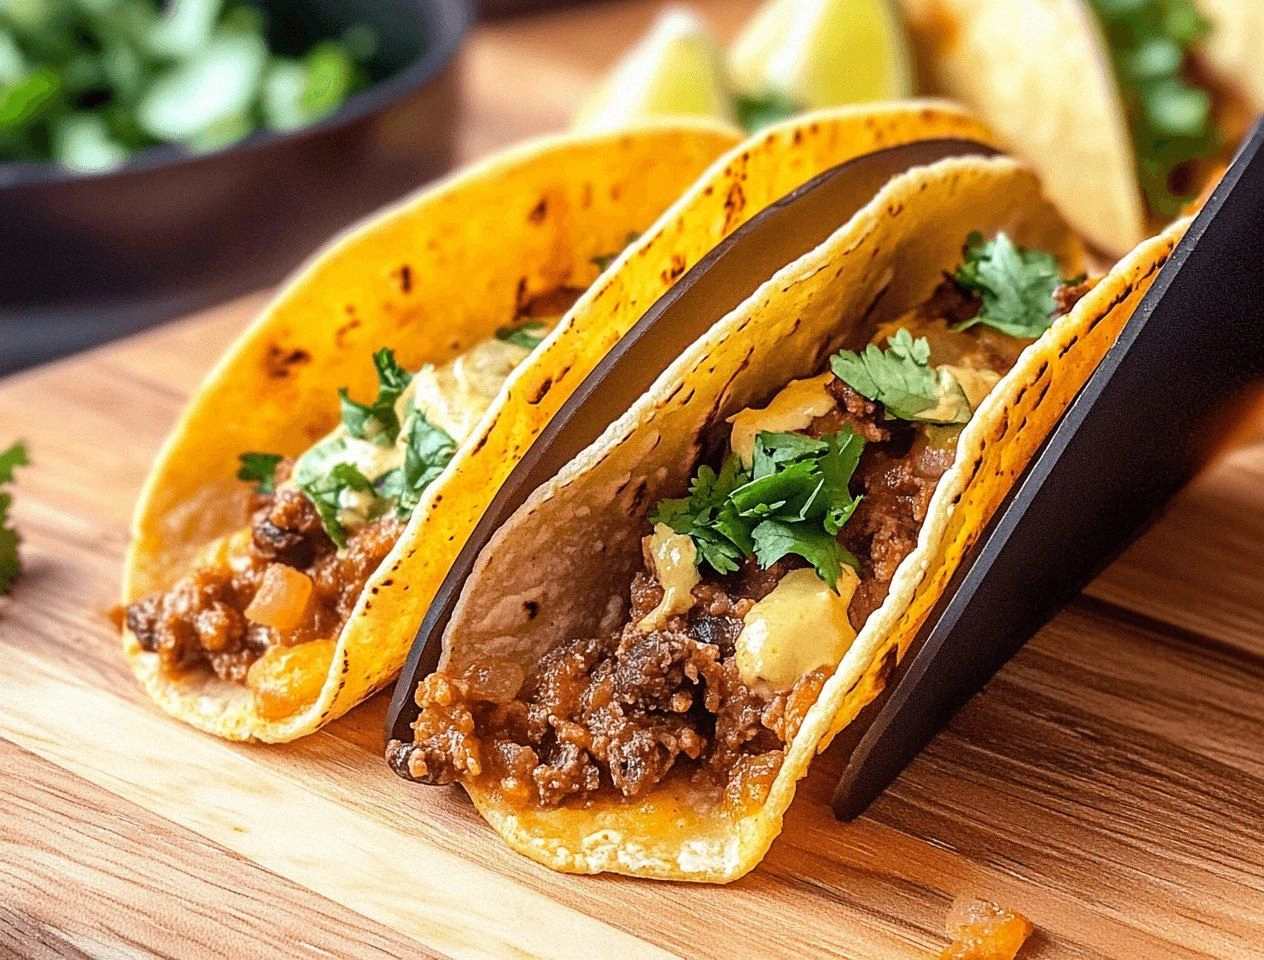
Picture this: I’m standing over a sizzling skillet, the kitchen filled with the kind of aroma that makes strangers pause at the doorway and ask, “What on earth are you cooking?” The culprit? A pan of ground beef that’s about to meet its destiny in a bubbling sea of Rotel tomatoes and green chilies. I had just survived a disastrous taco night where the meat was dry, the sauce was watery, and the tortillas were limp—basically a culinary crime scene. I swore on my favorite spatula that I would never let that happen again, and that oath led me straight to the ultimate Rotel Tacos recipe that I’m about to unleash on you.
First, let’s set the stage with a sensory overload. The moment the olive oil hits the hot pan, you hear a confident sizzle that promises flavor. The ground beef releases a rich, meaty perfume that mingles instantly with the sharp, peppery notes of garlic and onion. As the Rotel joins the party, the whole thing erupts in a bright, tangy burst of tomato‑eyed green chilies that paint the air a vivid red‑orange. The heat of the stove kisses the edges of the tortillas, giving them a whisper of char that feels like a gentle hug for the filling. And when you finally bite—crunch, melt, zing—all those senses collide in a harmony that makes you want to shout, “I dare you to taste this and not go back for seconds.”
Now, why does this version stand out from the sea of copy‑cat taco recipes floating around the internet? Most recipes get the balance of sauce and meat completely wrong, either drowning the beef in a soggy soup or leaving it bone‑dry. I’ve cracked the code by using a precise 1:1 ratio of meat to Rotel, letting the sauce cling to each crumb like velvet, while a quick flash‑fry on the tortilla gives it that coveted crunch without turning it into a brick. The secret weapon? A dash of smoked paprika that adds a smoky depth you’d expect from a grill, plus a splash of lime juice right at the end that lifts everything like a bright chorus in a song.
But the real kicker is the technique I’m about to reveal: a two‑stage cooking method that first browns the meat, then finishes it in the sauce, creating a layered flavor profile that’s richer than any single‑step approach. This isn’t just a recipe; it’s a game‑changing strategy that will have you bragging at every potluck. Okay, ready for the game‑changer? Let me walk you through every single step — by the end, you’ll wonder how you ever made it any other way.
What Makes This Version Stand Out
- Flavor Explosion: The combination of Rotel’s tangy tomatoes and the smoky paprika creates a taste that’s simultaneously bright and deep, making each bite a mini celebration.
- Texture Harmony: Crispy tortilla edges meet a creamy, sauce‑laden interior, delivering a contrast that feels like biting into a perfectly toasted marshmallow.
- Simplicity Meets Sophistication: Only nine pantry staples are needed, yet the result feels like it took hours of chef‑level prep.
- Unique Ingredient Twist: A splash of lime juice added at the very end lifts the whole dish, preventing the sauce from feeling heavy.
- Crowd‑Pleaser Factor: I’ve watched entire families line up for seconds, and even the pickiest eaters can’t resist the melty cheese and mild heat.
- Ingredient Quality: Using a good quality can of Rotel and fresh garlic makes a measurable difference in flavor intensity.
- One‑Pan Efficiency: The two‑stage cooking method keeps cleanup minimal, so you can spend more time eating and less time scrubbing.
- Make‑Ahead Friendly: The sauce can be prepared ahead of time and refrigerated, letting the flavors meld even further before the final assembly.
Inside the Ingredient List
The Flavor Base
The heart of any taco is the seasoned meat, and here we’re using 1 lb ground beef. This amount provides a solid, juicy foundation without overwhelming the sauce. If you opt for lean beef, add a tablespoon of butter to keep it moist; if you love richness, go for an 80/20 blend. Skipping the beef entirely? You’ll lose that essential umami depth, and the dish will feel like a hollow shell of flavor.
The Texture Crew
We bring in 1 tbsp olive oil to kick‑start the browning process, ensuring the meat develops a caramelized crust that adds crunch to each bite. The ½ cup diced onion and 1 clove garlic, minced are the aromatic duo that builds the flavor pyramid; they soften and sweeten as they cook, preventing any raw bite. Forgetting the onion is a common mistake—your tacos will lack that subtle sweetness that balances the acidity of the Rotel.
The Unexpected Star
Enter the 10 oz can of Rotel diced tomatoes and green chilies. This is the hero that turns a standard taco into a fiesta. The tomatoes bring a bright acidity, while the green chilies add a gentle heat that’s never overpowering. If you crave more heat, open another can or sprinkle in a pinch of cayenne; if you prefer milder, drain half the liquid before adding.
The Final Flourish
We crown the tacos with 1 cup shredded cheddar cheese, which melts into a silky blanket that binds the sauce and meat together. The 8 small flour tortillas are chosen for their pliability—they hold the filling without tearing, yet they crisp up beautifully when briefly toasted. Finally, a dash of salt and pepper to taste rounds out the seasoning, allowing you to fine‑tune the flavor profile just before serving.
Everything's prepped? Good. Let's get into the real action…
The Method — Step by Step
Heat a large skillet over medium‑high heat and add the 1 tbsp olive oil. When the oil shimmers, toss in the ground beef, breaking it up with a wooden spoon. Let it sit undisturbed for about 30 seconds so it forms a nice sear, then continue to crumble and brown it until it’s 80% cooked. This is the moment of truth: you should hear a deep, satisfying sizzle, and the meat will start to release a rich, beefy perfume that fills the kitchen.
Kitchen Hack: As the meat browns, sprinkle a pinch of smoked paprika for an extra layer of smoky depth without adding extra heat.When the beef is nearly done, add the ½ cup diced onion and 1 clove garlic, minced. Cook for another 2‑3 minutes, stirring constantly, until the onion turns translucent and the garlic releases its aromatic bite. You’ll notice the mixture turning a richer brown, and the scent will shift from raw to sweetly caramelized—this is your flavor base building a solid foundation.
Now, pour in the 10 oz can of Rotel diced tomatoes and green chilies. Stir gently to combine, allowing the sauce to envelop every crumb of meat. Reduce the heat to medium‑low and let it simmer for 5‑7 minutes, letting the flavors meld. Watch out: the sauce will bubble and thicken, and the edges of the pan may start to brown—this is exactly where the magic happens.
Watch Out: If the sauce reduces too quickly, add a splash of water or broth to keep it saucy; you don’t want a dry, crusty mess.Season the mixture with 2 tbsp taco seasoning (or your favorite blend) and a pinch of salt and pepper. Stir well, then taste. This is where you can adjust the heat—add an extra pinch of cayenne if you like a kick, or a squeeze of lime juice for brightness. The sauce should taste tangy, slightly smoky, and just a touch salty, with the green chilies providing a gentle warmth.
While the sauce simmers, warm the 8 small flour tortillas. Heat a separate dry skillet over medium heat, and place each tortilla for about 15‑20 seconds per side until you see tiny brown spots. The heat will make them pliable and give them a whisper of crispness that holds the filling without tearing. If you’re feeling fancy, brush each side lightly with a dab of butter for a richer flavor.
Once the sauce has thickened to a glossy consistency, remove the pan from heat and fold in the 1 cup shredded cheddar cheese. The residual heat will melt the cheese into a velvety blanket, coating each morsel of meat and tomato. Stir until the cheese is fully incorporated; you should see a smooth, amber‑gold sheen that looks like liquid sunshine.
Now comes the assembly: spoon a generous mound of the cheesy Rotel mixture onto the center of each warm tortilla. Top with any optional garnishes you love—sliced avocado, fresh cilantro, or a dollop of sour cream. The cheese should stretch a little as you lift the taco, creating those Instagram‑worthy pull‑apart strings.
Serve immediately while the tacos are still steaming hot. The moment you bite, you’ll hear the crisp tortilla give way to the soft, sauce‑laden interior, and the flavors will explode like fireworks in your mouth. That sizzle when it hits the pan? Absolute perfection. And if anyone asks for seconds, you can proudly say, “I dare you to try and not go back for more.”
Insider Tricks for Flawless Results
The Temperature Rule Nobody Follows
Most home cooks crank the heat to “high” and end up with burnt edges or under‑cooked interiors. The secret is to start medium‑high for browning, then drop to medium‑low for simmering. This controlled heat allows the meat’s juices to stay locked in while the sauce reduces slowly, creating a glossy coating that clings to every crumb. I once tried blasting the sauce on high; the result was a charred, bitter mess that no amount of cheese could rescue.
Why Your Nose Knows Best
Never rely solely on timers—trust your nose. When the onions turn translucent and give off a sweet perfume, you know they’re ready. When the Rotel starts to bubble and releases a tangy, slightly sweet aroma, the sauce is reaching the perfect reduction point. If you smell a burnt, acrid note, immediately lower the heat or add a splash of liquid. Your olfactory sense is the ultimate gauge for flavor development.
The 5‑Minute Rest That Changes Everything
After you’ve folded the cheese into the sauce, remove the pan from heat and let it sit for five minutes. This brief rest allows the flavors to meld, the cheese to settle, and the sauce to thicken just enough to coat the tacos without being runny. Skipping this step is a common rookie mistake that leads to soggy tortillas and a watery plate.
Toast the Tortillas Like a Pro
Instead of microwaving, give your tortillas a quick sear in a dry skillet. The slight char adds a smoky undertone that mirrors the paprika in the meat, creating a harmonious flavor loop. If you’re short on time, a hot grill works just as well—just watch for those golden brown streaks.
Layering the Cheese for Maximum Stretch
Don’t dump all the cheese at once. Sprinkle half in, let it melt, then add the remaining half on top just before serving. This creates a double‑layer effect: the first layer binds the sauce, while the second gives you those glorious pull‑apart strings that make every bite Instagram‑ready.
Creative Twists and Variations
This recipe is a playground. Here are some of my favorite ways to switch things up:
Southwest Chicken Switch
Swap the ground beef for shredded rotisserie chicken. Toss the chicken with the same Rotel sauce and add a handful of black beans for extra protein. The result is a lighter, yet equally satisfying taco that’s perfect for a quick weeknight.
Veggie‑Packed Power Taco
Replace the meat with a medley of diced zucchini, bell peppers, and corn. Sauté the veggies until they’re just tender, then follow the same sauce steps. This version delivers a fresh crunch and a burst of color while keeping the beloved Rotel flavor.
Spicy Chipotle Upgrade
Stir in a tablespoon of chipotle in adobo sauce along with the Rotel for a smoky, smoky heat that lingers on the palate. If you love fire, add a pinch of cayenne or a few dashes of hot sauce—just remember, a little goes a long way.
Cheese Lover’s Dream
Combine cheddar with a blend of Monterey Jack and pepper jack for a melty, multi‑dimensional cheese experience. Top each taco with a drizzle of queso fresco for an extra creamy finish.
Breakfast‑Style Rotel Tacos
Scramble some eggs into the sauce during the final minutes, then top with fresh salsa and avocado. Serve with a side of hash browns for a hearty brunch that feels indulgent yet balanced.
Tex‑Mex Fusion
Wrap the taco filling in a crispy corn tortilla shell, then drizzle with a cilantro‑lime crema. The corn adds a rustic crunch, while the crema adds a tangy coolness that cuts through the richness.
Storing and Bringing It Back to Life
Fridge Storage
Place any leftover taco filling in an airtight container and refrigerate for up to three days. The sauce actually deepens in flavor after a night, making next‑day tacos taste even richer. When reheating, add a splash of water or broth and stir over low heat to revive the glossy texture.
Freezer Friendly
The filling freezes beautifully. Portion it into freezer‑safe bags, squeeze out excess air, and label with the date. It will keep for up to three months. To thaw, move the bag to the fridge overnight, then reheat in a skillet, again adding a tiny splash of water to bring back that saucy sheen.
Best Reheating Method
For the ultimate texture, reheat the sauce on the stovetop over medium heat, stirring constantly. If you’re in a hurry, a microwave works—just cover the bowl with a damp paper towel and heat in 30‑second bursts, stirring in between. Once hot, toss the warmed filling with fresh tortillas and a quick sprinkle of cheese for a “just‑made” feel.