I was standing in the kitchen, watching the dough crumble under my fingers like a broken promise. The last time I tried making a pie crust, I had a half‑baked disaster that left the crust soggy, the edges unappetizing, and the whole pie looking like a sad, doughy cloud. My friends were laughing, and I was left with a lesson: there is a single, flawless technique that turns a mediocre crust into a buttery, flaky masterpiece. That single technique is the secret behind this recipe, and it’s so simple, I could explain it in a single sentence—but I’m going to take you through every detail.
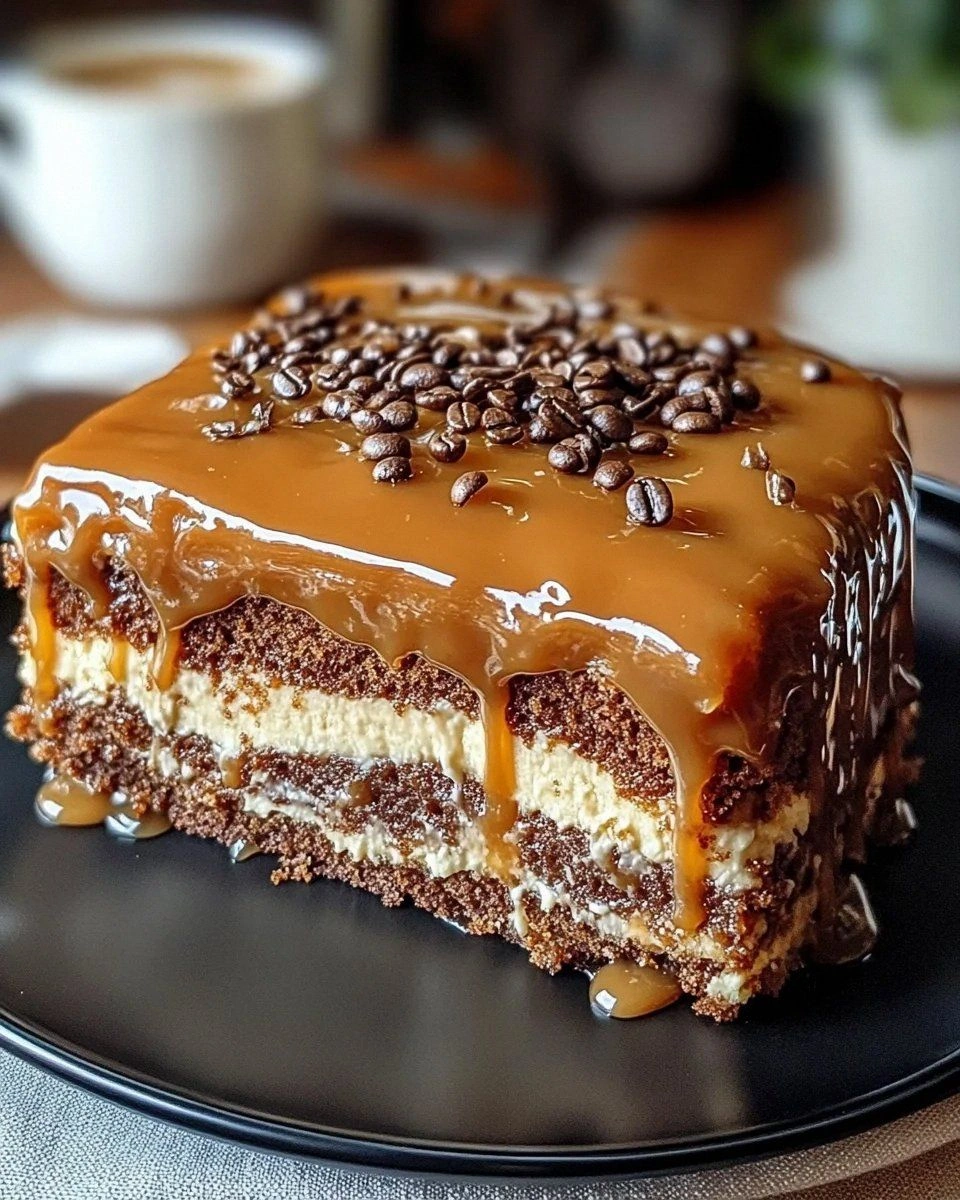
Picture yourself pulling a golden, crisp crust out of the oven, the aroma of toasted butter and sugar filling the room. The sound of the first bite is a satisfying crack, the crust shattering like thin ice under a sudden, cool gust of wind. The interior is tender, the edges buttery, and the overall texture is a dance between crisp and soft, a contrast that makes every bite a revelation. This is the moment you’ll be tempted to taste it, and I dare you to taste this and not go back for seconds.
What makes this version stand out is not just the ingredients, but the precise balance of temperature, technique, and timing. It’s a recipe that has been refined through countless experiments, where every tweak was tested against the ultimate benchmark: a crust that is flaky on the outside, tender on the inside, and easy to work with. I’ve distilled years of kitchen battles into a single, foolproof method that even the most anxious home bakers can trust. The result? A crust that feels like a buttery blanket and tastes like a slice of sunshine.
By the end of this post, you’ll be able to make a pie crust that will make your friends ask where you learned the trick. You’ll be able to adjust the recipe for different pie sizes, experiment with variations, and store it for later use without losing its quality. The journey starts now, and every step is a chance to learn a new kitchen hack, a fun fact, or a warning that will save you from a culinary mishap. Let me walk you through every single step — by the end, you’ll wonder how you ever made it any other way.
What Makes This Version Stand Out
- Flaky: The secret lies in the cold butter and minimal mixing, which creates layers that puff up during baking. If you over‑mix, the gluten develops and the crust turns chewy.
- Buttery: Using unsalted butter allows you to control the salt level precisely, giving a richer flavor that’s not over‑bruised.
- Simple: No fancy ingredients or elaborate steps—just flour, butter, salt, sugar, and ice water. The fewer variables, the more consistent the result.
- Versatile: It works for sweet pies, savory quiches, and even tarts. The base is neutral enough to accommodate any filling.
- Make‑ahead: The dough can be prepared a day ahead, refrigerated or frozen, and baked later without compromising texture.
- Quick: From prep to bake, the entire process takes less than 45 minutes, making it a great option for last‑minute dessert plans.
- Crowd‑pleaser: In a family gathering, the crust is the star—its golden crust and tender crumb win every time.
- Ingredient Quality: Using high‑quality all‑purpose flour and cold butter ensures the best flavor and texture.
Alright, let's break down exactly what goes into this masterpiece...
Inside the Ingredient List
The Flavor Base
The all‑purpose flour is the backbone of the crust. It provides structure and a neutral canvas that lets the butter shine. If you skip the flour, you lose the necessary gluten network that holds the crust together. You can replace it with pastry flour for a slightly more tender result, but the classic all‑purpose is the most reliable.
The Texture Crew
Unsalted butter is the star of the texture crew. It melts into the dough, creating pockets of steam that puff the crust during baking. The coldness of the butter is crucial; if it’s too warm, it will blend into the flour, resulting in a dense, chewy crust. You can experiment with different butter types—salted butter adds an extra layer of flavor, but it also affects the salt content.
The Unexpected Star
Granulated sugar is more than a sweetener; it caramelizes slightly during baking, adding a subtle crispness to the edges. Even though the crust is primarily savory, that hint of sweetness balances the buttery richness. If you prefer a less sweet crust, you can reduce the sugar to ½ teaspoon or omit it entirely—just be aware that the final texture will shift.
The Final Flourish
Ice water is the glue that brings all the components together. Adding it gradually allows the dough to come together without overworking the mixture. Too much water turns the dough sticky; too little makes it dry and crumbly. The 4‑6 tablespoon range gives you flexibility based on the room temperature and the flour’s absorption.
Everything's prepped? Good. Let's get into the real action...
The Method — Step by Step
- Start by chilling all your equipment—bowls, pastry cutter, and the dough itself—by placing them in the fridge for 15 minutes. Cold surfaces prevent the butter from melting prematurely. This simple step is the foundation for a flaky crust. If you skip it, the butter will blend too quickly, and the dough will become tough.
- In a large mixing bowl, combine 1.25 cups of all‑purpose flour, ½ teaspoon of salt, and 1 teaspoon of granulated sugar. Whisk them together until evenly distributed. The salt ensures that the butter’s flavor is amplified, while the sugar adds a touch of caramelized crispness. This dry mix is the base that will hold everything together.
- Cut ½ cup of cold unsalted butter into 1‑inch cubes and add them to the dry mix. Use a pastry cutter, two forks, or your fingertips to work the butter into the flour until the mixture resembles coarse crumbs with some pea‑size bits of butter still visible. The goal is to keep the butter mostly solid so it creates steam pockets during baking.
- In a small bowl, whisk 5 tablespoons of ice water until it’s just cold. Slowly drizzle the water over the dough, stirring gently with a fork after each addition. The dough should come together when you press it between your fingers, but it must not be sticky. If it feels dry, add a splash more water; if sticky, add a pinch more flour.
- Turn the dough onto a lightly floured surface and gently knead it just until it forms a cohesive ball. Over‑kneading develops gluten, which will make the crust tough. This step should take no more than 30 seconds. If you’re feeling adventurous, you can roll it into a flat disc, but keep it simple to maintain flakiness.
- Kitchen Hack: Wrap the dough in plastic wrap and refrigerate for at least 30 minutes. This rest period allows the gluten to relax and the butter to firm up again, which is essential for a tender crust. If you’re short on time, you can skip this step, but the result will be slightly denser.
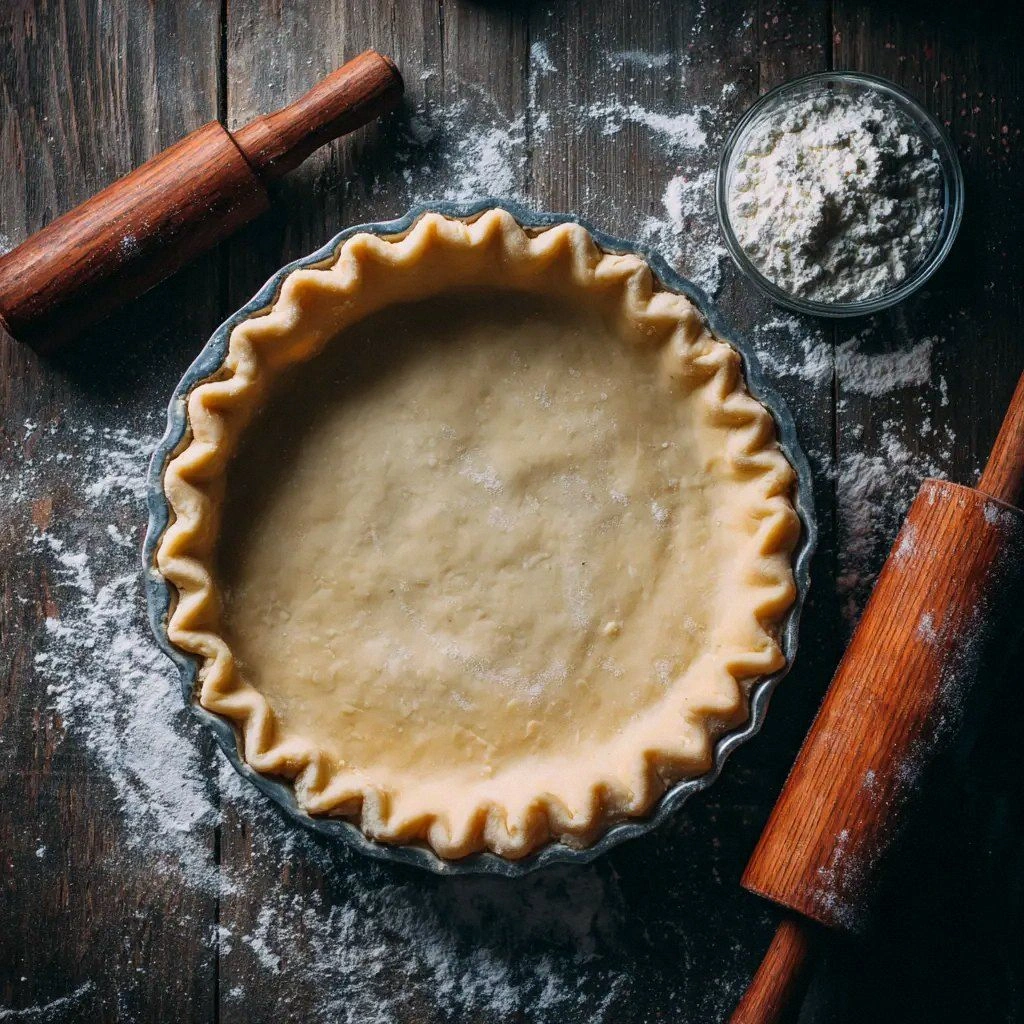
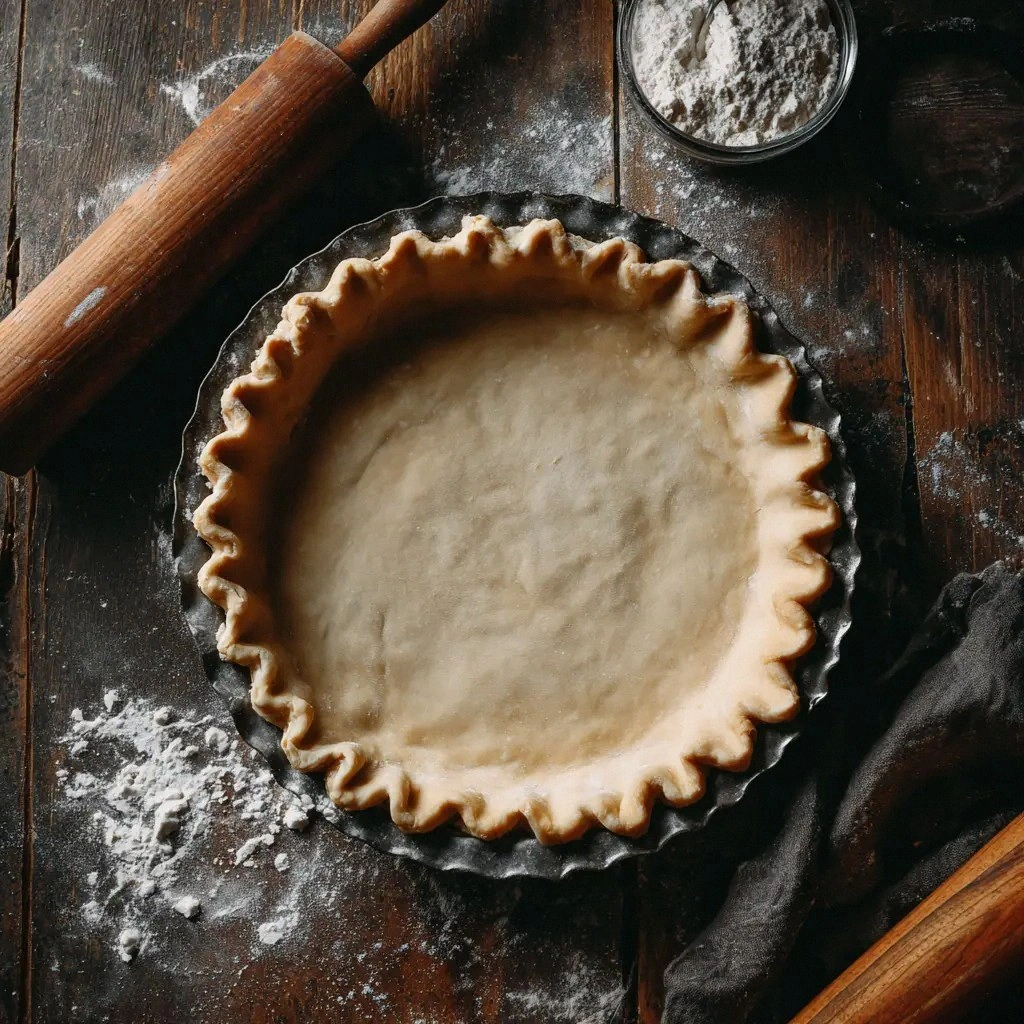
- After chilling, roll the dough out into a circle that’s about 2 inches larger than your pie pan. Use a rolling pin to press the dough evenly, keeping the center slightly thicker for a uniform rise. If you see cracks, lightly dust the surface with flour and continue rolling; this will seal the cracks and prevent them from becoming holes.
- Transfer the rolled dough to a 9‑inch pie pan, pressing it gently into the bottom and up the sides. Trim any excess dough with a knife, leaving a ½‑inch overhang. This overhang will be folded over the filling later, ensuring a sealed edge. Pat the dough down so it’s snug but not pressed flat, preserving the airy pockets.
- Watch Out: Don’t overfill the crust with liquid or wet fillings, as the water will seep into the dough and make it soggy. If you’re making a fruit pie, pre‑cook the filling slightly to reduce moisture. For savory pies, ensure the filling isn’t too watery.
- Blind bake the crust for 10 minutes at 375°F (190°C) to set the structure before adding the filling. If you’re using a short‑crust pastry, you can skip the blind bake, but for a flaky, buttery crust, it’s essential. The crust should be golden at the edges but still pale in the center. This step locks in the steam pockets and prevents a soggy bottom.
- Let the crust cool for 5 minutes before adding your filling. This brief cooling period allows the crust to firm up slightly, preventing it from collapsing under the weight of the filling. Once the filling is in, bake the pie according to your filling’s recipe—usually 30‑35 minutes for fruit pies, 25‑30 minutes for savory pies.
That’s it— you did it. But hold on, I’ve got a few more tricks that'll take this to another level...
Insider Tricks for Flawless Results
The Temperature Rule Nobody Follows
Many bakers bake at 350°F, thinking it’s safe for everything. In reality, a higher temperature (375°F) gives the butter a chance to melt quickly, creating steam that lifts the layers. Lower temperatures result in a denser crust. If you’re baking a thick pie, consider raising the temperature by 25°F for the first 5 minutes, then lowering it for the remainder.
Why Your Nose Knows Best
Before you add the filling, give the crust a quick sniff. If it smells buttery and slightly toasted, you’re on the right track. If it smells raw or doughy, let it bake a few more minutes. Your nose can detect over‑baked or under‑baked crusts better than your eyes.
The 5‑Minute Rest That Changes Everything
After blind baking, let the crust rest for exactly five minutes before adding the filling. This brief pause allows the steam to settle and the crust to firm up, preventing it from cracking when the filling is added. Skipping this step can cause the crust to buckle under the weight of the filling.
The Folding Trick
When you fold the overhang over the filling, make a clean, straight fold. A crooked fold can create uneven edges that look unprofessional. Use a sharp knife to trim the excess after folding, ensuring a neat edge.
The Quick Chill
If you’re making a pie on a hot day, chill the dough for an extra 30 minutes before rolling. The cold butter will stay firm longer, reducing the risk of the dough becoming sticky. This simple tweak can save you from a dough‑drowning disaster.
Creative Twists and Variations
This recipe is a playground. Here are some of my favorite ways to switch things up:
Herbed Savory Crust
Add 1 teaspoon of dried thyme or rosemary to the flour mix. The herbs infuse the crust with a subtle earthy aroma that pairs beautifully with chicken pot pies or mushroom quiches.
Citrus‑Infused Crust
Grate 1 teaspoon of lemon zest into the flour before adding butter. The citrus brightens the crust, making it a perfect base for fruit pies like lemon meringue or apple.
Chocolate‑Swirled Crust
Fold 2 tablespoons of melted dark chocolate into the dough before blind baking. The chocolate creates a subtle, glossy sheen and a hint of richness that elevates chocolate pies.
Whole‑Wheat Upgrade
Replace half of the all‑purpose flour with whole‑wheat flour for a nutty flavor and added fiber. The crust will be slightly denser, but it will still puff up nicely if you keep the butter cold.
Salted Caramel Crust
Swap the granulated sugar for brown sugar and add ½ teaspoon of sea salt to the flour. The caramelized brown sugar adds depth, while the sea salt gives a savory kick that balances the sweetness.
Spiced Crust
Add ¼ teaspoon of cinnamon or nutmeg to the flour mix for a warm, spiced flavor that works wonderfully with pumpkin or pecan pies.
Storing and Bringing It Back to Life
Fridge Storage
Wrap the rolled dough tightly in plastic wrap and store it in the refrigerator for up to 3 days. This keeps the butter firm and prevents the dough from drying out. When ready to use, let it sit at room temperature for 10 minutes before rolling to ease handling.
Freezer Friendly
Place the dough in a freezer‑safe bag, removing as much air as possible. It can be stored for up to 2 months. Thaw overnight in the fridge before using. The texture remains flaky once baked.
Best Reheating Method
To reheat a pie, preheat your oven to 350°F (175°C). Place the pie on a baking sheet and cover loosely with foil to prevent the crust from burning. Warm for 10–12 minutes, then remove the foil and bake for an additional 5 minutes to restore crispness. If the crust has lost its crunch, sprinkle a light dusting of sugar and bake for an extra minute.