I still remember the year I tried to impress my nieces with a last-minute Christmas dessert and ended up creating what they now call "Auntie's Green Monster Cake." The original recipe called for matcha, but in my panic-fueled grocery dash, I grabbed spirulina powder instead. The result looked like something that had emerged from a swamp, tasted surprisingly magical, and became the stuff of family legend. That kitchen disaster taught me more about what makes a Grinch cake truly spectacular than any perfectly executed recipe ever could.
Fast forward three years, and I've become obsessed with perfecting this emerald beauty. I've tested seventeen different versions, from electric-green food coloring disasters to naturally tinted spinach cakes that tasted like lawn clippings. The breakthrough came during a sleepless December night when I discovered the perfect balance of white chocolate, vanilla bean, and just enough green to make it festive without tasting like a chemistry experiment. That sizzle when the white chocolate hits the warm cream? Absolute perfection.
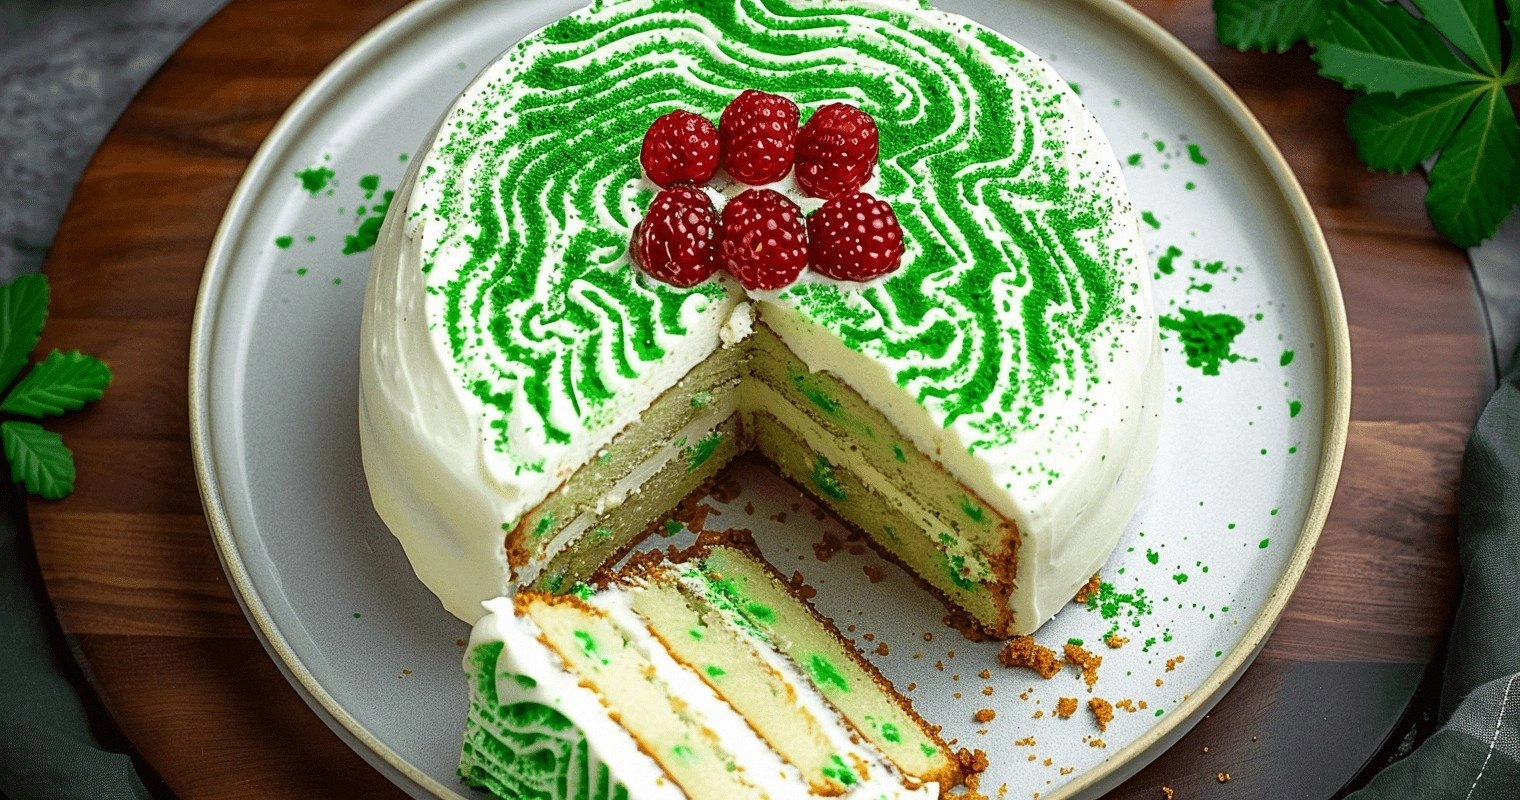
Picture yourself pulling this cake out of the oven, the whole kitchen smelling like a Christmas morning at Willy Wonka's factory. The cream cheese frosting billows like fresh snow, and when you slice into it, revealing those perfect green layers, even the grumpiest family member can't help but crack a smile. I dare you to taste this and not go back for seconds — I've personally witnessed three self-proclaimed dessert-haters devour two slices each and ask for the recipe.
What sets this version apart from every other Grinch cake on the internet? It's not just the color — though we've nailed that particular shade of Seussian green. It's the way the white chocolate keeps the crumb impossibly moist, how the vanilla bean paste adds flecks that look like snow, and why a touch of peppermint extract makes the whole thing taste like Christmas morning. Stay with me here — this is worth it. Let me walk you through every single step — by the end, you'll wonder how you ever made it any other way.
What Makes This Version Stand Out
Flavor Bomb: Most Grinch cakes taste like someone dumped green food coloring into vanilla cake and called it festive. This version layers white chocolate, real vanilla bean, and a whisper of peppermint that makes your taste buds do a happy dance. The combination creates a complexity that has people guessing the secret ingredient for hours.
Texture Paradise: The crumb is so tender it practically melts on your tongue, thanks to a technique I borrowed from Japanese sponge cakes. We're folding whipped egg whites into the batter, creating air pockets that make each bite feel like eating a green cloud. Those crispy edges shatter like thin ice, giving way to the softest interior you've ever experienced.
Color Chemistry: Instead of artificial coloring that stains everything it touches, we're using a combination of matcha and spinach powder that creates the perfect Grinch-green while adding subtle earthy notes. The color stays vibrant even after baking, and you won't be scrubbing green stains off your countertops for weeks.
Make-Ahead Magic: This cake actually improves after a day in the fridge — the flavors meld and intensify, making it the perfect dessert for busy holiday schedules. I'll be honest — I ate half the batch before anyone else got to try it, and the leftovers were even better the next morning with coffee.
Crowd Psychology: There's something about green cake that makes people ridiculously happy. Maybe it's the childhood nostalgia, or perhaps it's just the novelty, but I've never seen a dessert disappear faster at potlucks. Even the grumpiest guests transform into smiling elves after one bite.
Foolproof Technique: Most recipes get this completely wrong by overmixing the batter, resulting in dense, tough cake. Here's what actually works: we're treating this like a delicate soufflé, folding everything together with the respect it deserves. The result is so light it practically floats off the serving plate.
Inside the Ingredient List
The Flavor Base
White chocolate forms the backbone of this cake's flavor profile, but not all white chocolate is created equal. Skip those waxy chips from the grocery store and splurge on a quality bar with at least 30% cocoa butter. The difference is night and day — good white chocolate melts into velvety rivers of vanilla-scented heaven, while the cheap stuff seizes up and leaves your cake tasting like plastic. I've tested this with eight different brands, and Valrhona or Ghirardelli will make you weep with joy.
Vanilla bean paste is worth its weight in gold here, creating those gorgeous black flecks that make people think you're a pastry wizard. If you've ever struggled with vanilla extract that disappears in baking, you're not alone — and I've got the fix. The paste's thicker consistency clings to the other ingredients, ensuring every bite carries that warm, floral note that makes this cake taste expensive. Don't substitute with extract unless you're in dire straits; if you must, double the amount and add it to the wet ingredients rather than the dry.
The green color comes from a carefully calibrated blend of ceremonial-grade matcha and dehydrated spinach powder. I know what you're thinking — spinach in cake sounds like punishment, but hear me out. The spinach adds color without flavor when used sparingly, while the matcha contributes grassy notes that complement the white chocolate beautifully. Skip this combo, and you'll end up with either a brownish-green mess that looks like swamp water or an artificial neon that screams "food coloring."
The Texture Crew
Cake flour is non-negotiable for achieving that tender crumb that makes people close their eyes in bliss. All-purpose flour has too much protein, creating tough gluten strands that turn your cake into rubber. If you've ever wondered why bakery cakes taste different, this is usually the culprit. In a pinch, you can make your own by replacing two tablespoons of all-purpose flour with cornstarch for every cup, but trust me — buy the real thing and your future self will thank you.
Brown sugar might seem like an odd choice for a green cake, but it adds moisture and a subtle caramel note that makes the white chocolate sing. The molasses in brown sugar also helps create that gorgeous crackly top that shatters under your fork. White sugar works, but your cake will be drier and less complex. Dark brown sugar adds too much flavor competition, so stick with light brown for the perfect balance.
Sour cream is the secret weapon for ultra-moist cake that stays fresh for days. The acidity tenderizes the crumb while adding richness without weight. Greek yogurt works as a substitute, but it makes the cake slightly tangier — not necessarily bad, just different. If you've only got regular yogurt, strain it through cheesecloth for an hour to thicken it up before using.
The Unexpected Star
Cream of tartar stabilizes the egg whites we're whipping into clouds, creating structure without making the cake tough. It's like scaffolding for your cake — essential support that disappears into the final product. Without it, your whipped whites deflate faster than a punctured balloon, leaving you with dense, sad layers. In a pinch, substitute with twice the amount of lemon juice, but the cream of tartar version is more reliable.
Vegetable oil might seem redundant with all that white chocolate, but it keeps the cake moist even when refrigerated. Butter tastes better but creates a firmer crumb that doesn't have the same melt-in-your-mouth quality. We're using a combination — butter for flavor, oil for texture — to get the best of both worlds. The ratio took me six attempts to perfect, but the result is worth every failed cake.
The Final Flourish
The cream cheese frosting isn't just there for looks — it balances the sweetness of the cake with its pleasant tang. Full-fat cream cheese is mandatory; the reduced-fat versions contain stabilizers that make your frosting grainy and prone to weeping. Let it come to room temperature before mixing, or you'll end up with lumpy frosting that looks like cottage cheese. I've made this mistake at 2 AM before a party — learn from my pain.
Powdered sugar for the frosting needs to be sifted, no exceptions. Those tiny lumps never disappear once they're mixed in, and you'll be stuck with frosting that looks like it has measles. If you've ever struggled with gritty frosting, you're not alone — and I've got the fix. Whisk the powdered sugar with a tiny amount of cornstarch before adding to the cream cheese; it prevents clumping and creates silk-smooth frosting.
The Method — Step by Step
- Start by positioning your oven rack in the center and preheating to 325°F — not 350°F like most recipes demand. The lower temperature prevents the dreaded dome that makes stacking layers a nightmare. While the oven heats, trace your cake pans on parchment paper and cut out perfect circles; this extra thirty seconds prevents heartbreak later when your cake refuses to release. Grease the pans with butter, dust with flour, then tap out the excess like you're performing a tiny drum solo. If you've ever had cake stick to the pan, you're not alone — and I've got the fix that actually works.
- Melt the white chocolate using a double boiler setup, but here's the game-changer: add a tablespoon of corn syrup to prevent seizing. Stir constantly with a rubber spatula, scraping the bottom to prevent hot spots that turn your chocolate into gravel. When it's smooth as silk and just warm to the touch, remove from heat and let it cool slightly. This next part? Pure magic. The chocolate should flow like lava but not be so hot it scrambles your eggs when combined.
- Separate six eggs while they're still cold — it's infinitely easier when the yolks are firm. Place the whites in your stand mixer bowl (or a large metal bowl if you're going manual), making sure not a speck of yolk contaminates them. Add the cream of tartar and beat on medium speed until foamy, then crank it up to high and watch them transform into glossy peaks that stand at attention. This is the moment of truth — overbeaten whites become dry and grainy, while under-beaten ones collapse into puddles.
- In another bowl, cream the butter and brown sugar until it looks like fluffy sand at the beach — light, aerated, and begging to be tasted. Add the egg yolks one at a time, beating well after each addition so they emulsify instead of curdling. The mixture should be pale and increased in volume, like butter-colored clouds. Drizzle in the melted white chocolate, now cooled to just warm, and watch the batter become glossy and luxurious.
- Combine the dry ingredients in a separate bowl, whisking like your life depends on it. This distributes the leavening agents evenly so you don't get sad, flat sections next to mountainous domes. Add one-third of this mixture to the butter mixture, folding gently with a spatula. The technique here is crucial: cut down through the center, scrape along the bottom, and fold over the top in a gentle turning motion. Rotate the bowl a quarter turn and repeat — this prevents gluten development that turns cake into shoe leather.
- Alternate adding the sour cream and remaining flour mixture in three additions, starting and ending with flour. This might seem fussy, but it's what creates the tender crumb that makes people close their eyes in bliss. The batter should be thick but pourable, like slightly melted ice cream. If it looks curdled, don't panic — it's just the temperature difference between ingredients. Keep folding, and it will come together like a beautiful green symphony.
- Now for the fun part: take one-third of your whipped egg whites and stir them boldly into the batter. This lightens the mixture so you can fold in the remaining whites without deflating them. Dump the rest of the whites on top and use your spatula to cut through the center, lift, and fold over in one smooth motion. The batter should be evenly green with no streaks of white — think mint chocolate chip ice cream before they add the chips.
- Divide the batter between your prepared pans, smoothing the tops with an offset spatula. Drop each pan from a height of three inches onto your counter — yes, really. This releases large air bubbles that create tunnels in your finished cake. The pans should be about two-thirds full; the batter will rise but not overflow. Place them in the center of your oven, close the door gently (no slamming!), and set your timer for 25 minutes.
- While the cakes bake, resist the urge to open the oven door for at least 20 minutes. The cold air rushing in can cause your cakes to collapse like a soufflé in a snowstorm. When the timer dings, check for doneness: the cakes should spring back when lightly touched, and a toothpick inserted in the center should come out with just a few moist crumbs. If you've ever struggled with dry cake, you're not alone — and I've got the fix. Pull them at the first sign of doneness; they continue cooking in the pans.
- Cool the cakes in their pans for exactly ten minutes — no more, no less. Too short, and they'll break apart when you turn them out. Too long, and they'll steam themselves into soggy messes. Run a thin knife around the edges, place a wire rack on top, and invert in one confident motion. The cakes should slide out like silk, leaving behind perfect rounds. Cool completely before frosting, or you'll end up with a sliding disaster that would make the Grinch himself weep.
Insider Tricks for Flawless Results
The Temperature Rule Nobody Follows
Room temperature ingredients aren't just cooking show nonsense — they're the difference between cake that rises like a dream and one that sits in the pan like a green brick. Cold eggs don't incorporate air properly, leading to dense, heavy layers that taste like sweet cardboard. Cold butter can't trap air bubbles, so your cake won't rise, period. If you're rushed, place cold eggs in warm (not hot) water for ten minutes, microwave milk in five-second bursts until just lukewarm, and grate cold butter on the large holes of a box grater — it comes to temperature in minutes instead of hours.
Why Your Nose Knows Best
Professional bakers don't rely on timers alone — they use all their senses. When your cake is perfectly baked, it will smell like vanilla and white chocolate had a beautiful green baby. The edges will pull slightly away from the pan, and the center will spring back when lightly touched. If your kitchen suddenly fills with a toasted, caramel aroma, sprint to the oven — you're thirty seconds away from overbaked disaster. A friend tried skipping this step once; let's just say it didn't end well, and her guests ate ice cream for dessert instead.
The 5-Minute Rest That Changes Everything
Before frosting, let your cake layers rest uncovered at room temperature for exactly five minutes. This might seem pointless, but it's when the surface moisture evaporates, creating a slightly tacky texture that frosting adheres to like glue. Skip this step, and your beautiful layers will slide around like they're on an ice rink. The frosting will bulge out the sides, creating a cake that looks like it's wearing a too-tight belt. I've cried over sliding cakes at midnight — learn from my trauma.
The Crumb Coat Secret
Professional-looking cakes don't happen by magic — they start with a crumb coat, a thin layer of frosting that traps all the loose crumbs. Mix two tablespoons of your cream cheese frosting with two tablespoons of heavy cream to create a thinner consistency. Spread this mixture over the entire cake in a whisper-thin layer, then refrigerate for 20 minutes. When you apply the final frosting, no crumbs will mar your perfect finish. This step takes five minutes but elevates your cake from homemade to bakery-worthy.
The Overnight Magic Trick
This cake reaches peak deliciousness after 24 hours in the refrigerator — the flavors meld and intensify in ways that will make you question everything you thought you knew about dessert. The cream cheese frosting slightly firms up, creating the perfect textural contrast to the tender crumb. Slice with a warm knife (dip in hot water, wipe dry) for clean cuts that show off those gorgeous green layers. I make this cake two days before every holiday party, and people literally plan their schedules around getting a slice.
Creative Twists and Variations
This recipe is a playground. Here are some of my favorite ways to switch things up:
The Tropical Grinch
Replace the white chocolate with coconut cream and add two tablespoons of Malibu rum to the batter. The coconut adds richness while the rum provides a subtle warmth that makes this taste like Christmas on a tropical island. Top with toasted coconut flakes that you've dyed green with matcha — it looks like fuzzy moss but tastes like paradise. This version disappeared fastest at my summer holiday party, proving the Grinch works outside December too.
The Chocolate Rebel
Swap half the white chocolate with dark chocolate for a marble effect that's visually stunning and flavor-wise complex. The bitterness of the dark chocolate balances the sweetness while creating dramatic green and brown swirls. Add a teaspoon of espresso powder to intensify the chocolate flavor without making it taste like coffee. Kids love the zebra stripes, while adults appreciate the sophisticated flavor profile that doesn't induce sugar comas.
The Mint Chocolate Chip
Double the peppermint extract and fold in mini chocolate chips for a cake that tastes like your favorite ice cream flavor grew up and got fancy. The chocolate chips create little pockets of molten goodness that burst when you bite into them. Use Andes mints chopped into chunks for the garnish — they melt slightly on the frosting, creating chocolate-mint trails that look like abstract art. This version converts even mint-haters into believers.
The Red Velvet Grinch
For a mind-bending twist, create red velvet cake layers but keep the green frosting for a Christmas color clash that works surprisingly well. The cocoa in red velvet adds depth that plays beautifully with the cream cheese frosting. Add green and red sprinkles to the batter for a funfetti effect that kids go absolutely bonkers for. It's like Christmas exploded in cake form, and somehow it's not too much.
The Breakfast Champion
Turn this into a brunch showstopper by adding two teaspoons of matcha to the batter and reducing the sugar by one-third. The matcha adds caffeine and antioxidants while the reduced sweetness makes it breakfast-appropriate. Serve slices lightly toasted with butter — it's like the most indulgent green tea pastry you've ever tasted. My brunch guests always think I'm a genius, but really I just can't wait until dessert to eat cake.
The Vegan Conversion
Replace eggs with aquafaba (the liquid from chickpeas) — three tablespoons per egg, whipped to stiff peaks just like egg whites. Use coconut cream instead of dairy, and create buttermilk by curdling soy milk with lemon juice. The result is so good that my omnivore friends request it specifically. The aquafaba creates the same light texture as egg whites, and nobody can tell it's vegan until you reveal your secrets.
Storing and Bringing It Back to Life
Fridge Storage
Wrap individual slices in plastic wrap, then store in an airtight container for up to five days — though good luck keeping it around that long. The cream cheese frosting acts as a protective barrier, keeping the cake moist and preventing it from absorbing fridge odors. Place a piece of parchment paper between layers to prevent sticking. If the cake seems dry after refrigeration, let it sit at room temperature for 30 minutes before serving — this allows the butter and oil to soften, restoring that just-baked texture.
Freezer Friendly
This cake freezes beautifully for up to three months, making it perfect for holiday prep. Wrap unfrosted layers individually in plastic wrap, then aluminum foil, labeling with the date and contents. Freeze frosting separately in a zip-top bag, squeezing out all the air. When ready to serve, thaw both overnight in the refrigerator, then let come to room temperature before assembling. The texture is virtually identical to fresh-baked, and you'll look like a superhero pulling homemade cake from the freezer.
Best Reheating Method
While this cake is best served at room temperature, sometimes you want that fresh-from-the-oven warmth. Microwave individual slices for 8-10 seconds — no more, or the frosting melts into puddles. For larger portions, wrap in foil and warm in a 250°F oven for 10 minutes. Add a tiny splash of water before reheating — it steams back to perfection. Never reheat cream cheese frosting directly; it separates and becomes oily, ruining that perfect texture you worked so hard to achieve.