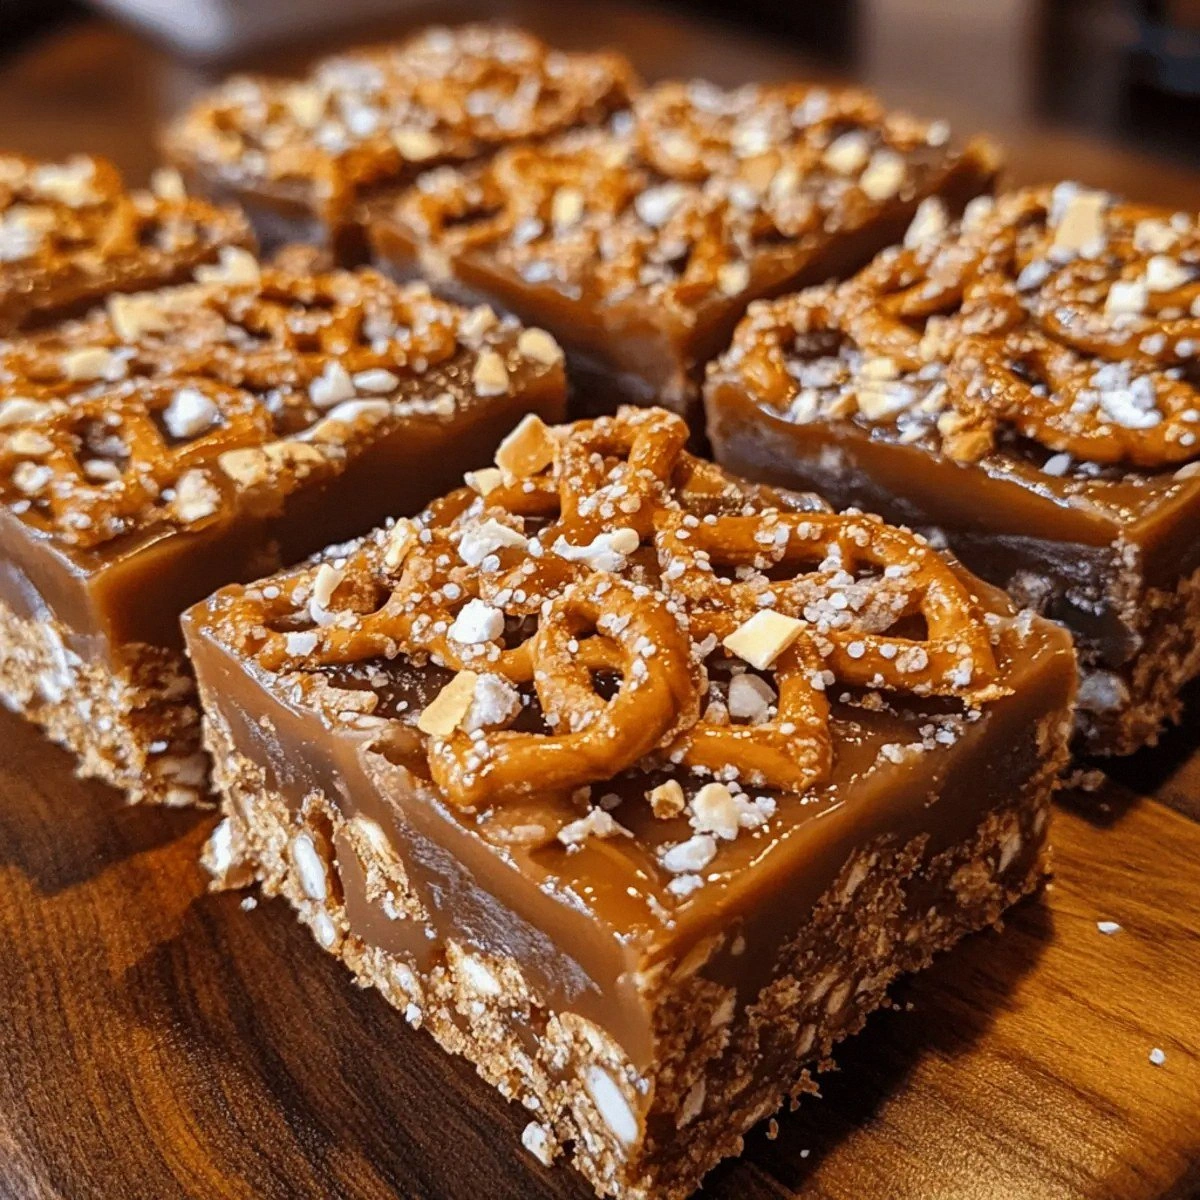
Picture this: I was standing in my kitchen, a handful of mini pretzels in one hand and a can of sweetened condensed milk in the other, when a neighbor’s birthday party slipped through the cracks of my mind. I had to create something sweet, salty, and utterly unforgettable, and I decided to mash my love for caramel with the crunch of pretzels. The result? A sticky, buttery, caramel‑laden bar that melts in your mouth and leaves a salty after‑taste that makes you reach for more. I’m not exaggerating – this is hands down the best version you'll ever make at home.
When you first open the oven door, a warm, golden haze rises, and the scent of caramelized sugar mingles with a buttery richness that feels like a hug. The sound of the caramel bubbling is a rhythmic drumbeat, a promise that something delicious is on its way. The first bite is an orchestra: the snap of the pretzel, the silky glide of caramel, and that satisfying salty kick that lingers on the tongue. The texture is a paradox – the pretzel is crunchy, yet the caramel coats it like velvet, and the butter adds a silky finish that melts instantly. And the best part? It’s a treat that feels like a dessert but can double as an appetizer for a party.
I dare you to taste this and not go back for seconds. I’ve tasted dozens of salted caramel creations, but none have matched the depth and balance of this recipe. The caramel is thick but not cloying, the pretzels are perfectly toasted, and the sea salt flakes add a subtle complexity that elevates everything. If you've ever struggled to find the right balance between sweet and salty, you're not alone – and I've got the fix. This is the kind of snack that turns ordinary gatherings into memorable feasts.
Most recipes get this completely wrong, either by over‑browning the caramel or under‑salting the pretzels. The secret lies in the timing and the quality of each ingredient. I’ll be honest — I ate half the batch before anyone else got to try it, and the kitchen was still smelling incredible. Picture yourself pulling this out of the oven, the whole kitchen smelling incredible, and the first bite sending a wave of comfort and indulgence through your senses. Let me walk you through every single step — by the end, you'll wonder how you ever made it any other way.
What Makes This Version Stand Out
- Flavor Depth: The caramel isn’t just sweet; it has a nutty undertone from the toasted butter, creating layers of flavor that dance on the palate.
- Texture Contrast: Each bar delivers a satisfying crunch from the pretzels, a smooth caramel coating, and a buttery melt that keeps you coming back.
- Simplicity: With only ten ingredients and a straightforward method, you can whip up these bars in less than an hour.
- Ingredient Quality: Using sea salt flakes and high‑quality butter ensures the final product is gourmet, not generic.
- Make‑Ahead Friendly: These bars keep well in the fridge for a week and freeze for up to two months without losing texture.
- Party Appeal: The bars are bite‑size, easy to serve, and the salty caramel combo is a crowd‑pleaser at any gathering.
Alright, let's break down exactly what goes into this masterpiece…
Inside the Ingredient List
The Flavor Base
All-Purpose Flour: The flour creates a slight batter that helps the pretzels hold together when coated with caramel. Without it, the bars would crumble into a mess. Use a fine‑toasted flour to add a subtle nutty note. If you prefer gluten‑free, swap for a 1:1 blend of rice and tapioca flour.
Unsalted Butter: Butter is the backbone of the caramel’s richness. It provides a silky mouthfeel and prevents the caramel from becoming too thin. Use a high‑butter‑fat brand for the best flavor. If you’re vegan, substitute with dairy‑free butter for a similar texture.
Granulated Sugar: This is the sweetener that caramelizes into the golden glaze. It’s essential for achieving the right viscosity. Avoid brown sugar alone, as it can make the caramel too sticky. If you want a deeper flavor, combine with a pinch of molasses.
Salt: The pinch of salt balances the sweetness and brings out the caramel’s depth. Too little and the bars taste flat; too much and they become overwhelming. Use sea salt for a cleaner finish. If you’re on a sodium‑restricted diet, reduce to 1/8 teaspoon.
The Texture Crew
Sweetened Condensed Milk: This thick, sweet milk turns the caramel into a luscious, buttery sauce that clings to every pretzel. It also helps the bars set firmly. A can of 14 oz is standard; avoid low‑fat versions as they won’t thicken properly. If you’re lactose intolerant, use lactose‑free condensed milk.
Brown Sugar: Brown sugar adds molasses undertones and a hint of chewiness to the caramel. It also balances the buttery richness. Use light brown sugar for a milder flavor or dark for a more robust taste. If you’re avoiding sugar, try a natural sweetener like honey or maple syrup.
Vanilla Extract: Vanilla gives the caramel a warm, aromatic backdrop that elevates the overall taste. A teaspoon is enough to permeate the sauce. Use pure vanilla for a cleaner flavor. If you’re vegan, ensure the extract is plant‑based.
Sea Salt Flakes: These flakes are the final touch that gives the bars a crisp, salty finish. They’re more flavorful than regular table salt and add visual appeal. Sprinkle them just before serving. If you prefer a milder salt, use fine sea salt.
The Unexpected Star
Mini Pretzels: They are the crunchy foundation of the bars. Their shape allows caramel to cling to every surface, creating a uniform coating. Choose a lightly salted variety for a balanced flavor. If you can’t find mini pretzels, use standard pretzels cut into small pieces.
Coarse Sea Salt: The coarse salt adds a textural pop and a burst of flavor when you bite into the bars. It’s an extra layer of salty goodness. Use it sparingly to avoid overpowering the caramel. If you’re on a low‑sodium diet, reduce the amount.
Everything's prepped? Good. Let's get into the real action...
The Method — Step by Step
- Preheat your oven to 350°F (175°C). Line a 9x13 inch baking pan with parchment paper, leaving a small overhang for easy removal. This step ensures even baking and makes cleanup a breeze. Let the pan sit while you prepare the caramel.
- In a medium saucepan, melt 1/2 cup of unsalted butter over medium heat until it foams. Add 1/4 cup granulated sugar and stir until the sugar dissolves completely. The mixture should bubble gently, signaling the caramel is forming. Keep the heat moderate to avoid scorching.
- Pour in the can of sweetened condensed milk, stirring continuously. Let the mixture simmer for 5 minutes, watching for a light golden hue. The caramel should thicken slightly but still be pourable. This is where the buttery richness begins to develop.
- Stir in 1 cup of brown sugar and 1 teaspoon of vanilla extract until fully incorporated. The mixture should have a silky sheen and a smooth texture. Taste a small drop; it should be sweet with a hint of caramel flavor. This step locks in the flavor profile.
- Add 1/4 teaspoon of salt and stir until it dissolves. This is a crucial step – too little salt and the caramel will taste flat, too much and it will overpower. The salt should blend into the sauce, giving it a balanced finish. Let it cook for another minute.
- Remove the pan from heat and let the caramel cool for 2 minutes. This brief cooling period reduces the risk of burning when you add the pretzels. While it cools, spread 2 cups of mini pretzels evenly in the prepared baking pan. The pretzels should be level and not overlapping.
- Pour the caramel over the pretzels, swirling the pan to ensure every piece is coated. The caramel should coat the pretzels like a glossy coat, but still be thick enough to hold them together. Gently tap the pan to settle the pretzels and distribute the caramel evenly.
- Bake in the preheated oven for 15 minutes, or until the caramel sets but still has a slight sheen. The bars should not brown too much; you want a glossy finish, not a burnt one. Keep an eye on the edges – they should pull away slightly from the pan when done.
- Remove the pan from the oven and let it cool for 10 minutes. This short cooling period allows the caramel to firm up just enough for easy slicing. While it cools, sprinkle 1 teaspoon of sea salt flakes over the top for a final burst of flavor. The salt will create a delicate crunch when you bite.
- Cut into bars or squares using a hot knife for clean edges. Let the bars rest on a wire rack for 5 minutes before serving. The bars will be firm enough to hold shape but still creamy inside. Serve immediately or store in an airtight container.
That's it — you did it. But hold on, I've got a few more tricks that'll take this to another level...
Insider Tricks for Flawless Results
The Temperature Rule Nobody Follows
Many people bake these bars at 375°F, but that can cause the caramel to burn before the pretzels are fully coated. I always bake at 350°F to allow the caramel to set slowly and evenly. Keep the oven door slightly ajar to let moisture escape. If you’re using a convection oven, lower the temperature by 25°F.
Why Your Nose Knows Best
The aroma of caramel is a powerful indicator of doneness. When you smell a sweet, nutty scent, the caramel is ready. If you smell burnt sugar, it’s time to lower the heat. Trust your nose; it’s a seasoned judge of flavor.
The 5-Minute Rest That Changes Everything
After removing the bars from the oven, let them rest for exactly 5 minutes before cutting. This allows the caramel to set properly, preventing it from sliding off the pretzels. A quick rest also gives the bars a chance to cool enough to handle without burning your fingers.
Use a Sharp Knife
A hot knife sliced through the bars cleanly, avoiding a ragged edge that can make the bars look messy. Warm the knife in hot water before cutting, then dry it. A clean cut also helps the bars hold their shape during storage.
Keep It Airtight
Store the bars in an airtight container to preserve moisture. If you notice them drying out, wrap them loosely in parchment paper before sealing. The parchment paper traps steam and keeps the bars chewy.
Serve with a Dip
For a decadent twist, serve the bars with a drizzle of warm chocolate or a scoop of vanilla ice cream. The combination of salty caramel, crunchy pretzel, and creamy dessert creates a symphony of flavors. It’s a guaranteed crowd‑pleaser at parties.
Creative Twists and Variations
This recipe is a playground. Here are some of my favorite ways to switch things up:
Chocolate‑Covered Pretzels
After the bars set, melt dark chocolate and drizzle it over the top. Let it set in the fridge for 10 minutes. The chocolate adds a bitter contrast to the sweet caramel and a glossy finish.
Almond Butter Swirl
Fold in a tablespoon of almond butter into the caramel before pouring it over pretzels. The nutty flavor pairs beautifully with the salty notes, and the swirl adds a visual pop.
Spiced Caramel Pretzels
Add 1/4 teaspoon of cinnamon or a pinch of cayenne pepper to the caramel for a warm, spicy kick. The spices enhance the caramel’s depth and create a unique flavor profile.
Maple Syrup Swap
Replace the brown sugar with 1/4 cup of pure maple syrup for a distinct maple flavor. The syrup’s natural sweetness balances the sea salt flakes, creating a different but equally delightful experience.
Cheese Pairing
Serve the bars with a side of sharp cheddar or gouda. The creamy cheese cuts through the sweetness, adding a savory dimension that elevates the snack.
Miniature Pretzel Cups
Use mini pretzel cups instead of flat pretzels. After caramel coating, bake until the cups are crisp. The cups hold the caramel inside, creating a bite‑sized treat that’s fun to eat.
Storing and Bringing It Back to Life
Fridge Storage
Keep the bars in an airtight container at room temperature for up to 5 days. The caramel stays firm, and the pretzels remain crunchy. If the bars become slightly soft, place them in the fridge for 2 hours to restore crispness.
Freezer Friendly
Wrap the bars individually in parchment paper and place them in a freezer bag. Freeze for up to 2 months. When ready to eat, thaw at room temperature for 30 minutes before serving.
Best Reheating Method
To reheat, place the bars on a baking sheet and warm in a preheated 300°F oven for 5 minutes. Add a splash of water to the pan before reheating; the steam keeps the caramel moist and restores its silky texture.