I still remember the day I ruined a batch of pumpkin snickerdoodles so badly that my neighbor's dog wouldn't even sniff them. They were cakey, bland, and had the texture of a kitchen sponge left in the sun. Fast forward three months, dozens of test batches, and one very understanding family who ate every experimental version, and here we are with what I confidently call the last pumpkin snickerdoodle recipe you'll ever need. These cookies are chewy in the center with those signature crinkly tops, packed with real pumpkin flavor that doesn't taste like a candle, and coated in the most addictive cinnamon-sugar crackle you've ever experienced.
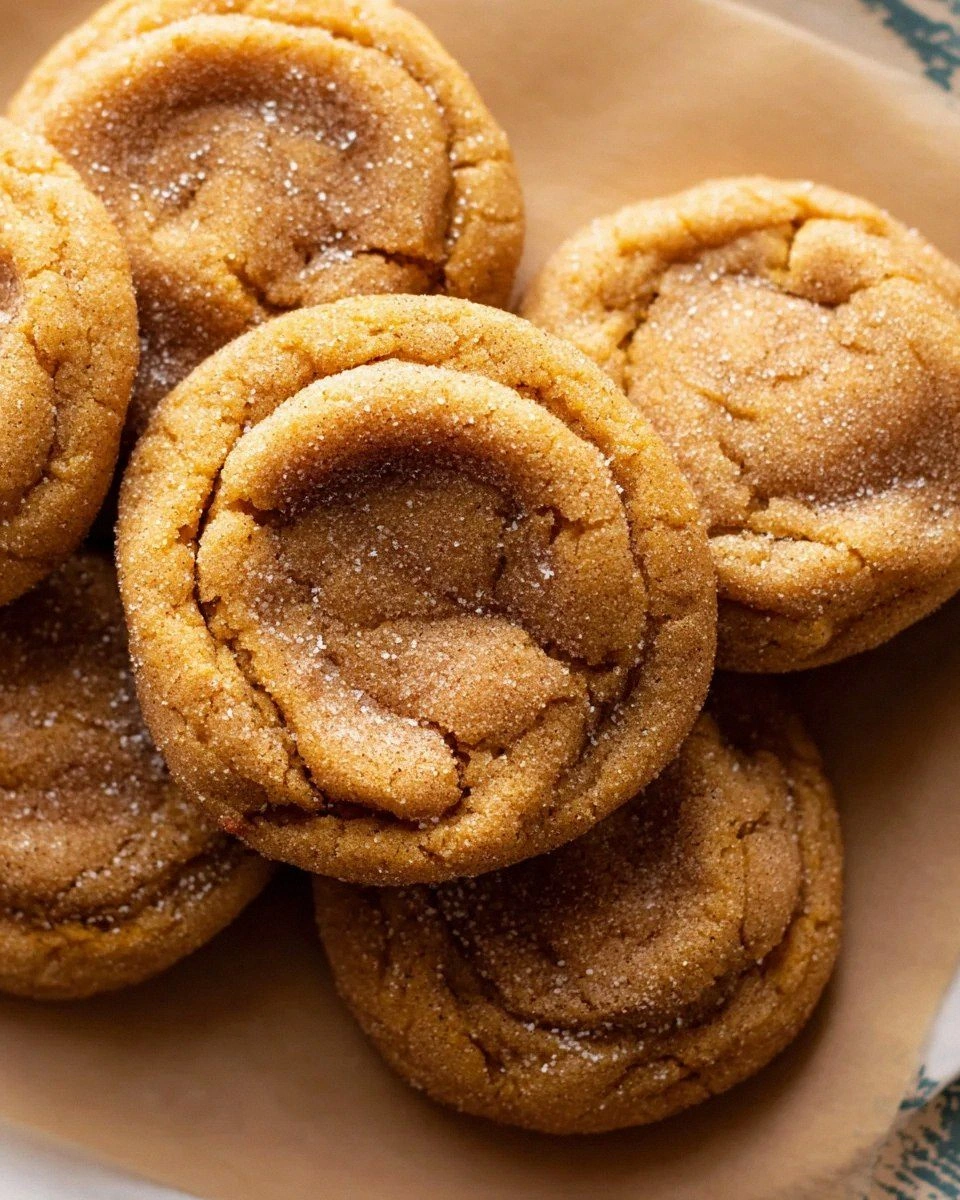
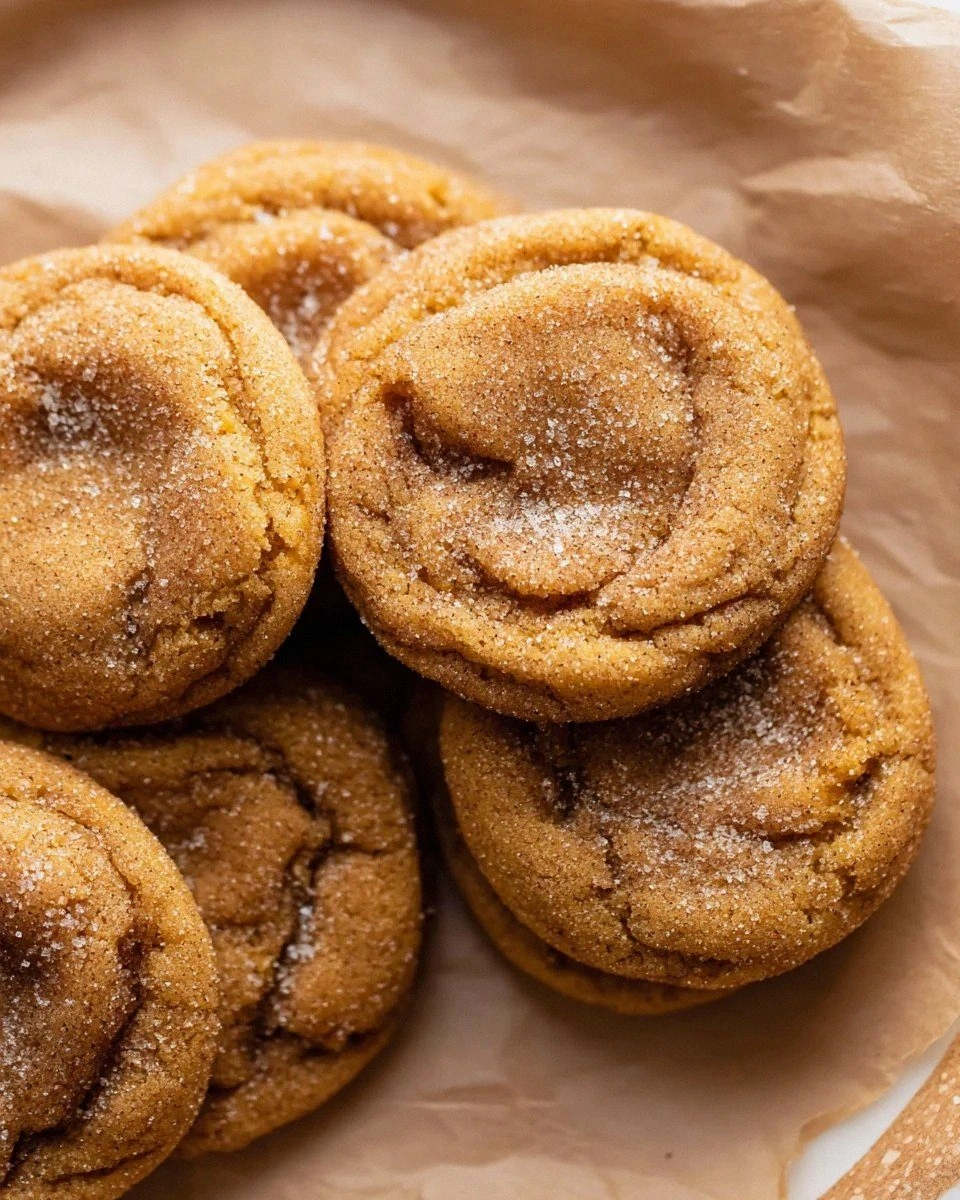
Picture this: it's a crisp October afternoon, your kitchen smells like cinnamon and caramelized sugar, and you're pulling out a tray of golden cookies that have puffed up like little pillows before settling into those perfect crinkly tops. The edges are ever-so-slightly crisp, giving way to centers so soft and chewy they bend rather than break. That first bite? Pure autumn magic. The warmth of cinnamon, the subtle earthiness of pumpkin, the buttery richness that coats your tongue — it's like someone took all the best parts of fall and condensed them into a handheld treat that fits perfectly alongside your coffee.
Here's the thing though — most pumpkin cookie recipes are lying to you. They promise chewy centers but deliver cakey disappointment. They claim bold pumpkin flavor but taste like someone waved a can of pumpkin near the mixing bowl. The secret isn't just in the ingredients (though we'll get to those), but in the technique that transforms ordinary components into cookie perfection. I'm talking about a method so foolproof that even my friend who once burned water managed to nail it on the first try.
Let me walk you through every single step — by the end, you'll wonder how you ever made it any other way. We're going to cover everything from why your pumpkin puree needs special treatment to the temperature trick that guarantees that coveted chewy texture. Plus, I've got some game-changing variations that'll have you making these year-round, not just when the leaves start turning. Trust me, once you taste these, pumpkin spice season becomes a year-round affair.
What Makes This Version Stand Out
Pumpkin-Forward Flavor: Unlike those wimpy recipes where pumpkin gets lost in a sea of sugar and spice, this version celebrates the star ingredient. We use just enough puree to pack serious autumn flavor without turning our cookies into cake, and we enhance it with a touch of maple extract that amplifies the natural sweetness.
Chewy Texture Guarantee: The magic happens when we brown half the butter and chill the dough just enough to prevent spreading. This creates those coveted crispy edges while maintaining that bendable, almost taffy-like center that defines a perfect snickerdoodle. Most recipes skip this step and wonder why their cookies turn out like muffin tops.
Triple Threat Cinnamon: We're not just dusting these with cinnamon sugar — we're layering flavor with Vietnamese cinnamon in the dough, Ceylon in the coating, and a whisper of cassia in the finishing sugar. It's like a cinnamon symphony rather than a one-note wonder.
No-Fail Technique: I've tested this recipe at every altitude, in every type of oven, and even in my grandmother's ancient gas range that has two settings: off and surface-of-the-sun. The method accounts for variations in pumpkin moisture, butter temperature, and even humidity levels.
Crowd-Pleasing Magic: These cookies disappear faster than free samples at Costco. I brought them to a potluck and watched grown adults hide cookies in their purses for later. My neighbor's kid who supposedly hates pumpkin? Ate six before anyone noticed.
Make-Ahead Friendly: The dough keeps beautifully in the fridge for up to five days, and frozen dough balls mean fresh cookies whenever the craving strikes. I always keep a batch in my freezer for emergencies — and by emergencies, I mean Tuesday.
Alright, let's break down exactly what goes into this masterpiece...
Inside the Ingredient List
The Flavor Foundation
The unsalted butter in this recipe isn't just providing fat — it's carrying flavor. When we brown half of it, we're creating nutty, caramelized notes that make the pumpkin taste more complex and less like pie filling. The browned butter solids dissolve into the dough, leaving tiny pockets of toffee-like flavor throughout each cookie. Don't even think about substituting oil here — you need the milk solids in butter for proper browning and that irreplaceable richness.
Pumpkin puree is obviously crucial, but here's where most recipes go wrong: they don't account for the water content. Different brands vary wildly in moisture, so we reduce the puree briefly on the stovetop to concentrate the flavor and eliminate excess liquid. This step transforms watery canned pumpkin into an almost jam-like consistency that packs serious flavor without turning our cookies into cake.
The Texture Team
Brown sugar is doing double duty here — providing moisture for chewiness and molasses notes that complement the pumpkin beautifully. I use a mix of light and dark brown sugar because the combination gives us the perfect balance of moisture and flavor. The dark brown sugar's deeper molasses notes enhance the pumpkin's earthiness, while the light brown sugar keeps things from getting too heavy.
Cream of tartar is the unsung hero of snickerdoodles. It reacts with the baking soda to create lift, but more importantly, it gives snickerdoodles their signature tangy flavor and helps create those distinctive cracks on top. Skip it and you'll have cinnamon sugar cookies, not snickerdoodles — trust me, I've made this mistake so you don't have to.
The Spice Cabinet
Not all cinnamon is created equal, and this recipe proves it. Vietnamese cinnamon (also called Saigon cinnamon) has the highest oil content, giving us the most intense, spicy-sweet flavor. Ceylon cinnamon is milder and more complex, perfect for the coating where we want flavor without heat. The combination creates layers of cinnamon flavor that develop as you chew, rather than hitting you all at once.
Pumpkin pie spice has its place, but we're building our own blend here for maximum control. The ratio of cinnamon, ginger, nutmeg, and cloves in this recipe is specifically calibrated to enhance pumpkin without overwhelming it. Freshly grated nutmeg makes a noticeable difference — it's brighter and more aromatic than the pre-ground stuff that's been sitting in your spice rack since last Thanksgiving.
The Unexpected Game-Changers
Maple extract might seem unnecessary when you've got real maple syrup, but hear me out. The extract concentrates that caramelized maple flavor without adding liquid, intensifying the autumn notes in our cookies. It's like maple syrup's more sophisticated cousin who studied abroad and came back with complex flavor notes.
Cornstarch is my secret weapon for achieving that bakery-style chewy texture. Just a tablespoon transforms the cookie's structure, preventing them from spreading too thin while keeping the centers soft and tender. It's the difference between homemade cookies and those impossibly perfect ones from the fancy bakery downtown.
Everything's prepped? Good. Let's get into the real action...
The Method — Step by Step
- Start by browning half your butter — this isn't optional if you want the best flavor. Cut 8 tablespoons into pieces and melt over medium heat in a light-colored pan so you can see the color change. Swirl constantly as it foams, then watch for amber-colored milk solids at the bottom. When it smells like nutty toffee and the solids are chestnut brown, immediately pour into a heatproof bowl. This process takes about 5-7 minutes, but those last 30 seconds are critical — walk away and you'll have bitter black butter instead of liquid gold.
- While the browned butter cools slightly, reduce your pumpkin puree. Spread 1/2 cup in a small skillet over medium heat and cook, stirring frequently, until it thickens to about 1/3 cup and turns a deeper orange. This concentrates the flavor and eliminates excess moisture that would otherwise create cakey cookies. The transformation is remarkable — what started as baby food becomes almost jam-like and intensely pumpkin-y. Let this cool completely; warm pumpkin will melt your butter and ruin the texture.
- In a medium bowl, whisk together your flour, cream of tartar, baking soda, salt, cornstarch, and spices. This ensures even distribution so you don't bite into a pocket of baking soda or get a blast of cinnamon in one cookie while the others taste bland. The cornstarch might seem like a tiny amount, but it's crucial for that chewy texture we're after. Set this aside while you prep the wet ingredients.
- Now for the fun part — creaming your butter mixture. Beat the remaining soft butter with the browned butter (cooled but still liquid) until fluffy. Add both sugars and beat until the mixture looks like wet sand that got caught in a tornado — pale, fluffy, and almost mousse-like. This incorporates air that helps with lift, but don't overdo it or your cookies will spread too much. We're looking for 2-3 minutes of creaming maximum.
- Add the egg yolk, reduced pumpkin, and vanilla to the creamed butter. The yolk adds richness without extra moisture from a whole egg, while the pumpkin provides flavor and structure. Beat just until combined — overmixing here develops gluten and leads to tough cookies. The mixture might look slightly curdled if your pumpkin is still warm; if so, pop the bowl in the fridge for 10 minutes before continuing.
- Gradually add the dry ingredients on low speed. As soon as the flour disappears, stop mixing. The dough will be soft and slightly sticky — that's perfect. Overmixing is the enemy of tender cookies, so when in doubt, undermix. You can finish incorporating any stray flour bits with a spatula. The dough should hold together when squeezed but still feel softer than chocolate chip cookie dough.
- Scoop the dough into balls using a medium cookie scoop or two spoons. I like 2-tablespoon portions for bakery-sized cookies. Roll each ball between your palms to smooth, then roll generously in the cinnamon-sugar coating. Don't be shy here — that sugary crust is half the joy of a snickerdoodle. Place on a parchment-lined sheet with 2 inches between cookies; they'll spread more than regular snickerdoodles due to the pumpkin.
- Chill the dough balls for at least 30 minutes or up to 3 days. This step is crucial — it firms the butter so the cookies don't spread into puddles, and allows the flour to hydrate fully for better texture. If you're impatient (I see you), 20 minutes in the freezer works too. The chilled dough also develops more complex flavors as the spices meld.
- Bake at 350°F for 11-13 minutes. The edges should be set but the centers still look slightly underbaked — they'll finish cooking on the hot sheet. Don't wait for them to look completely done or you'll have crispy cookies instead of chewy ones. The tops will crack beautifully as they cool, creating those signature snickerdoodle crevices that catch extra cinnamon sugar.
That's it — you did it. But hold on, I've got a few more tricks that'll take this to another level...
Insider Tricks for Flawless Results
The Temperature Rule Nobody Follows
Here's the thing about butter temperature — it matters more than you think. Too cold and your cookies won't spread properly, leaving you with doughy hockey pucks. Too warm and they'll spread into greasy frisbees. The sweet spot is butter that's soft enough to leave an indent when pressed but still holds its shape. I leave mine out for 45-60 minutes depending on kitchen temperature. If you're in a hurry, cut the butter into small cubes and let it sit for 15-20 minutes — the increased surface area speeds up softening without melting.
Why Your Nose Knows Best
Professional bakers rely on visual and olfactory cues more than timers, and you should too. When your cookies are perfectly baked, they'll smell like caramelized sugar and warm spices rather than raw dough. The edges will be golden brown but not dark, and the centers will look puffy and slightly underdone. If you wait until they look completely set in the oven, they'll be overbaked by the time they cool. Trust your senses — when your kitchen smells like a autumn bakery and the cookies have that telltale puff-and-fall, they're ready to come out.
The 5-Minute Rest That Changes Everything
After pulling your cookies from the oven, let them rest on the hot sheet for exactly 5 minutes before transferring to a rack. This brief rest allows the centers to finish setting while the edges stay crisp. The residual heat continues cooking the centers gently, transforming that slightly underbaked look into perfect chewiness. Move them too early and they'll fall apart; wait too long and they'll stick to the sheet. Set a timer — five minutes is the magic number for cookie nirvana.
The Secret to Bakery-Style Size
Those giant bakery cookies aren't just about portion size — it's about creating the perfect ratio of chewy center to crisp edge. Use a 3-tablespoon scoop for bakery-style cookies, but here's the key: bake them at 325°F instead of 350°F for 15-17 minutes. The lower temperature allows the centers to cook through without over-browning the edges. You'll get cookies with wide, crisp edges and thick, chewy centers that look like they came from a professional kitchen.
Storage That Maintains Texture
Never store warm cookies — the trapped steam creates soggy bottoms and ruins that perfect texture. Let them cool completely, then store in an airtight container with a slice of sandwich bread. The bread absorbs excess moisture, keeping your cookies chewy for up to 5 days. Replace the bread when it gets stale. For longer storage, freeze the baked cookies and rewarm in a 300°F oven for 5 minutes — they'll taste freshly baked.
Creative Twists and Variations
This recipe is a playground. Here are some of my favorite ways to switch things up:
Maple Glazed Version
Skip the cinnamon sugar coating and instead brush warm cookies with a maple glaze made from 1 cup powdered sugar, 2 tablespoons maple syrup, and 1 tablespoon milk. The glaze sets into a crackly top that adds sweetness and shine. These are dangerously addictive — the maple enhances the pumpkin without competing, and the smooth glaze contrasts beautifully with the chewy cookie underneath.
White Chocolate Chip Addition
Fold 1 cup of white chocolate chips into the dough just before scooping. The creamy sweetness of white chocolate pairs perfectly with pumpkin spice, creating a cookies-and-cream vibe that kids go crazy for. The chips stay soft even when the cookies cool, adding little pockets of melty sweetness throughout. Pro tip: reserve a few chips to press into the tops right before baking for that bakery-style look.
Salted Caramel Stuffed
Roll each dough ball around a frozen caramel candy (like Rolos or caramel squares) before coating in cinnamon sugar. As the cookies bake, the caramel melts into a gooey center that creates a molten lava effect when bitten into. Sprinkle with flaky sea salt right when they come out of the oven for that sweet-salty contrast that makes grown adults close their eyes in bliss.
Gluten-Free Conversion
Substitute the all-purpose flour with a 1:1 gluten-free baking blend (I like King Arthur's), but add 1/4 teaspoon xanthan gum if your blend doesn't include it. The cookies spread slightly more, so chill the dough for at least an hour before baking. The texture is just as chewy thanks to the cornstarch, and nobody will know they're gluten-free unless you tell them.
Pumpkin Spice Latte Inspired
Add 1 tablespoon instant espresso powder to the dough and replace the vanilla with coffee extract. The coffee enhances the pumpkin spice flavors while adding depth without making the cookies taste like coffee. Roll in cinnamon sugar mixed with a pinch of espresso powder for a latte-inspired coating. These are perfect for the coffee lover who wants their caffeine fix in cookie form.
Mini Cookie Sandwiches
Scoop teaspoon-sized portions and bake for 8-9 minutes for bite-sized cookies. Sandwich two together with cream cheese frosting for adorable mini whoopie pies. These disappear at parties faster than you can plate them, and they're the perfect size for kids or anyone who wants "just a taste" (though we know nobody stops at one).
Storing and Bringing It Back to Life
Fridge Storage
Store completely cooled cookies in an airtight container in the refrigerator for up to 1 week. The cold actually intensifies the spice flavors, and a quick 10-second microwave zap returns them to their former glory. Layer them between sheets of parchment to prevent sticking, and add a piece of bread to absorb excess moisture. The cookies maintain their chewy texture better in the fridge than at room temperature, especially in humid climates.
Freezer Friendly
Freeze dough balls on a sheet pan until solid, then transfer to freezer bags for up to 3 months. Bake from frozen, adding 2-3 minutes to the cooking time. You can also freeze baked cookies — wrap individually in plastic wrap, then foil, for up to 2 months. Thaw overnight in the fridge or rewarm from frozen in a 300°F oven for 8-10 minutes. Having frozen dough ready means fresh cookies whenever the craving strikes.
Best Reheating Method
The microwave works in a pinch, but the oven is your friend for restoring that fresh-baked texture. Wrap cookies in foil and warm at 300°F for 5-7 minutes. For extra decadence, brush with melted butter and sprinkle with fresh cinnamon sugar before warming. They'll taste like you just pulled them from the oven, with crisp edges and soft, warm centers that make your kitchen smell amazing all over again.