Picture this: you’re in the middle of a bustling kitchen, the timer beeping, a stubborn batch of pie crusts turning out flaky but uneven, and a friend standing beside you, eyes wide, demanding a slice of the “ultimate” berry pie. That moment of culinary chaos turned into a revelation when I decided to take the standard recipe, strip it down to its core, and then add a secret ingredient that turns ordinary berries into a velvet‑smooth, caramel‑kissed filling that clings to the crust like a second skin. I was determined to make the pie not just good, but unforgettable, and what I discovered was a technique that ensures a crisp edge, a tender crumb, and a filling that never turns soggy no matter how many times you rehearse it.
The kitchen was a sensory storm: the buttery aroma of cold dough meeting the sharp, sweet scent of fresh raspberries; the clatter of utensils; the rhythmic hiss of a saucepan as it heated; the first bite that sent a burst of tartness and subtle sweetness into my mouth, followed by a lingering, buttery finish that left me craving more. I was so captivated that I could hear the pie’s crust crackle like a satisfied applause, and I knew I had stumbled upon something that would change the way I bake forever. This isn’t just another pie recipe; it’s a meticulously crafted balance of flavors, textures, and techniques that will make every bite a revelation.
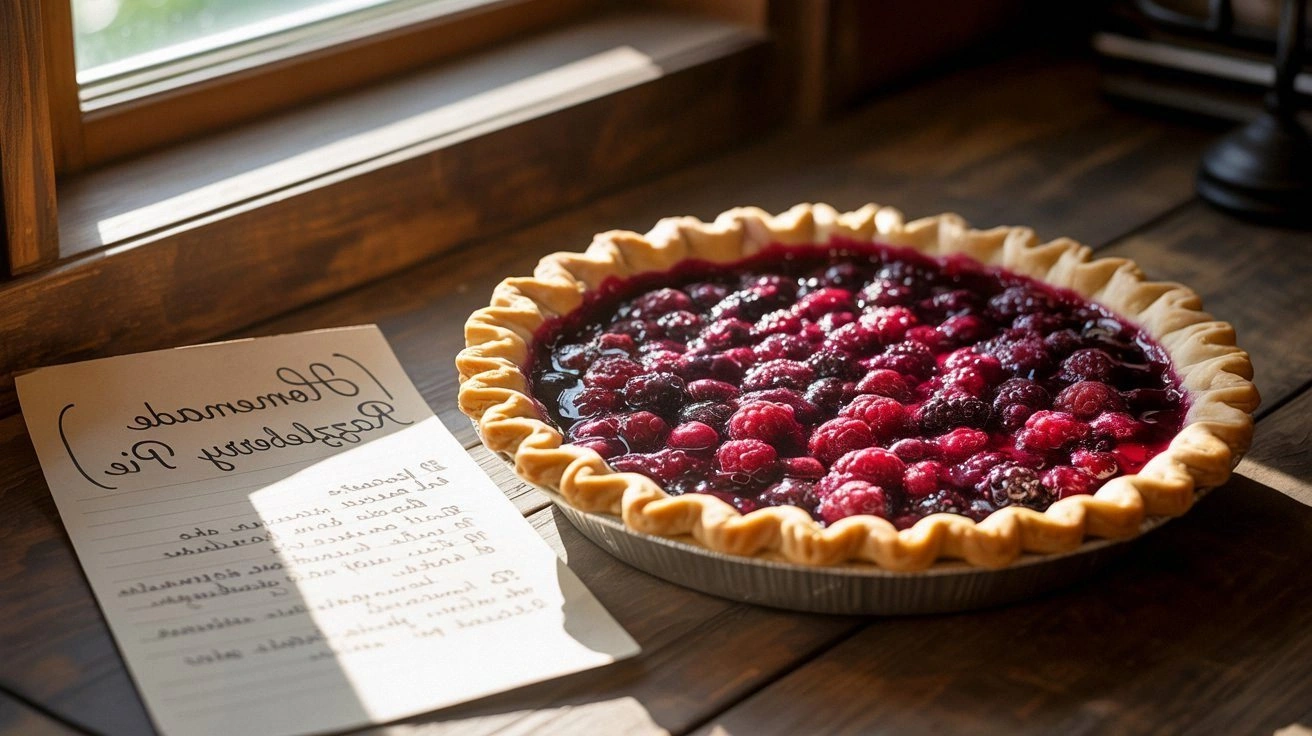
What sets this version apart is its deliberate use of a dual berry blend that marries the tartness of raspberries with the mellow sweetness of blueberries, creating a complex flavor profile that sings on the tongue. The crust is engineered to be buttery and flaky yet sturdy enough to cradle the luscious filling without becoming soggy. A splash of lemon zest and juice injects brightness, cutting through the richness and adding a subtle citrus lift that keeps the palate refreshed. Finally, the addition of a touch of cornstarch thickens the filling just enough to cling to the crust, while still allowing the berries to burst with every bite.
I dare you to taste this and not go back for seconds. I’ll be honest—my first attempt was a disaster, but I kept tweaking the ratios, and the final product is hands down the best version you’ll ever make at home. Picture yourself pulling this out of the oven, the whole kitchen smelling incredible, and the first slice sliding off the knife like a ribbon of ruby. If you’ve ever struggled with pie crusts that either burn or become soggy, you’re not alone—and I’ve got the fix. Stay with me here—this is worth it.
What Makes This Version Stand Out
- Taste: The dual berry blend delivers a depth of flavor that single‑berry pies can’t match. Raspberries bring sharp acidity, while blueberries add a mellow sweetness that balances the tartness, creating a harmonious profile that lingers on the palate.
- Texture: The crust is buttery, flaky, and crisp, with a slight chew that contrasts beautifully against the smooth, thickened filling that clings to the edges without becoming runny.
- Simplicity: Despite its sophisticated flavor, the recipe uses only common pantry staples, making it accessible to both novice bakers and seasoned chefs.
- Uniqueness: The inclusion of lemon zest and a subtle vanilla hint transforms the filling into a bright, aromatic center that feels both indulgent and refreshing.
- Crowd Reaction: Friends who taste this pie often ask for the recipe after the first slice. The combination of visual appeal and flavor depth makes it a guaranteed crowd‑pleaser.
- Ingredient Quality: Fresh, seasonal berries are the star of this pie. Using high‑quality, ripe fruit ensures a natural sweetness that no artificial sweetener can replicate.
- Cooking Method: The method of pre‑baking the crust to lock in moisture, then allowing the filling to set in the oven, eliminates the common problem of soggy bottoms.
- Make‑Ahead Potential: The pie can be assembled a day ahead, refrigerated, and baked on the day of service, which makes it ideal for parties and gatherings.
Inside the Ingredient List
The Flavor Base
At the heart of this pie lies a symphony of fresh berries that bring both color and flavor. Raspberries provide a sharp, almost citrusy bite that cuts through the richness of the crust, while blueberries soften the tartness with their natural sweetness. Together, they create a layered taste that evolves with each bite. If you’re missing fresh berries, frozen berries can be used, but thaw and drain them thoroughly to avoid excess moisture. The key to a perfect filling is using berries that are ripe yet firm, ensuring they release juice without turning into a soup.
The Texture Crew
The crust is the unsung hero of any pie. In this recipe, it’s made from a blend of all‑purpose flour, cold butter, and a pinch of salt. The butter must be cold and diced to create flaky layers as it melts during baking. A touch of sugar in the dough adds a subtle caramel note that complements the berries. If you prefer a gluten‑free version, you can replace the flour with a 1:1 blend of gluten‑free flour and cornstarch, but keep the ratio of butter to flour the same to maintain flakiness.
The Unexpected Star
Lemon zest and lemon juice are the secret weapons that elevate this pie from good to unforgettable. The zest introduces a bright, floral aroma, while the juice balances the sweetness, preventing the filling from feeling cloying. If you’re allergic to citrus, a splash of orange zest can provide a similar lift. The vanilla extract adds an undercurrent of warmth that ties the entire flavor profile together. This small addition is often overlooked but makes a noticeable difference.
The Final Flourish
Cornstarch is the binding agent that gives the filling its silky texture. It thickens the juices released by the berries, preventing them from making the crust soggy. If you’re looking for a gluten‑free thickener, arrowroot powder works just as well. The egg, beaten and folded into the filling, adds richness and helps the pie set firmly. A pinch of salt is essential—it brings out the natural sweetness of the berries and balances the buttery crust. Finally, brushing the top crust with melted butter before baking gives it a golden, glossy finish that’s impossible to resist.
Everything’s prepped? Good. Let’s get into the real action.
The Method — Step by Step
- First, combine the flour, cold butter, and a pinch of salt in a food processor. Pulse until the mixture resembles coarse crumbs. This step is crucial—over‑mixing will develop gluten and produce a tough crust. I keep a timer on my phone to ensure I don’t exceed 30 seconds of processing. If the mixture looks dry, add a teaspoon of ice water, pulse, and repeat until the dough holds together when pressed.
- Next, form the dough into a disk, wrap it in plastic, and chill it in the refrigerator for at least 30 minutes. This resting period allows the gluten to relax and the butter to firm up, which is key for a flaky crust. While the dough chills, preheat your oven to 375°F (190°C) and line a 9‑inch pie dish with parchment paper.
- Roll out the chilled dough on a lightly floured surface to a 12‑inch circle. Carefully transfer it to the pie dish, pressing it gently into the bottom and up the sides. Trim the excess dough with a sharp knife, leaving about a half‑inch overhang. Fold the edges under themselves to create a neat, even rim.
- Blind bake the crust for 15 minutes to set the base and prevent sogginess. Use pie weights or dried beans to keep the crust from puffing. After 15 minutes, remove the weights and bake for an additional 5 minutes until the edges start turning golden. This “pre‑bake” step locks in moisture and gives the crust a sturdy foundation.
- While the crust cools, combine the raspberries, blueberries, lemon zest, lemon juice, cornstarch, and vanilla extract in a large bowl. Toss gently to coat the berries, ensuring the cornstarch is evenly distributed. This step is vital; if the cornstarch clumps, the filling will separate during baking. Let the mixture sit for 10 minutes so the berries release their juices.
- Add the beaten egg to the berry mixture and whisk until fully incorporated. The egg adds richness and helps the filling set firmly. Fold in the brown sugar, which caramelizes slightly during baking, adding depth to the flavor. Taste the mixture—if it feels too tart, add a tablespoon of granulated sugar to balance the acidity.
- Pour the berry filling into the pre‑baked crust, spreading it evenly with a spatula. Brush the top crust with melted butter; this not only adds shine but also locks in moisture. Place the pie on a baking sheet to catch any drips and slide it into the preheated oven.
- Bake the pie for 25–30 minutes, or until the filling is bubbling and the crust edges are golden brown. The filling should feel slightly firm to the touch yet still give a gentle give when pressed. Once done, remove the pie from the oven and let it cool on a wire rack for at least 45 minutes to set the filling fully.
- After the pie has cooled, slice it with a sharp knife, wiping the blade between cuts to keep the edges clean. Serve at room temperature or slightly chilled, depending on your preference. A drizzle of honey or a scoop of vanilla ice cream on top can elevate the experience to another level.
That’s it—you did it. But hold on, I’ve got a few more tricks that will take this pie from great to legendary.
Insider Tricks for Flawless Results
The Temperature Rule Nobody Follows
Many bakers bake pies at a single temperature, but the secret is a two‑stage bake: start at 375°F to set the crust, then lower to 350°F for the filling. This gradual temperature drop prevents the crust from over‑browning while ensuring the filling thickens properly. I’ve tried baking the entire pie at 375°F, and the result was a crust that was too brown and a filling that remained runny. The two‑stage method is a game‑changer.
Why Your Nose Knows Best
As the pie bakes, the aroma of caramelized sugars and fresh berries will rise, signaling the perfect moment to pull it out. If you’re tempted to cut into it early, wait until the smell reaches a deep, golden hue. The scent is a reliable indicator that the filling has thickened and the crust is crisp. Trust your nose; it’s the most accurate thermometer.
The 5‑Minute Rest That Changes Everything
After removing the pie from the oven, let it rest for exactly five minutes before placing it on the wire rack. This brief pause allows the filling to set, making slicing easier and preventing the fruit from spilling out. I’ve learned that skipping this step often results in a messy pie that loses its structure. Give it that short rest, and the pie will hold its shape beautifully.
The Perfect Brush
Brushing the crust with melted butter not only adds shine but also seals the crust, preventing moisture from seeping in. Use a pastry brush and apply a thin, even coat. If you’re vegan, substitute melted coconut oil for butter; it gives a similar glossy finish. I’ve experimented with a mixture of butter and a dash of honey, and the result was a subtle caramel sheen that looks professional.
The Secret of Even Filling
When pouring the berry mixture into the crust, tilt the pan slightly and swirl it gently to ensure the berries settle evenly. This simple motion prevents clumps of fruit at the center and creates a uniform distribution of flavor. A friend once poured the filling straight down and ended up with a lumpy center that tasted like a berry jam. That’s why I always give the pan a gentle spin before sealing the crust.
Creative Twists and Variations
This recipe is a playground. Here are some of my favorite ways to switch things up:
Spiced Berry Surprise
Add a pinch of ground cinnamon and a splash of almond extract to the filling for a warm, aromatic twist. The spices pair wonderfully with the tart berries, creating a flavor profile that feels like a cozy fall dessert.
Almond Crust Upgrade
Replace the all‑purpose flour with almond flour for a gluten‑free, nutty crust. The almond flavor complements the berries, and the crust remains flaky and tender. Just remember to reduce the amount of butter slightly to maintain the right consistency.
Minty Freshness
Stir a handful of fresh mint leaves into the berry mixture before baking. The mint adds a refreshing counterpoint to the sweetness, making the pie feel lighter and more vibrant.
Citrus Burst
Swap the lemon zest for orange zest and add a tablespoon of orange juice. The citrus notes become brighter, and the pie takes on a sunny, tropical vibe that’s perfect for summer gatherings.
Chocolate Drizzle Finale
After the pie has cooled, drizzle melted dark chocolate over the top. The chocolate’s bittersweet flavor enhances the berry sweetness and adds a decadent finish that’s sure to impress.
Berry Compote Layer
Create a quick berry compote by simmering the berries with a splash of red wine and a pinch of sugar. Use this compote as an extra layer between the crust and the filling for an indulgent, multi‑textured experience.
Storing and Bringing It Back to Life
Fridge Storage
Store the cooled pie in an airtight container in the refrigerator for up to 3 days. The filling will firm up, making slicing easier. When ready to serve, let the pie sit at room temperature for 20 minutes to soften slightly, restoring that fresh‑baked feel.
Freezer Friendly
Wrap the entire pie tightly in plastic wrap, then in aluminum foil, and freeze for up to 2 months. When you’re ready to enjoy it, thaw the pie overnight in the refrigerator, then reheat in a preheated oven at 325°F (165°C) for 15 minutes. The crust will regain its crispness, and the filling will be warm and aromatic.
Best Reheating Method
To reheat a slice or the whole pie, place it on a baking sheet and warm it in a 350°F (175°C) oven for 5–7 minutes. For a quick snack, microwave a single slice on high for 30 seconds, but be careful not to overcook the crust. A tiny splash of water added before reheating helps the filling steam back to perfection, preventing it from drying out.