I was standing in my kitchen, arms full of a bag of frozen chocolate cake mix and a half‑sized tub of vanilla Greek yogurt, when the disaster hit. The yogurt had been left in the fridge all night, turned into a thick, icy sludge that threatened to ruin any dessert I could think of. I stared at the frozen mess and thought, “What if I could turn this into something that actually tastes good?” That moment of panic turned into a culinary epiphany, and I began experimenting with instant pudding mixes and crushed waffle cones. The result was a protein chocolate cheesecake that feels like a decadent chocolate mousse with a creamy, tangy twist.
Imagine the first bite: a velvety chocolate coating that melts on your tongue, revealing a luscious, creamy center that’s both rich and surprisingly light. The aroma is a sweet, chocolatey perfume that lingers in the air, while the texture is a perfect balance between a silky mousse and a firm cheesecake. The sound of the spoon cutting through the thick mixture is almost satisfying, like a gentle crunch of a perfectly toasted cookie. The first taste is an explosion of chocolate, yogurt tang, and a subtle sweetness that doesn’t overwhelm. The finish is a lingering chocolate note that leaves you craving a second scoop.
What makes this version stand out is that it’s built on a foundation of protein and low sugar, yet it feels indulgent enough to satisfy any sweet tooth. I dared you to taste this and not go back for seconds, and I’ll be honest—I ate half the batch before anyone else got to try it. Most recipes get this completely wrong by using heavy cream or too much sugar, but here the Greek yogurt provides the necessary tang and protein punch, while the instant pudding mixes give a quick, silky texture. The crushed waffle cones add a subtle crunch and a hint of caramel flavor that sets this cheesecake apart. Picture yourself pulling this out of the fridge, the whole kitchen smelling incredible, and knowing you just made the best dessert you’ll ever have at home.
Okay, ready for the game‑changer? Let me walk you through every single step—by the end, you’ll wonder how you ever made it any other way.
What Makes This Version Stand Out
- Taste: The combination of chocolate fudge and cheesecake instant pudding creates a layered flavor profile that feels both sweet and sophisticated, with a hint of tartness from the yogurt.
- Texture: The cheesecake is silky and mousse‑like yet holds its shape thanks to the protein content and the instant pudding’s stabilizing properties.
- Protein Boost: Each serving delivers 25 grams of protein, making it a perfect post‑workout dessert or a guilt‑free indulgence.
- Low Sugar: The recipe uses sugar‑free instant pudding mixes, so you get a sweet treat without the crash.
- Make‑Ahead: It can be assembled the night before and chilled in the fridge, making it ideal for parties or last‑minute dessert needs.
- Crunch Factor: Crushed waffle cones give a delightful crunch that contrasts the creamy interior.
- Time Efficiency: No baking required—just mix, chill, and serve. It’s the ultimate quick‑dessert hack.
- Versatility: You can swap in different pudding mixes or add fruit for a fresh twist.
Inside the Ingredient List
The Flavor Base
At the heart of this cheesecake is 32 ounces of plain, vanilla Greek yogurt—about 4 cups. The yogurt provides a tangy backdrop that balances the richness of the chocolate. It’s also a protein powerhouse, delivering that 25‑gram protein punch in each serving. If you’re craving a sweeter base, consider adding a splash of vanilla extract, but be careful not to overpower the yogurt’s natural flavor.
The Texture Crew
The instant pudding mixes are the secret to that silky texture. One box of sugar‑free chocolate fudge instant pudding mix brings a deep chocolate flavor and a smooth mouthfeel. The second box, a sugar‑free cheesecake instant pudding mix, adds a subtle tang and thickens the mixture just enough to hold its shape. If you can’t find instant pudding, swap in a homemade chocolate pudding made with cornstarch or use a high‑protein pudding mix from the health food aisle.
The Unexpected Star
Crushed waffle cones (180 g) are the crunchy surprise that keeps the cheesecake from becoming a one‑dimensional dessert. The cones add a caramel‑like sweetness and a delightful crunch that echoes the texture of a classic cheesecake crust. If waffle cones are not available, crushed chocolate wafer cookies or crushed pretzels can add a different flavor dimension.
The Final Flourish
A sheet of graham crackers, crushed, adds a familiar, buttery crunch that complements the waffle cones. The crackers also provide a subtle, slightly sweet flavor that pairs beautifully with the chocolatey base. For a gluten‑free version, substitute with almond flour or gluten‑free crackers.
Everything's prepped? Good. Let's get into the real action...
The Method — Step by Step
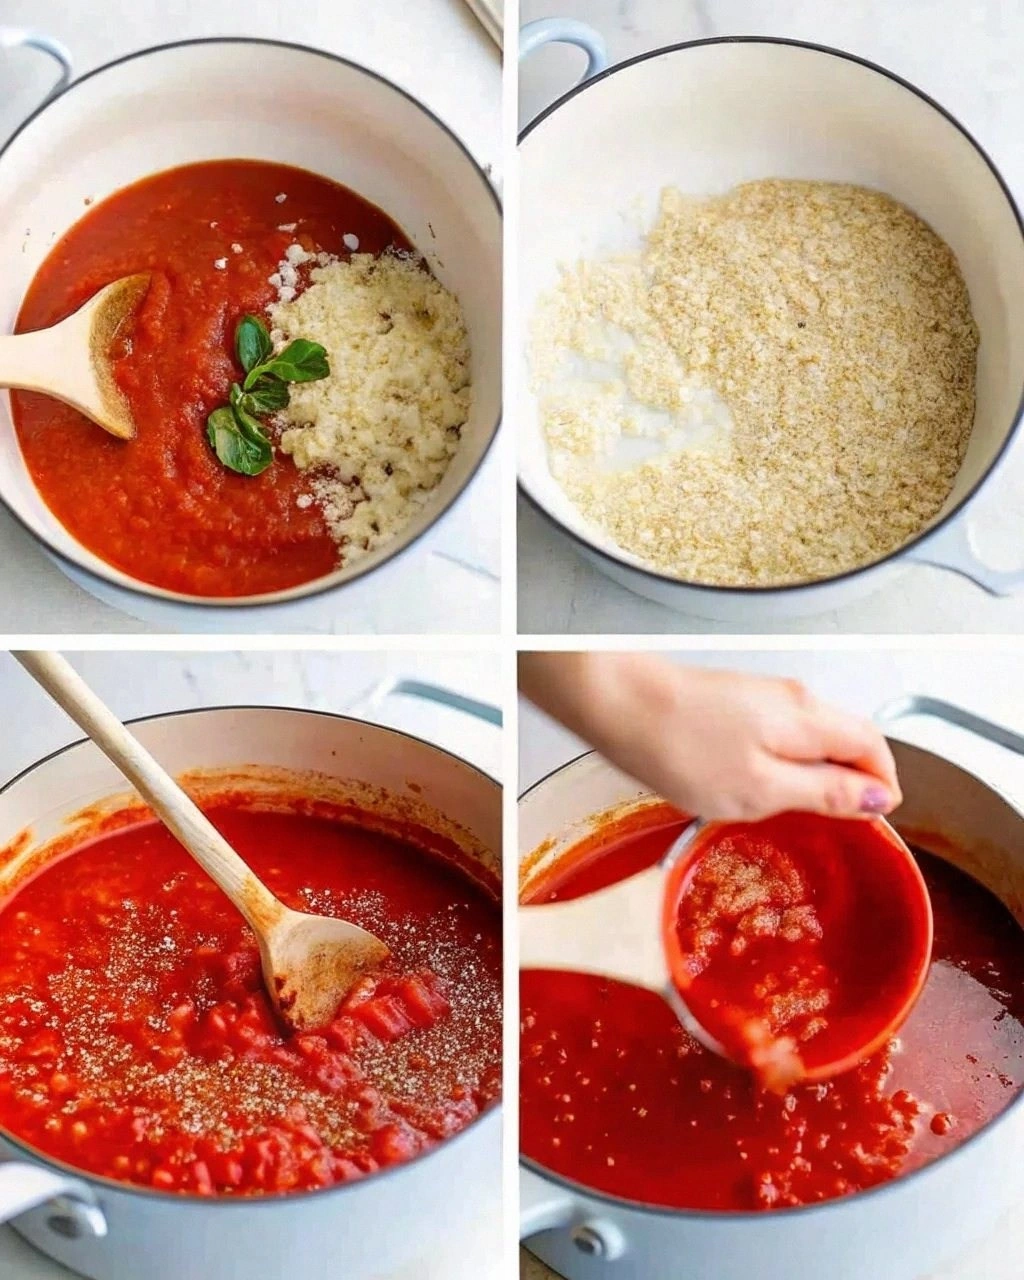
- Step 1: Prepare the Base. In a large bowl, combine the 4 cups of vanilla Greek yogurt with the two instant pudding mixes. Whisk vigorously until the mixture is smooth and the pudding powders are fully dissolved. The mixture should look glossy and thick, like a creamy custard.
- Step 2: Add Crunch. Fold in the crushed waffle cones and the crushed graham crackers. Stir gently until the crunchy bits are evenly distributed. The mixture should have a slight grainy texture that’s still smooth enough to pour.
- Step 3: Portion into Cups. Line a muffin tin with paper liners or lightly grease it. Spoon the cheesecake mixture into each cup, filling them about three‑quarters full. This ensures the tops have room to rise slightly as they set.
- Step 4: Chill. Place the muffin tin in the refrigerator for at least 4 hours, preferably overnight. The cheesecake will firm up and the flavors will meld together. If you’re in a hurry, a 2‑hour chill will still yield a good result, but the texture will be slightly softer.
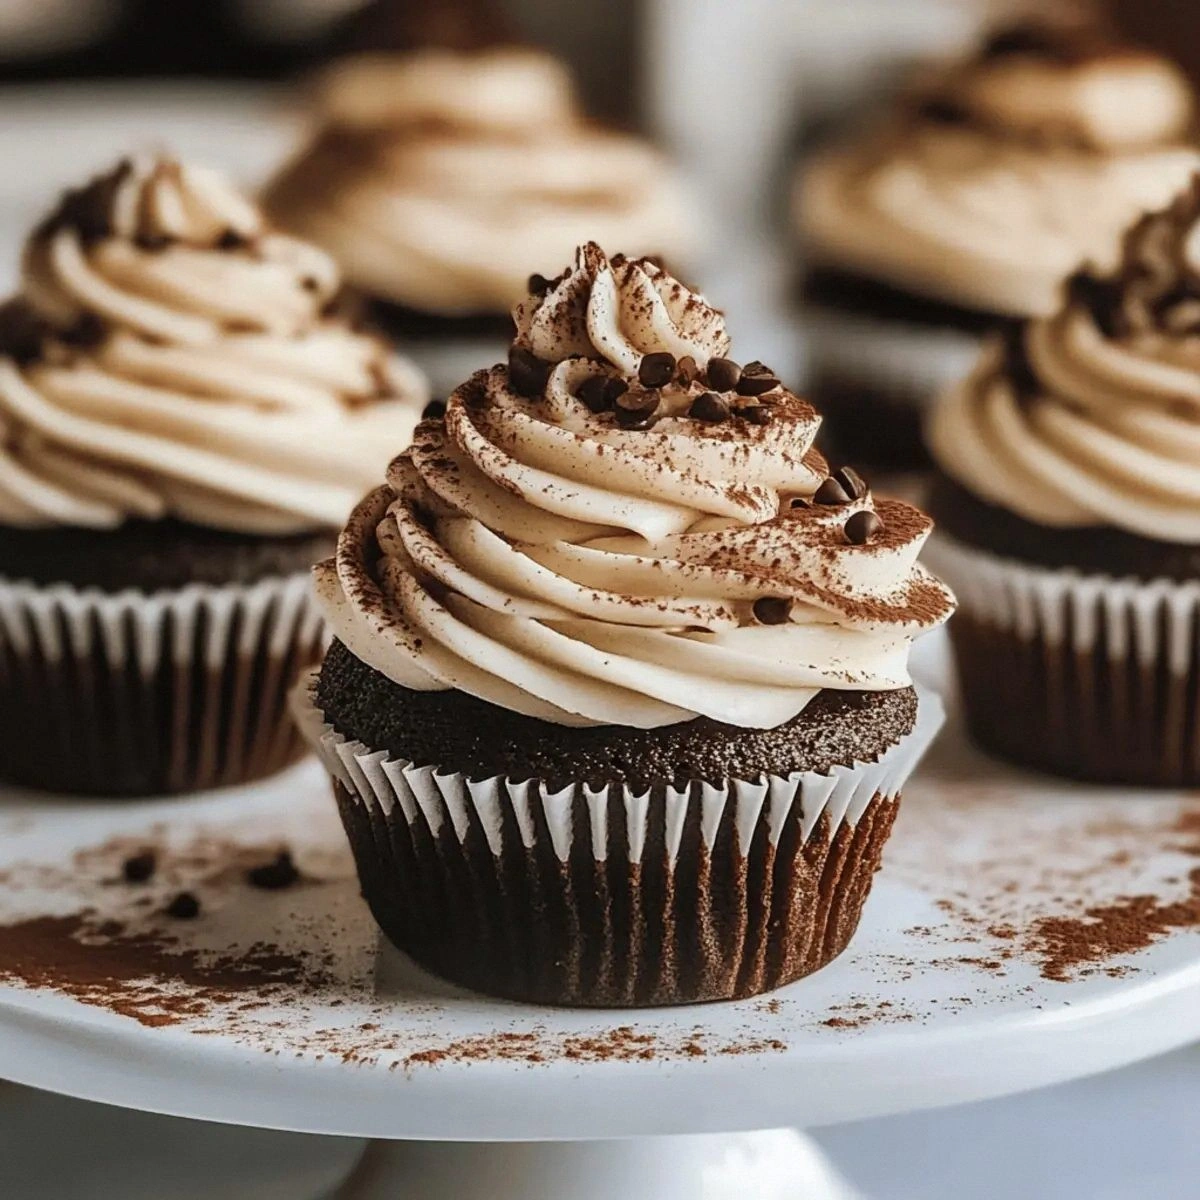
- Step 5: Optional Topping. If you like, sprinkle a thin layer of crushed chocolate cookies or a dusting of cocoa powder over the tops before chilling. This adds an extra chocolatey finish and a visual pop.
- Step 6: Serve. Once chilled, remove the cheesecake cups from the tin and serve immediately. The cheesecake will have a firm yet creamy texture that melts in your mouth.
- Step 7: Store. If you have leftovers, keep them in an airtight container in the refrigerator for up to 3 days. For longer storage, freeze the individual cups for up to 2 weeks.
- Step 8: Reheat (Optional). If you prefer a warmer dessert, microwave each cup on low for 10–15 seconds. The cheesecake will become slightly softer, allowing the chocolate to bloom.
- Step 9: Garnish. Finish with a drizzle of melted dark chocolate, a few fresh berries, or a dollop of whipped coconut cream. These additions elevate the presentation and add complementary flavors.
- Step 10: Enjoy. Take a bite, let the flavors unfold, and savor the silky chocolate, tangy yogurt, and crunchy texture. I dare you to taste this and not go back for seconds.
That's it—you did it. But hold on, I've got a few more tricks that'll take this to another level...
Insider Tricks for Flawless Results
The Temperature Rule Nobody Follows
Keep all ingredients at room temperature before mixing. If the yogurt is too cold, the instant pudding powders will clump and the mixture will be lumpy. Let the yogurt sit out for 10 minutes or gently warm it in a bowl of warm water for a minute.
Why Your Nose Knows Best
Before refrigerating, give the cheesecake a quick sniff. A faint chocolate aroma indicates that the pudding has fully dissolved and the mixture is ready. If you notice a sour smell, it’s a sign that the yogurt may have gone slightly off; discard and start fresh.
The 5‑Minute Rest That Changes Everything
After pouring the cheesecake into the cups, let them rest on the counter for 5 minutes before refrigerating. This short rest allows the mixture to settle, reducing the risk of cracks or uneven texture when it sets.
The Crunch Control
If you prefer a softer crunch, toast the waffle cones briefly in a dry skillet for 1–2 minutes. This brings out a caramel flavor and softens the texture.
The Sweetness Tweak
If you’re not satisfied with the sweetness, add a tablespoon of a sugar‑free sweetener like stevia or erythritol. Mix it in with the yogurt before adding the pudding powders to ensure even distribution.
The Final Touch
When serving, add a light dusting of cocoa powder or a few shaved dark chocolate pieces. This not only adds visual appeal but also intensifies the chocolate flavor.
Creative Twists and Variations
This recipe is a playground. Here are some of my favorite ways to switch things up:
Berry Burst
Fold in a cup of frozen mixed berries into the base before chilling. The berries will infuse a sweet, tart layer that pairs beautifully with the chocolate.
Minty Fresh
Add 1 teaspoon of fresh mint extract to the mixture. The mint will give a refreshing counterpoint to the chocolate, creating a sophisticated flavor profile.
Nutty Crunch
Replace the waffle cones with chopped almonds or hazelnuts. The nuts add a buttery crunch and a subtle nutty aroma that elevates the dessert.
Coffee Kick
Stir in 2 tablespoons of instant espresso powder for a mocha twist. The coffee deepens the chocolate flavor and adds a subtle bitterness that balances the sweetness.
Coconut Dream
Swap the Greek yogurt for coconut yogurt and add shredded coconut to the mix. The result is a tropical, creamy cheesecake that transports you to a beachside escape.
Storing and Bringing It Back to Life
Fridge Storage
Store the cheesecake cups in an airtight container in the refrigerator for up to 3 days. The yogurt base will keep the dessert moist, while the chocolate will remain firm.
Freezer Friendly
Wrap each cup individually in plastic wrap and place them in a freezer bag. Freeze for up to 2 weeks. Thaw in the refrigerator overnight before serving.
Best Reheating Method
To revive a frozen cheesecake, microwave on low for 10–15 seconds. Add a tiny splash of water before reheating to create steam and keep the texture creamy.