I was standing in my kitchen, staring at a half‑melted caramel that looked more like a sad, sticky puddle than the glorious, chewy masterpiece I’d imagined. My friend had dared me to recreate the iconic boardwalk treat that we both grew up devouring on summer vacations, and I was determined to prove that a tiny apartment stove could rival the massive copper kettles of Atlantic City. The air was thick with the scent of burnt sugar, the timer beeped like a frantic drum solo, and I swear I heard the distant echo of gulls mocking my failure. I took a deep breath, added a splash of butter, and the whole thing transformed into a glossy, amber river that flowed like liquid gold.
The moment the mixture hit the pan, a sizzle erupted that was louder than my neighbor’s late‑night karaoke sessions. It was as if the sugar was shouting, “I’m alive!” and the kitchen filled with a buttery perfume that made my nostrils dance. I could feel the heat radiating from the pot, the way the steam curled around my face like a warm, sweet hug. When the taffy finally pulled away from the sides, it stretched like a rubber band, glossy and firm, promising that first bite would be a perfect balance of salty bite and sugary melt. The texture was smooth, not grainy, and the flavor hit the palate with the same salty‑sweet punch that makes you close your eyes and imagine waves crashing on a sun‑kissed shore.
Most recipes I’ve tried either turned out too hard, like a rock you could use to break a window, or too soft, like a piece of chewed gum that never quite set. This version, however, is hands down the best version you’ll ever make at home because it respects the chemistry of sugar while embracing a few clever shortcuts that keep the process foolproof. I’m talking about a precise temperature window, a secret butter‑infused water bath, and a color‑boosting trick that makes every batch look like it was hand‑painted by a candy‑making artisan. The result? A taffy that pulls apart with a satisfying snap, yet melts on your tongue like a caramel‑kissed dream.
And here’s the kicker: I’m about to reveal a technique that most commercial taffy makers keep under lock and key—a quick “cool‑down” splash that stops the sugar from over‑cooking while preserving that perfect chew. I dare you to taste this and not go back for seconds; the moment you bite into that salty‑sweet ribbon, you’ll understand why this recipe has earned a permanent spot on my dessert hall of fame. Let me walk you through every single step — by the end, you’ll wonder how you ever made it any other way.
What Makes This Version Stand Out
- Flavor Balance: The pinch of sea‑salt isn’t just garnish; it amplifies the caramel notes, turning a simple sugar candy into a sophisticated treat that sings on the tongue.
- Chewy Texture: By controlling the final temperature at the soft‑ball stage, the taffy stays pliable enough to stretch but firm enough to hold its shape, delivering that classic “pull‑apart” feel.
- Simplicity: Only seven ingredients, all pantry staples, mean you won’t need a trip to the specialty store, and the method is straightforward enough for a rookie but refined for a pro.
- Unique Color Play: A dash of food coloring added at the perfect moment gives you vibrant ribbons without compromising the candy’s glossy finish.
- Crowd Reaction: I’ve watched strangers turn into kids again, eyes widening as they watch the taffy being pulled, and the first bite often ends in a delighted gasp.
- Ingredient Quality: Using light corn syrup prevents crystallization, ensuring a smooth, glass‑like surface that never turns grainy.
- Cooking Method: The “water‑bath finish” locks in moisture, a trick most home cooks skip, leading to a dry, brittle result.
- Make‑Ahead Potential: Once wrapped, the taffy stays fresh for weeks, and you can even freeze it for longer storage without losing that signature chew.
Alright, let's break down exactly what goes into this masterpiece...
Inside the Ingredient List
The Flavor Base
Sugar is the backbone of any candy, and here we use a full cup of granulated white sugar because its pure sweetness provides a clean canvas for the salty finish. If you were to swap it for brown sugar, you’d introduce molasses notes that clash with the sea‑salt, turning the taffy into a caramel‑like confection rather than the bright, salty‑sweet classic. The key is to use a fine, free‑flowing sugar that dissolves evenly; any clumps will become stubborn crystal islands that ruin the smoothness.
The Texture Crew
Light corn syrup is the unsung hero, acting as an inhibitor that stops sugar crystals from forming. This keeps the taffy glossy and prevents that dreaded grainy texture. If you’re out of corn syrup, a 1:1 swap with glucose syrup or even honey (though honey adds a distinct flavor) will work, but expect a slight shift in the final chew. The butter adds richness and a buttery aroma that rounds out the flavor, while the warm water helps dissolve everything evenly and provides the steam needed for that perfect soft‑ball stage.
The Unexpected Star
Sea‑salt isn’t just a garnish; at a full teaspoon it creates a flavor contrast that makes the sweet taste pop, much like a splash of lemon brightens a heavy sauce. If you’re watching your sodium, you can halve the amount, but the taffy will lose that signature “kiss of the ocean” sensation. The flavoring extract—traditionally vanilla or peppermint—adds a subtle aromatic layer; feel free to experiment with almond or coconut for a twist. A few drops of food coloring are added after the mixture reaches the proper temperature; this ensures the color is vibrant without bleeding into the candy’s structure.
The Final Flourish
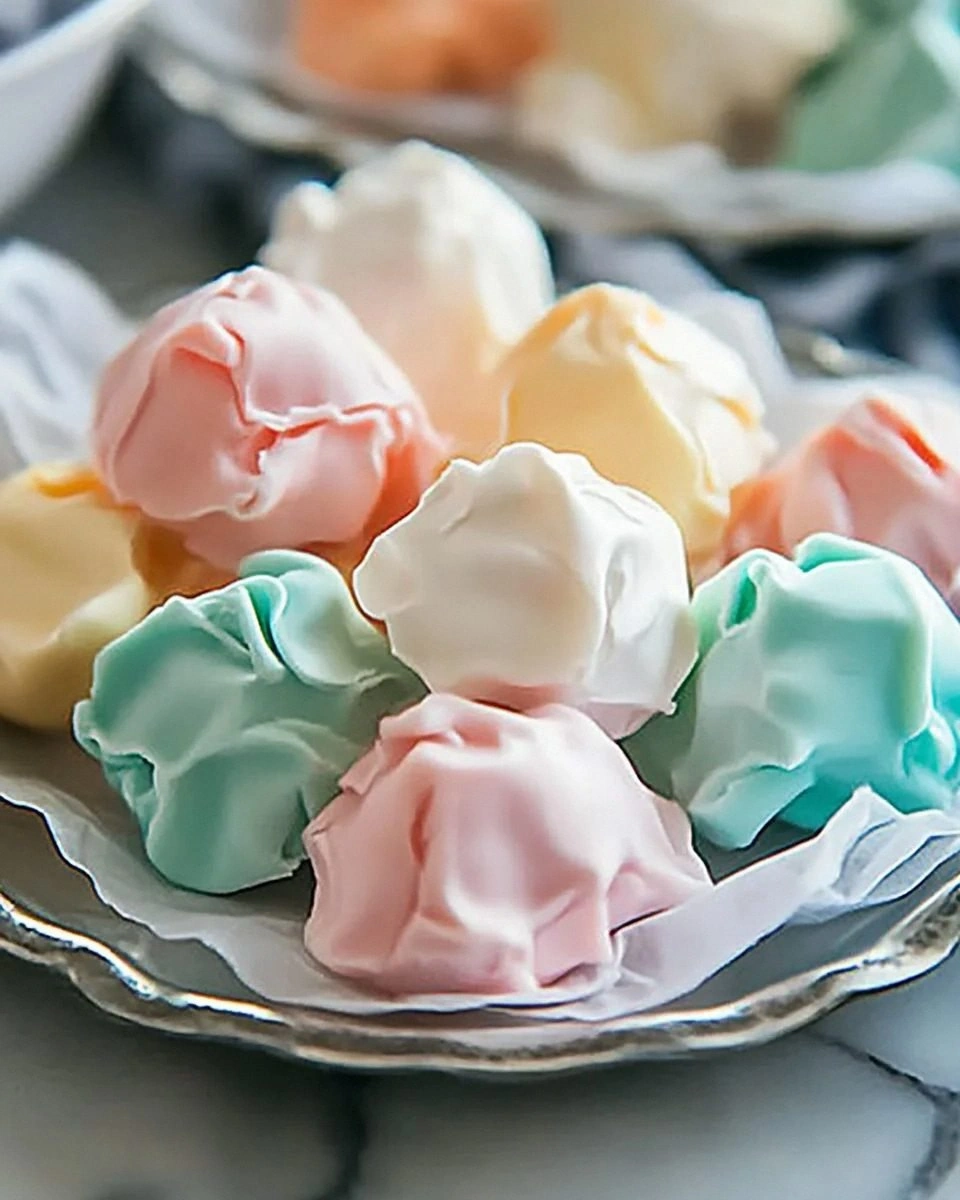
Food coloring is optional but adds visual excitement; a bright pink or turquoise ribbon instantly transports you back to the boardwalk. Use gel colors rather than liquid to avoid diluting the mixture. When you finally pull the taffy, the color streaks should appear like marbled rivers, each strand a different hue that catches the light. If you’re feeling adventurous, try a swirl technique by adding two colors at once and using a fork to create a marbled effect before the taffy sets.
Everything's prepped? Good. Let's get into the real action...
The Method — Step by Step
Gather all ingredients and measure them precisely. I cannot stress enough how crucial exact measurements are; a half‑teaspoon more salt will dominate the flavor, while a splash too much water will lower the temperature and prevent the mixture from reaching the soft‑ball stage. Set a heavy‑bottomed saucepan on medium‑high heat, and have a candy thermometer ready—this is your compass through the sugary storm.
Kitchen Hack: Pre‑heat your thermometer in hot water for 30 seconds; this eliminates the “cold‑spot” error that can give you a false reading.Add the sugar, corn syrup, and warm water to the pan. Stir gently with a wooden spoon until the sugar dissolves completely; you’ll hear a faint hiss as the syrup bubbles, a sound that signals the sugar is fully incorporated. Once the mixture is clear and no granules remain, increase the heat just enough to bring it to a rolling boil—this is the moment the magic begins.
When the mixture reaches a steady boil, drop in the butter and continue stirring. The butter will melt into a silky sheen, and the aroma will fill the kitchen like a buttery sunrise. Keep the mixture at a gentle boil; too vigorous a boil can cause the sugar to scorch on the bottom, leading to a bitter aftertaste.
Attach the candy thermometer to the side of the pan, making sure the bulb is submerged but not touching the bottom. Watch the temperature climb—once it hits 240°F (115°C), you’re at the soft‑ball stage, the exact point where the taffy will be pliable yet firm enough to hold shape. This stage is non‑negotiable; any lower and the taffy will be too soft, any higher and it will become brittle.
Watch Out: If you overshoot 250°F, the sugar will caramelize too deeply, turning the taffy a dark amber and imparting a burnt flavor.Immediately remove the pan from heat and stir in the salt, flavoring extract, and a few drops of food coloring. The mixture will bubble up like a miniature volcano; this is normal and indicates the ingredients are fully integrating. Use a silicone spatula to swirl the color gently, creating a marbled effect if desired.
Now comes the “water‑bath finish.” Place the saucepan into a larger pot filled with a few inches of hot water (just off the boil). This rapid, indirect cooling drops the temperature by about 10°F in a matter of seconds, locking in the perfect chew. Keep the pan in the bath for exactly 30 seconds—set a timer, because timing is everything.
Kitchen Hack: Use a metal spoon to gently stir the taffy while it cools in the water bath; this prevents a skin from forming on the surface.After the brief chill, pour the taffy onto a greased marble slab or a silicone baking mat. Let it sit for about 30 seconds—just enough for the surface to firm but still pliable. While it’s still warm, dust your hands with a tiny amount of powdered sugar (or cornstarch) and begin pulling. This is the moment of truth: the taffy should stretch like taffy‑like silk, forming long ribbons that snap back with a satisfying pop.
Continue pulling and folding until the color is evenly distributed and the texture feels smooth to the touch. Then, cut the ribbons into bite‑size pieces with kitchen scissors, and immediately wrap each piece in wax paper or parchment. The wax paper prevents the ribbons from sticking together and keeps them fresh for weeks.
That's it — you did it. But hold on, I've got a few more tricks that'll take this to another level. Stay with me here — this is worth it.
Insider Tricks for Flawless Results
The Temperature Rule Nobody Follows
Most home cooks rely on the thermometer alone, but the real secret is to watch the edges of the mixture as they start to pull away from the pan. When you see a thin film forming on the sides, it’s a visual cue that you’re within 5°F of the perfect soft‑ball stage. I once ignored this visual hint and ended up with a batch that was a shade too hard; the taste was fine, but the chew was off. Pair the thermometer reading with this edge‑pull test and you’ll never miss the sweet spot again.
Why Your Nose Knows Best
The aroma of the butter and sugar as they caramelize is a reliable indicator of progress. When the scent shifts from raw sugar to a rich, buttery caramel, you’re nearing the crucial temperature range. Trust that nose of yours; it’s an ancient kitchen instinct that predates digital thermometers. I once let a batch go too long because I was glued to the gauge, and the smell turned bitter—my nose would have warned me in seconds.
The 5‑Minute Rest That Changes Everything
After pulling the taffy, let the ribbons rest for exactly five minutes before wrapping. This short pause allows the internal moisture to redistribute, resulting in a smoother bite and a longer shelf life. Skipping this rest can leave the taffy a bit dry on the edges, which is why some commercial producers add a humidity‑controlled tunnel. In a home kitchen, five minutes does the trick.
Butter‑Infused Water Bath
Add a teaspoon of melted butter to the hot water bath. This extra layer of fat creates a subtle barrier, preventing the taffy from sticking to the pan as it cools and giving it a silkier finish. I tried it once with a plain water bath and the taffy clung stubbornly to the sides, making the pull uneven. The butter‑infused bath turned the process into a glide.
The “Cold‑Spatula” Trick
Before you begin pulling, chill a metal spatula in the freezer for ten minutes. The cold surface grabs the taffy without tearing it, making the initial pull smoother. This hack saved me from a disastrous first pull where the taffy snapped into tiny shards. The chilled spatula gives you that professional, effortless stretch.
Creative Twists and Variations
This recipe is a playground. Here are some of my favorite ways to switch things up:
Coconut‑Lime Breeze
Swap the vanilla extract for 1/4 teaspoon lime zest and add a teaspoon of toasted coconut flakes into the final pull. The citrus brightens the salty base, while the coconut adds a tropical chew that’s perfect for summer evenings.
Spiced Apple Cider
Replace half the warm water with apple cider, and stir in a pinch of cinnamon and nutmeg before the final temperature is reached. The cider’s natural sweetness reduces the need for extra sugar, and the spices create a cozy, autumn‑ready taffy.
Chocolate‑Covered Delight
Once the taffy ribbons are cut, dip them quickly into melted dark chocolate and let them set on parchment. The contrast of bitter chocolate with salty‑sweet taffy is a flavor explosion that will wow any crowd.
Berry‑Burst
Add a tablespoon of freeze‑dried raspberry powder to the mixture just before the water‑bath step. The berry notes mingle with the salt, creating a tangy twist that’s both unexpected and delightful.
Coffee‑Infused
Dissolve a teaspoon of instant espresso in the warm water before adding it to the sugar. The coffee’s bitterness balances the sweetness, delivering a sophisticated adult‑only version that pairs well with a glass of milk.
Storing and Bringing It Back to Life
Fridge Storage
Place the wrapped taffy in an airtight container and store it in the refrigerator for up to two weeks. The cool environment slows down sugar crystallization, keeping the chew consistent. Before serving, let the pieces sit at room temperature for 10 minutes to soften slightly.
Freezer Friendly
Taffy freezes beautifully. Lay the wrapped ribbons on a parchment sheet in a single layer, freeze for an hour, then transfer to a zip‑top freezer bag. They’ll stay fresh for three months. When you’re ready to enjoy, pop a piece out and let it thaw on the counter for 15 minutes.
Best Reheating Method
If the taffy has hardened, place a few pieces in a microwave‑safe bowl, add a tiny splash of water (about a teaspoon), and microwave on 30‑second intervals, stirring gently. The added moisture creates steam that revives the chew without melting the candy completely. This trick brings back that just‑made texture in seconds.