Picture this: a midnight kitchen, a pantry full of forgotten ingredients, and an unstoppable craving for something crunchy and cheesy. The air smells of sizzling meat and the faint whisper of spices. My phone buzzes with a text from a friend daring me to create the ultimate nachos. I’m already half‑way through the recipe, my skillet ready, and the timer on my phone counting down. That moment of anticipation feels like a tiny explosion of flavor waiting to happen.
I’ve spent years hunting for the perfect nacho recipe, and every attempt ends with either soggy chips or bland seasoning. Last week, I found myself staring at a bag of tortilla chips that looked like they had seen better days. I tossed them in a pan with a splash of oil, and the sizzling sound was music to my ears. The aroma of browned corn hit me like a warm hug, and I knew this was the beginning of something special. This version isn’t just a tweak; it’s a revolution in nacho-making.
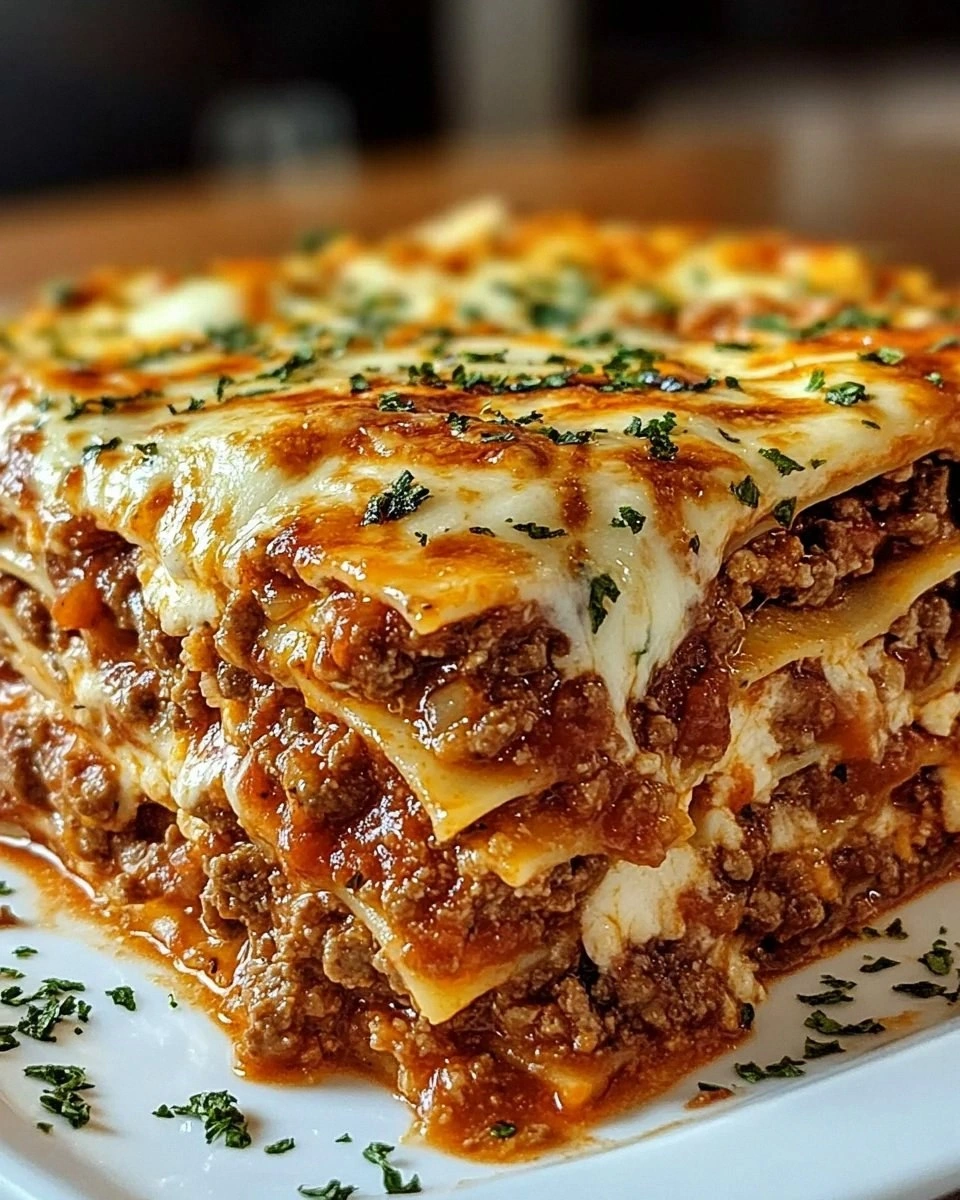
What sets this loaded nacho apart is the balance of textures and the depth of flavor that comes from each carefully chosen ingredient. The beef is cooked to a perfect medium‑rare, retaining juices that coat the chips like velvet. The cheese melts into a gooey blanket, while fresh tomatoes add a bright, almost citrusy bite. Jalapeños provide a kick that’s sharp but not overwhelming, and the green onions finish it with a crisp, herbal note. Every bite is a layered experience that makes you question how you ever ate nachos before.
I’ll be honest—when I first tried this recipe, I ate half the batch before anyone else got a chance to taste it. The combination of flavors was so addictive that I kept reaching for more. The crunch of the chips, the savory beef, and the creamy toppings all worked together like a well‑orchestrated symphony. If you’ve ever struggled with finding the right nacho recipe, you’re not alone—and I’ve got the fix. The secret is simple yet powerful: a few key techniques and the right ingredients.
Picture yourself pulling this out of the oven, the whole kitchen smelling incredible, and a plate of golden, bubbling nachos waiting for you. The anticipation is almost too much to bear, but I promise you, by the end of this guide you’ll wonder how you ever made it any other way. Let me walk you through every single step, from the first sizzle to the final sprinkle, so you can replicate this masterpiece at home with confidence and flair.
What Makes This Version Stand Out
- Flavor: The beef is seared to a caramelized crust, locking in juices that mingle with fresh tomatoes and jalapeños. The combination of savory and sweet creates a depth that ordinary nachos lack. Each bite delivers a burst of umami, balanced by the brightness of the salsa. The result is a complex flavor profile that keeps you coming back for seconds. This isn’t just seasoning; it’s a flavor explosion.
- Texture: The chips are toasted until they’re crisp on the outside yet still soft enough to hold the toppings. The cheese forms a gooey, golden blanket that doesn’t slide off. Fresh tomatoes add a juicy pop, while the jalapeños provide a slight crunch. The overall mouthfeel is satisfying and indulgent. No soggy moments, just pure, layered crunch.
- Simplicity: You only need eight ingredients, and the cooking process is straightforward. Each step is a quick, clear instruction that even novice cooks can follow. The recipe takes less than 45 minutes from start to finish. You can prepare the components ahead of time, making it a stress‑free crowd‑pleaser. It’s the perfect balance between effort and reward.
- Uniqueness: The inclusion of fresh diced tomatoes instead of canned adds a fresh burst of color and flavor. The jalapeños are sliced thin, offering a precise heat level that can be adjusted. The final drizzle of sour cream and a sprinkle of green onions provide a creamy, aromatic finish. This twist turns a classic snack into a gourmet experience. You’ll find no other nacho recipe that matches this level of sophistication.
- Crowd Reaction: Friends always rave about the crunch and the gooey cheese. The dish is perfect for parties, game nights, or a quick family dinner. Even picky eaters love the familiar flavors with a gourmet touch. The presentation is impressive, making it ideal for social media shares. Everyone ends up asking for the recipe after the first bite.
- Ingredient Quality: Using lean ground beef ensures a lighter dish without sacrificing flavor. Fresh tortilla chips provide a better texture than store‑bought varieties. High‑quality cheddar melts smoothly, creating the perfect cheese blanket. The fresh produce adds vibrant color and a burst of freshness. Every ingredient is chosen to elevate the overall experience.
Inside the Ingredient List
The Flavor Base
Ground beef is the heart of this dish, providing a rich, savory foundation that balances the bright accents. Choose lean beef for a healthier option or regular for extra flavor; the difference is noticeable in the final taste. Sauté the beef with a pinch of salt and pepper until browned, then drain excess fat to keep the dish from becoming greasy. Skipping this step will leave your nachos feeling flat and uninspired. The beef’s caramelized edges add a subtle depth that elevates the overall flavor.
The Texture Crew
Tortilla chips are the cornerstone of crunch. Opt for sturdy, lightly salted chips that can hold all the toppings without breaking apart. If you prefer a homemade touch, lightly dust fresh corn tortillas with flour and bake until golden. The chips should be crisp yet flexible enough to support the cheese and toppings. A weak chip will result in soggy nachos, so invest in quality for maximum satisfaction.
The Unexpected Star
Diced tomatoes bring a burst of freshness that cuts through the richness of beef and cheese. Fresh tomatoes are ideal, but canned tomatoes can work in a pinch—just drain them well. The acidity of the tomatoes balances the dish’s overall heaviness. If you’re feeling adventurous, add a splash of lime juice for an extra zing. The tomatoes also add color, turning your plate into a visual feast.
The Final Flourish
Sliced jalapeños, chopped green onions, sour cream, and salsa are the finishing touches that bring harmony and depth. Jalapeños provide heat that can be dialed to your tolerance; pickled jalapeños offer a tangy twist. Green onions add a fresh, herbal crunch that brightens the dish. Sour cream introduces creaminess, balancing the heat and cheese. Salsa layers on a final layer of flavor that ties everything together.
Everything’s prepped? Good. Let’s get into the real action that turns this concept into a mouth‑watering reality.

The Method — Step by Step
- Heat a large skillet over medium heat and add the ground beef. Allow it to sear until it releases its juices and turns a deep brown. Stir occasionally, breaking it into fine crumbles. Once the beef is fully cooked, drain off any excess fat to keep the dish light. This step is crucial for flavor; a well‑seared beef base makes all the difference.
- While the beef cooks, preheat your oven to 375°F (190°C). Spread the tortilla chips evenly on a baking sheet in a single layer. If you’re using homemade chips, bake them until they’re golden and crisp. The chips should be firm enough to hold toppings without breaking. This brief oven time locks in crunch and prevents sogginess.
- Transfer the cooked beef onto the chip layer, spreading it evenly. The beef should cover the chips like a savory blanket. Sprinkle shredded cheddar cheese over the beef, ensuring each chip gets a generous amount of cheese. The cheese will melt into a gooey, golden layer during the next oven step. This is the moment of truth.
- Place the baking sheet back in the oven and bake for 8-10 minutes, or until the cheese is melted and bubbly. Keep an eye on the cheese; you want a golden crust, not burnt. Once done, remove the sheet from the oven and let it cool for a minute. This short rest allows the cheese to set slightly for easier topping.
- Add diced tomatoes on top of the melted cheese, distributing them evenly. The tomatoes should sit on the cheese without sinking. Next, sprinkle sliced jalapeños over the tomatoes, adjusting the amount to your heat preference. The jalapeños will release a gentle heat that permeates the dish.
- Finish by adding dollops of sour cream, a handful of chopped green onions, and a generous drizzle of salsa. The sour cream provides a cool contrast to the heat, while the green onions add a fresh, herbal note. The salsa ties everything together with its vibrant, tangy flavor. This final layering is where the dish truly shines.
- Serve immediately, allowing guests to enjoy the contrast of hot, melted cheese and cool, creamy toppings. The nachos should be served while still slightly warm to keep the cheese from solidifying. Encourage your guests to add extra salsa or jalapeños if they desire more heat. The dish is best enjoyed with a cold drink to balance the richness.
- If you have leftovers, store them in an airtight container in the refrigerator. Reheat in the microwave for 30-45 seconds, then add a splash of water to keep the chips from drying out. Alternatively, pop them back in a hot oven for a few minutes to restore crispness. The key is to reheat gently to preserve texture.
Insider Tricks for Flawless Results
The Temperature Rule Nobody Follows
Cooking the beef at a slightly lower temperature allows it to release more moisture, creating a juicy base. Many chefs overheat the pan, leading to dry, tough meat. Keep the heat medium and stir frequently to maintain even cooking. The result is a tender, flavorful beef layer that holds up under the toppings.
Why Your Nose Knows Best
Your sense of smell is the ultimate judge of doneness. When the beef is cooked, it should emit a rich, savory aroma that signals it’s ready. If the scent is weak, let it cook a bit longer. Trust your nose to guide you; it’s a reliable cue that the meat is perfectly browned.
The 5-Minute Rest That Changes Everything
After baking, let the nachos rest for 5 minutes before serving. This short pause allows the cheese to set, preventing it from sliding off the chips. The rest also lets the flavors meld together, creating a harmonious bite. Skipping this step often results in a messy, uneven dish.
The Quick Toss for Even Toppings
When adding the tomatoes and jalapeños, gently toss them with a spoon to distribute heat evenly. A quick toss ensures every chip receives the same amount of heat and flavor. This small step prevents pockets of underseasoned or overly spicy bites.
The Final Drizzle of Salsa
A final drizzle of salsa adds a fresh, zesty finish that balances the richness of cheese and beef. Use a spoon to control the amount, ensuring each bite has a balanced flavor. This technique is a simple way to elevate the dish from good to unforgettable. Your guests will notice the thoughtful finish.
Creative Twists and Variations
Spicy Mexican Street Tacos
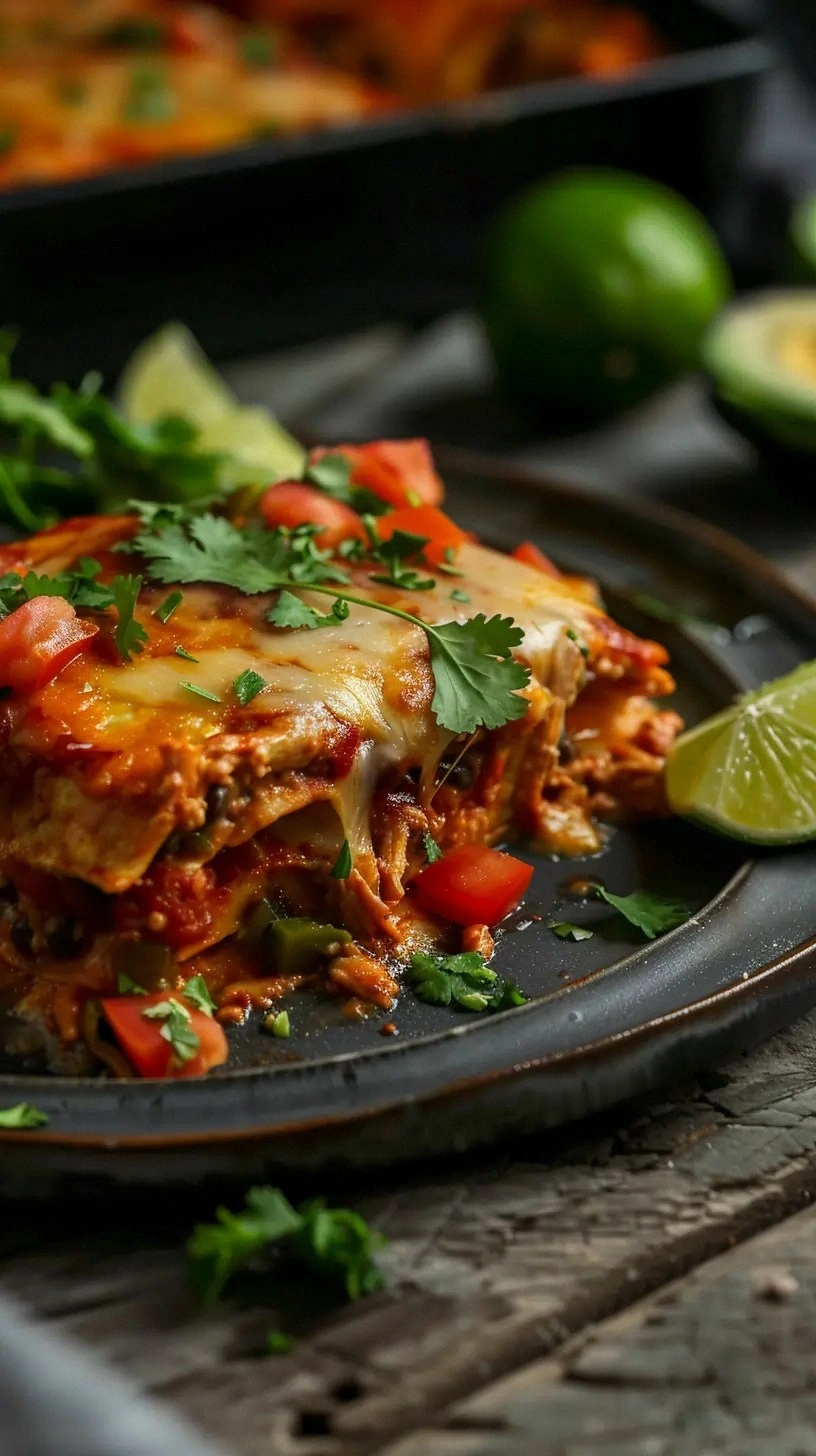
Swap the tortilla chips for soft corn tortillas folded into taco shapes. Use the same beef and cheese mixture, then top with fresh cilantro and a squeeze of lime. This variation turns nachos into handheld tacos, perfect for a casual gathering. The fresh cilantro adds a bright, herbal note that complements the heat.
Mediterranean Fusion
Replace cheddar cheese with feta and add diced cucumbers, olives, and a drizzle of tzatziki sauce. The salty feta pairs beautifully with the creamy yogurt base of the tzatziki. This version offers a refreshing, tangy twist that’s ideal for a summer gathering. The Mediterranean flavors bring a new dimension to the classic nacho.
Vegan Delight
Use plant‑based ground “beef” and vegan cheese. Substitute sour cream with coconut yogurt and use a vegan salsa. The result is a plant‑based nacho that still delivers the same rich, layered flavors. This variation is perfect for vegans or those looking to reduce dairy.
Breakfast Nachos
Replace the beef with scrambled eggs and add a sprinkle of chorizo. Top with avocado slices and a dash of hot sauce. The eggs provide a hearty, protein‑rich base, while the chorizo adds savory depth. This breakfast twist is a fun way to start the day with a savory crunch.
Dessert Nachos
Swap the savory beef for chocolate‑covered marshmallows and drizzle with caramel sauce. Add crushed nuts and a sprinkle of sea salt for crunch. This sweet version turns nachos into a dessert that’s both indulgent and satisfying. It’s a playful way to end a meal or celebrate a special occasion.
Storing and Bringing It Back to Life
Fridge Storage
Store leftover nachos in an airtight container for up to 3 days. Keep the chips on a separate layer to avoid sogginess. When ready to eat, reheat in the microwave for 30 seconds, then add a splash of water to steam the chips back to crispness. Alternatively, place them in a preheated oven at 350°F for 5 minutes. This method restores the original texture.
Freezer Friendly
For longer storage, freeze the nachos in a freezer‑safe bag for up to 2 months. Thaw overnight in the refrigerator before reheating. Reheat in a skillet or oven until the cheese melts. Freezing preserves the flavors, but the texture may change slightly. The result is still delicious and convenient.
Best Reheating Method
The best way to reheat nachos is in a hot oven at 375°F for 5-7 minutes. This method keeps the chips crispy and the cheese melty. Avoid microwaving the entire plate; instead, heat the chips separately and then add fresh toppings. A quick splash of water before reheating helps steam the chips back to perfection.