Picture this: I was halfway through a late‑night pizza experiment, the dough sticking to the counter like a stubborn rubber band, when my phone buzzed with a frantic text from a friend who’d just booked a last‑minute trip to Paris. “I need dessert, but I’m not even in my kitchen,” she wrote, and I felt the absurd pressure of turning a simple craving into something memorable. So I pulled out the pantry, stared at a jar of sweetened condensed milk and a can of cherry pie filling, and decided to ditch the oven entirely. The result? A silky, no‑bake cheesecake parfait that feels like a holiday treat yet can be whipped up in minutes. If you’re tired of the same old sweet, this is hands down the best version you’ll ever make at home.
I’ve always loved the idea of layering textures—crunch, cream, and fruit—into a single bite, but most recipes I’ve seen either over‑complicate the process or end up with a soggy base. This version flips that script. The graham cracker crust is crisped to a buttery perfection, the cheesecake layer is rich yet light, and the cherry filling adds a punch of tartness that cuts through the sweetness. Every spoonful feels like a mini celebration, and the best part is that it takes less time than it takes to decide what to have for dinner. I dare you to taste this and not go back for seconds.
When you first open the jar of cherry pie filling, the aroma is unmistakably sweet, with a hint of vanilla that lingers like a memory of childhood holidays. The butter, when melted, releases a buttery scent that mingles with the graham crackers, turning the base into a caramelized crunch. The cream cheese, when softened, gives off a mild, milky fragrance that promises richness. Together, they create an olfactory symphony that signals dessert is about to happen. That sensory preview is the first hint that this recipe is a game‑changer.
And if you’re wondering why this recipe feels so fresh compared to the endless variations out there, the answer lies in its simplicity and the precise balance of flavors. No baking, no heavy equipment, just a few pantry staples and a handful of quick steps. It’s the kind of dessert that feels like a secret, a hidden gem that you can pull out at any moment. Picture yourself pulling this out of the fridge, the whole kitchen smelling incredible, and guests lining up for a spoonful. Stay with me here—this is worth it.
What Makes This Version Stand Out
- Flavor: The combination of sweetened condensed milk and lemon juice creates a creamy base that’s both indulgent and bright, cutting through the richness of the cream cheese with a subtle citrus lift.
- Texture: The graham cracker crumbs are toasted just enough to give a satisfying crunch, while the cheesecake layer stays silky and smooth, preventing the dreaded “cheese‑y” mouthfeel.
- Convenience: No oven required—just a few minutes in the microwave and a quick chill in the fridge. Perfect for a last‑minute dessert or a lazy Sunday treat.
- Versatility: The recipe is a blank canvas; swap the cherry filling for blueberries, mango, or even chocolate ganache to suit any palate.
- Crowd‑pleaser: The layers of flavor and texture keep guests coming back for more, and the presentation is as stunning as it is simple.
- Make‑ahead: The parfaits can be assembled a day in advance and kept chilled, making them ideal for parties or meal‑prep.
- Ingredient Quality: Using high‑quality cream cheese and fresh graham crackers elevates the flavor profile beyond the usual store‑bought mixes.
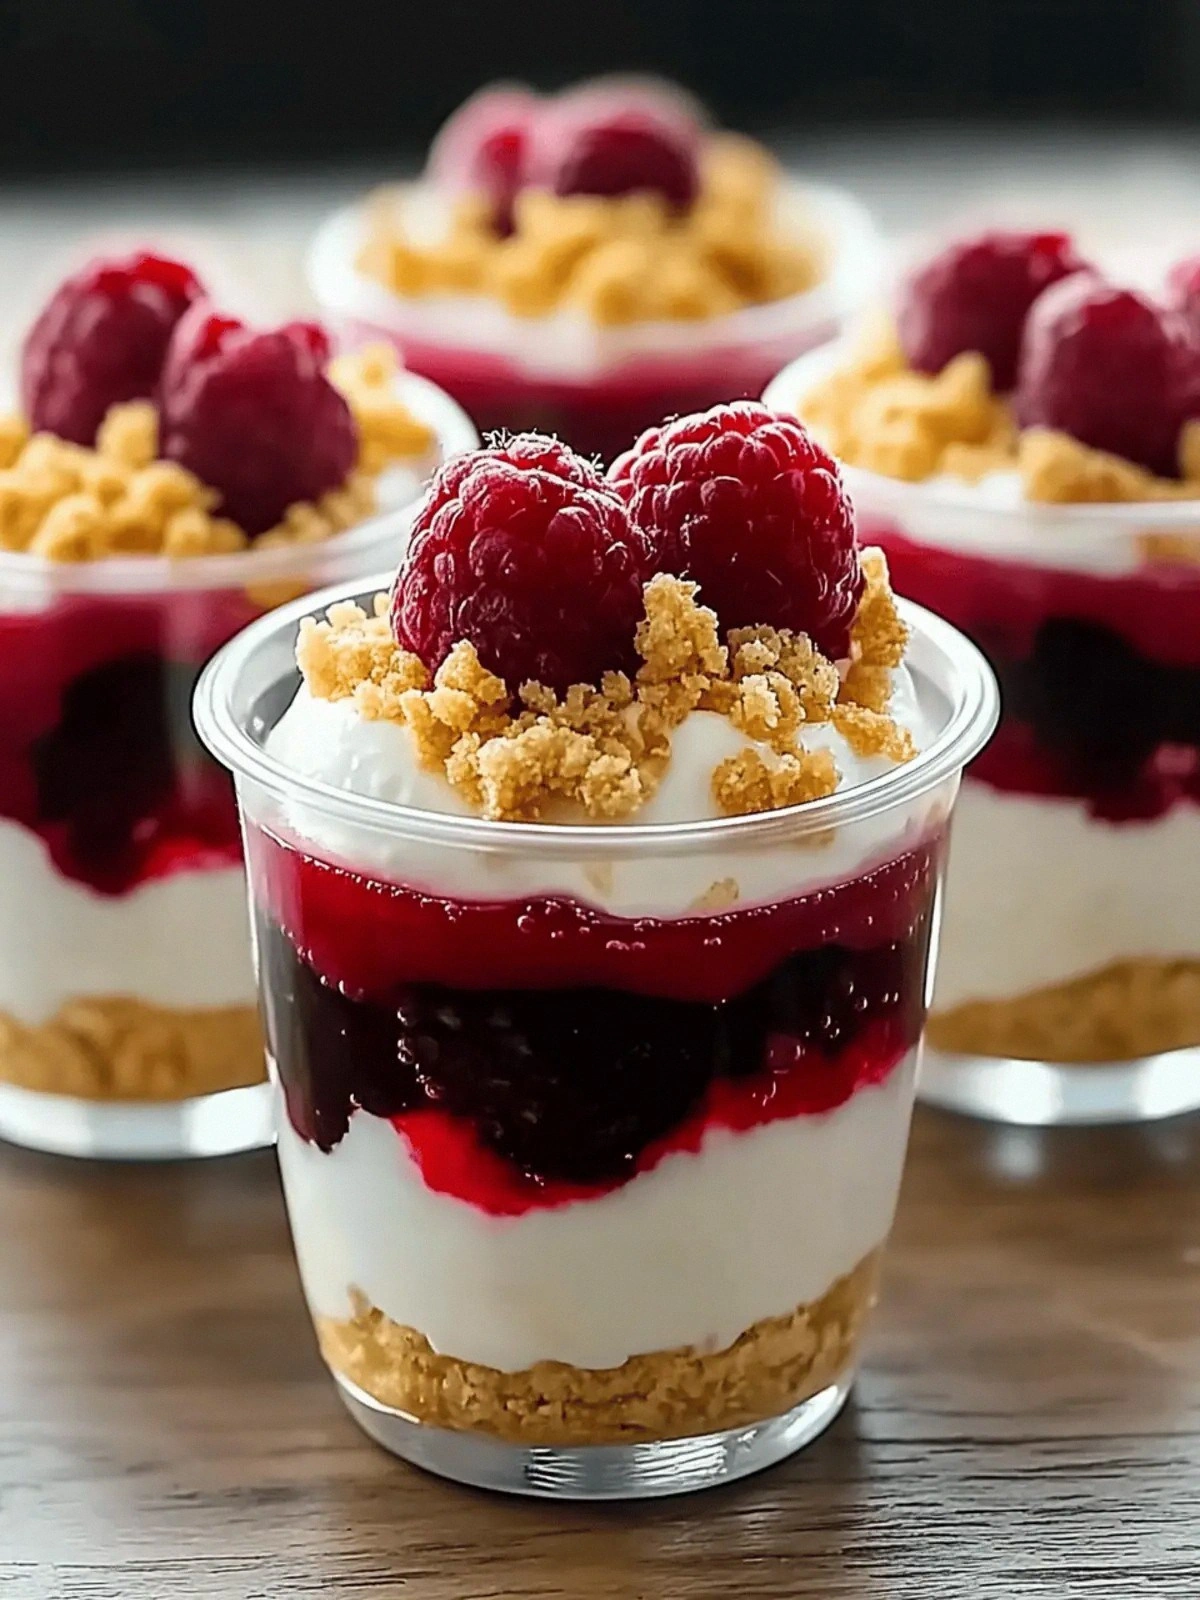
- Visual Appeal: The translucent layers of cheesecake and cherry filling create a striking, Instagram‑ready look that will wow anyone.
Inside the Ingredient List
The Flavor Base
Sweetened condensed milk is the unsung hero of any no‑bake dessert. Its thick, syrupy texture provides a natural sweetness that binds the cheesecake together without the need for a sugar rush. If you’re watching calories, you can swap it for a sugar‑free alternative or reduce the amount slightly, but the result will be noticeably less luscious. When selecting condensed milk, choose a brand with a creamy consistency rather than one that feels watery; the former ensures a silky final product.
The Texture Crew
Graham cracker crumbs are the backbone of the parfait’s structure. They absorb the butter and sugar, forming a crumbly yet cohesive base that holds the layers together. If you prefer a gluten‑free option, opt for a store‑bought gluten‑free graham cracker mix or use almond flour as a substitute, though the flavor will shift slightly. Remember, the crumbs must be fine; coarser crumbs will create a gritty mouthfeel that detracts from the silky cheesecake layer.
The Unexpected Star
Cherry pie filling is the star that adds color, flavor, and a hint of tartness. It’s the perfect complement to the sweet, rich cheesecake, and its natural fruitiness brightens the dessert. If you’re a fan of a more robust fruit flavor, consider using a fresh cherry compote or a mix of berries. The filling also serves as a natural thickener, so don’t be tempted to dilute it with juice or syrup.
The Final Flourish
Lemon juice and vanilla extract are the finishing touches that elevate the entire dessert. The lemon juice cuts through the richness of the cream cheese, providing a bright, fresh contrast that keeps the palate from getting overwhelmed. Vanilla extract adds depth and warmth, tying all the flavors together. A splash of fresh lemon zest can replace the juice for a more pronounced citrus note, but be careful not to overdo it, or the tartness will dominate.
Everything’s prepped? Good. Let’s get into the real action.
The Method — Step by Step
- Toast the Crumbs: Place the graham cracker crumbs in a skillet over medium heat. Add the melted butter and stir until the mixture is evenly coated. Continue cooking, stirring frequently, until the crumbs turn a light golden brown and emit a nutty aroma. Remove from heat and let them cool completely; this step is crucial for achieving that perfect crunch. I swear, the sound of the crumbs sizzling is the prelude to a deliciously satisfying dessert.
- Blend the Cheesecake: In a medium bowl, combine the softened cream cheese with the sweetened condensed milk. Use an electric mixer on medium speed until the mixture is smooth and free of lumps. Gradually pour in the lemon juice and vanilla extract, mixing until fully incorporated. The mixture should be thick yet pourable, like a rich custard. If it’s too thick, add a splash of milk to reach the desired consistency.
- Assemble the Base: Spoon the cooled graham cracker crumbs into the bottom of your serving glasses or jars, pressing them down firmly to form a compact layer. This layer should be about one‑third of the glass height. The base provides structural support and a crunchy contrast to the creamy layers above. If you’re making a large batch, you can use a shallow dish and cut into portions later.
- Add the Cheesecake Layer: Carefully pour the cheesecake mixture over the crumb layer, smoothing the top with a spatula. The cheesecake should sit evenly, filling the space above the crumbs. Let the mixture settle for a minute; you’ll see the layers start to separate slightly, indicating that the cheesecake is setting. This subtle separation is a visual cue that the dessert is on the right track.
- Introduce the Cherry: Spoon a generous amount of cherry pie filling over the cheesecake layer. The filling should cascade into the gaps, creating a marbled effect. The cherries add both color and a burst of tartness that balances the sweetness of the condensed milk. If you prefer a more uniform look, you can gently swirl the filling into the cheesecake with a toothpick, but be careful not to disturb the layers.
- Repeat the Layers: Continue layering—crumbs, cheesecake, cherry—until the glasses are almost full, leaving a small space at the top for the final garnish. The number of layers depends on the glass height, but aim for at least three complete cycles for maximum texture. Each layer builds on the previous one, creating a symphony of crunch, cream, and fruit.
- Chill: Cover the assembled parfaits with plastic wrap or lids and place them in the refrigerator for at least 3 hours, preferably overnight. The chilling process allows the flavors to meld and the texture to firm up, giving the parfaits a satisfying bite. I’ve found that a 4‑hour chill is enough for a quick dinner party, but a full night gives the best results.
- Garnish and Serve: Before serving, add a final drizzle of cherry filling or a dollop of whipped cream on top. A sprinkle of toasted graham cracker crumbs adds a finishing crunch. When you lift a spoon, the layers should be distinct yet cohesive, offering a delightful contrast in every bite. This is the moment of truth—watch your guests’ faces light up.
That’s it—you did it. But hold on, I’ve got a few more tricks that will take this to another level. From subtle tweaks to creative plating ideas, these insider tips will elevate your dessert from good to unforgettable.
Insider Tricks for Flawless Results
The Temperature Rule Nobody Follows
Many people assume room temperature cream cheese is enough, but the secret is to let it sit out for a full hour before mixing. This ensures it blends smoothly with the condensed milk, preventing lumps. If you’re in a hurry, a quick 10‑minute microwave pulse can do the trick, but the hour‑long sit is the gold standard. I’ve seen ruined batches when the cheese was too cold; the result was a gritty, uneven cheesecake layer.
Why Your Nose Knows Best
Before you pour the cheesecake mixture, give it a quick sniff. A faint buttery scent means it’s ready. If it smells overly sweet or has a hint of sourness, it might be too thick or too watery. Your nose is a reliable quality control tool—trust it, and you’ll avoid a disastrous dessert.
The 5-Minute Rest That Changes Everything
After assembling the parfaits, let them rest at room temperature for five minutes before refrigerating. This brief pause allows the crumbs to settle and the cheesecake to begin setting, which reduces the risk of the layers shifting during the long chill. It also gives you a chance to check for any unevenness and smooth the top with a spatula.
Use a Silicone Ring for Uniform Layers
Silicone rings are a game‑changer when it comes to creating even, symmetrical layers. Place a ring in each glass before adding the crumbs, then remove it once the base is set. This ensures each layer is the same height, making the parfaits look professional and preventing any one layer from being too thick.
Finish with a Citrus Twist
Just before serving, squeeze a few drops of fresh lemon or orange zest over the top. The citrus oils add a bright, aromatic finish that elevates the overall flavor profile. Don’t overdo it; a light dusting is enough to make the dessert feel fresh and vibrant.
Creative Twists and Variations
This recipe is a playground. Here are some of my favorite ways to switch things up:
Chocolate Cherry Delight
Swap the sweetened condensed milk for chocolate‑flavored condensed milk and add a splash of espresso. The cherries remain, but the chocolate adds depth, making this parfait a decadent treat for chocolate lovers.
Berry Burst
Replace the cherry filling with a mixed berry compote—strawberries, blueberries, and raspberries. The tartness of the berries complements the creamy cheesecake, and the vibrant colors make the parfait pop visually.
Minty Freshness
Incorporate a teaspoon of peppermint extract into the cheesecake mixture and top with crushed candy canes. The mint adds a refreshing bite that’s perfect for a summer dessert.
Almond Crunch
Use almond flour instead of graham cracker crumbs for a gluten‑free version. Add toasted almond slivers on top for extra crunch and a nutty flavor that pairs beautifully with the sweet filling.
Peachy Keen
Swap the cherry filling for a peach pie filling and add a pinch of cinnamon to the cheesecake mixture. The peaches bring a subtle sweetness, while the cinnamon adds warmth, making this parfait a cozy fall favorite.
Caramel Swirl
Drizzle caramel sauce over the top layer and sprinkle a few sea salt flakes. The caramel adds a buttery sweetness, while the sea salt provides a contrast that enhances every bite.
Storing and Bringing It Back to Life
Fridge Storage
Keep the assembled parfaits in the refrigerator for up to 3 days. Store them in airtight containers or cover the glasses with plastic wrap to prevent moisture absorption. When you’re ready to serve, let them sit at room temperature for 10 minutes to soften slightly, making them easier to scoop.
Freezer Friendly
For longer storage, place the parfaits in a freezer‑safe container and freeze for up to 2 weeks. Before serving, thaw them in the refrigerator overnight. The texture remains firm, but the flavors meld beautifully after a slow chill.
Best Reheating Method
To revive a frozen parfait, place it in the refrigerator for 6 hours, then gently warm in a microwave at 30% power for 20 seconds. Add a tiny splash of water before reheating; this steams the cheesecake back to a silky finish and prevents it from drying out.