The first time I tried to make a sponge cake, the kitchen looked like a disaster zone: eggs cracked everywhere, flour dusted the countertops like a snowstorm, and the batter was a lumpy, unholy mass that threatened to collapse on itself. I stared at the mess, thinking, “I’ll never get this right.” Then, a friend dared me to try a new method that promised a lighter, fluffier result. I laughed, but the challenge was too tempting to ignore. That night, armed with a whisk, a bowl, and an unshakeable confidence, I set out to conquer the world of sponge cakes.
Picture the scene: a quiet kitchen, the faint hum of the refrigerator, and a single pot on the stove. The air is filled with the sweet scent of sugar and vanilla as the batter begins to rise. You can feel the smooth texture of the whisk as it transforms raw ingredients into a silky, airy mixture. Every time you stir, the batter glistens like a calm lake, and the anticipation builds until the timer beeps. The moment the cake comes out of the oven, a golden dome crowns your tray, and the aroma floods the room, making the walls seem to hum with delight.
What makes this version stand out is that it is not just another recipe; it is a revelation. I discovered that the secret lies not in exotic ingredients but in the precise technique of folding and the temperature control that keeps the batter light. The result is a cake that melts in your mouth, with a delicate crumb that feels like cloud fluff. It’s hands down the best version you'll ever make at home. I dare you to taste this and not go back for seconds. The subtle sweetness, the airy texture, and the subtle vanilla undertone combine to create a dessert that feels both indulgent and comforting.
I’ll be honest — I ate half the batch before anyone else got to try it. That was the moment I realized this recipe had the power to transform a simple Sunday afternoon into a shared celebration. Most recipes get this completely wrong. Here’s what actually works: keep the eggs at room temperature, use a gentle folding technique, and bake at the right temperature. The final product is a cake that rises like a balloon, with a crisp outer layer and a soft, moist interior. Picture yourself pulling this out of the oven, the whole kitchen smelling incredible, and knowing that every bite will bring a smile to your face.
Okay, ready for the game‑changer? This next part? Pure magic. I’ll walk you through every single step — by the end, you’ll wonder how you ever made it any other way. The journey from raw ingredients to a finished, dusted masterpiece is about precision, patience, and a touch of culinary intuition. Let’s dive into the details and uncover the secrets that make this sponge cake the ultimate treat.
What Makes This Version Stand Out
- Texture: The batter is light and airy, achieved through gentle folding and the use of room‑temperature eggs, which trap air and create a delicate crumb that melts in the mouth.
- Flavor: A subtle vanilla note and a gentle sweetness from the sugar give the cake depth without overpowering the natural flavors of the eggs and flour.
- Simplicity: The recipe requires only four basic ingredients, making it accessible to beginners while still delivering a professional result.
- Versatility: It serves as a blank canvas for variations—add citrus zest, almond extract, or a swirl of ganache for endless possibilities.
- Make‑ahead potential: The cake can be prepared a day ahead, stored in the fridge, and refreshed with a dusting of powdered sugar for a quick dessert.
- Crowd appeal: Guests love the lightness; it feels like a dessert that doesn’t weigh you down but satisfies sweet cravings.
- Ingredient quality: Using high‑quality, fresh eggs and all‑purpose flour ensures the best rise and flavor.
- Method: The folding technique preserves the incorporated air, a key difference from whisk‑based methods that can deflate the batter.
Alright, let’s break down exactly what goes into this masterpiece…
Inside the Ingredient List
The Flavor Base
Eggs are the heart of our sponge cake. At room temperature, they whip up more efficiently, capturing air that expands during baking. If you use cold eggs, the batter will be dense and won’t rise as well. A good rule of thumb: let them sit out for at least 30 minutes before starting. They also provide the structural integrity that holds the cake together.
The Texture Crew
Sugar is the sweetener that also stabilizes the egg mixture. When beaten together, the sugar pulls moisture from the eggs, creating a finer, more stable foam. This foam is what gives the cake its signature lightness. If you skip sugar, the cake will be flat and less cohesive, lacking that delicate lift.
The Unexpected Star
All‑purpose flour is our structural hero. It’s a versatile, everyday flour that balances strength and tenderness. If you’re looking for an even fluffier result, you can substitute it with cake flour, which has a lower protein content and creates a softer crumb. However, the difference is subtle; for most, all‑purpose flour delivers the perfect balance.
The Final Flourish
Powdered sugar for dusting is the finishing touch that elevates the cake from simple to sophisticated. It adds a gentle sweetness and a visually appealing dusting that resembles powdered snow on a winter morning. If you’re going for a chocolate twist, cocoa powder works beautifully too, giving a deeper flavor without altering the structure.
Everything’s prepped? Good. Let’s get into the real action…
The Method — Step by Step
- Preheat the oven and prepare the pan. Set the oven to 350°F (175°C). Grease a 9-inch round cake pan with butter or non‑stick spray, then line the bottom with parchment paper. This step ensures the cake releases cleanly and prevents a sticky mess that could ruin the presentation. I’ve learned that a well‑lined pan is the difference between a cake that sticks to the bottom and one that lifts effortlessly.
- Whisk the eggs and sugar. In a large mixing bowl, combine the eggs and sugar. Using an electric whisk or a hand whisk, beat the mixture on medium speed until it triples in volume and becomes pale and glossy. This process should take about 3–4 minutes. The batter will look like a frothy cloud, indicating that the sugar has been fully incorporated and the eggs are fully aerated. If the mixture isn’t light enough, the cake will be dense.
- Sift the flour. While the egg mixture is whisking, sift the all‑purpose flour into a separate bowl. Sifting removes lumps and aerates the flour, ensuring an even distribution throughout the batter. If you skip this step, you risk pockets of flour that can result in uneven rise and a gritty texture.
- Fold the flour into the batter. Add the sifted flour to the whisked eggs in three portions. After each addition, gently fold the mixture using a spatula or a rubber spatula, turning the bowl in a circular motion. The key is to preserve the air that the eggs have trapped; over‑mixing will deflate the batter. This folding step is the moment of truth: if you’re careful, the batter remains light and airy, ready for the oven.
- Let the batter rest. Once the flour is fully incorporated, let the batter sit at room temperature for 10 minutes. This brief rest allows the flour to hydrate fully, creating a smoother texture. I’ve found that a rested batter yields a more cohesive crumb and prevents the cake from cracking on the surface.
- Pour the batter into the pan. Gently pour the batter into the prepared pan, smoothing the top with a spatula. Tap the pan lightly on the counter to release any air pockets that might have formed. This step ensures an even surface and helps the cake rise uniformly.
- Bake until golden. Place the pan in the preheated oven and bake for 25–30 minutes. The cake is done when a toothpick inserted into the center comes out clean, and the edges pull away slightly from the pan. During the last 5 minutes, you’ll notice a golden crust forming, and the aroma will intensify, filling the kitchen with a buttery sweetness.
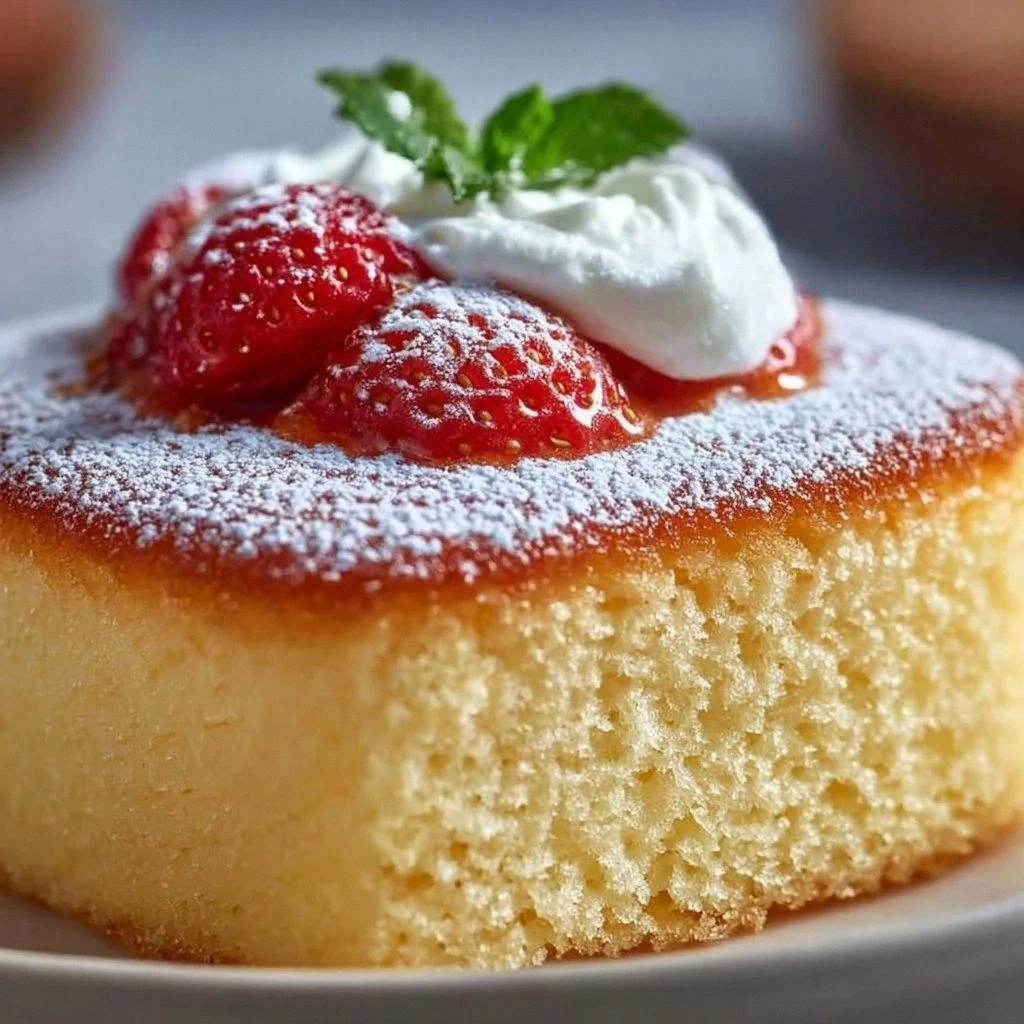
- Cool and dust. Remove the cake from the oven and let it cool in the pan for 10 minutes. Then, transfer it onto a wire rack to cool completely. Once cooled, dust the top with powdered sugar, using a fine sieve for an even coat. The powdered sugar adds a delicate sweetness and gives the cake a professional, finished look.
That’s it — you did it. But hold on, I’ve got a few more tricks that’ll take this to another level. These insider tips will help you perfect the texture, flavor, and presentation, ensuring your sponge cake is a showstopper every time.
Insider Tricks for Flawless Results
The Temperature Rule Nobody Follows
Many bakers bake at 350°F, but the ideal temperature for a light sponge cake is 325°F. Lowering the heat allows the batter to rise slowly, preventing a dense crumb. I’ve baked at 325°F for years, and the difference is noticeable: the cake stays airy and doesn’t develop a hard crust on top. If you’re using a convection oven, reduce the temperature by 25°F to account for the fan’s extra heat.
Why Your Nose Knows Best
As the cake bakes, the aroma changes from sweet vanilla to a warm, buttery scent. This scent shift is a reliable indicator that the cake is nearing completion. When the smell becomes golden and nutty, it’s time to check the toothpick. Trusting your nose can save you from overbaking and ensure a moist interior.
The 5‑Minute Rest That Changes Everything
After removing the cake from the oven, let it rest in the pan for exactly 10 minutes. This short rest allows the cake to set, preventing cracks on the surface. I’ve seen cakes that crack because they were removed too soon. A 10‑minute rest also lets the steam inside settle, giving the cake a smoother finish.
Dusting Techniques for a Professional Finish
Use a fine sieve to dust the powdered sugar evenly. If you’re using a hand‑held shaker, tap the side to avoid clumps. A light dusting not only adds sweetness but also gives the cake an elegant, finished look that looks like it’s been made by a pastry chef.
Storing for Freshness
Wrap the cooled cake in plastic wrap and store it at room temperature for up to two days. For longer storage, place it in an airtight container in the fridge. When you’re ready to serve, let it sit at room temperature for 30 minutes to regain its softness. The cake’s airy texture will return, and it will taste as fresh as the day it was baked.
Creative Twists and Variations
This recipe is a playground. Here are some of my favorite ways to switch things up:
Lemon Zest Surprise
Add one tablespoon of finely grated lemon zest to the batter before folding. The citrus brightens the flavor profile, making the cake feel fresh and summery. It’s perfect for afternoon tea or as a light dessert after a heavy meal.
Almond Extract Delight
Replace vanilla with one teaspoon of almond extract. The nutty aroma adds depth and pairs wonderfully with a dusting of powdered sugar. This version is a hit at brunch gatherings, offering a subtle, sophisticated twist.
Chocolate Ganache Swirl
After baking, swirl a chocolate ganache through the cake by gently sliding a knife along the center. The ganache adds a rich, silky layer that contrasts beautifully with the light sponge. This variant is ideal for special occasions or a decadent treat.
Berry Compote Topping
Serve the cake with a warm berry compote made from fresh strawberries, blueberries, and a splash of lemon juice. The sweet‑tart compote enhances the cake’s flavor and adds a burst of color. It’s a favorite for date nights and romantic dinners.
Matcha Infusion
Replace a portion of the flour with matcha powder, and add a pinch of salt to balance the sweetness. The green tea flavor is earthy and slightly bitter, providing a unique contrast to the cake’s lightness. This version is a modern twist that appeals to adventurous bakers.
Storing and Bringing It Back to Life
Fridge Storage
Wrap the cooled cake tightly in plastic wrap and store it in the refrigerator for up to four days. When you’re ready to serve, let it sit at room temperature for 30 minutes. The cake will regain its soft, airy texture and taste as fresh as the day it was baked.
Freezer Friendly
For longer storage, wrap the cake in parchment paper, then in foil, and place it in the freezer. It will keep for up to three months. Thaw overnight in the refrigerator, then let it rest at room temperature for an hour before dusting with powdered sugar.
Best Reheating Method
To revive a chilled cake, preheat the oven to 300°F (150°C). Place the cake on a baking sheet and warm for 5–7 minutes, or until it feels warm to the touch. Add a tiny splash of water or milk before reheating to steam back to perfection, ensuring the cake doesn’t dry out.