Introduction
I never thought a kitchen catastrophe could turn into a culinary revelation. One night, while attempting to make a classic lemon meringue pie, I accidentally knocked the whole dish off the counter. The lemon curd spilled, the meringue collapsed, and the crust was a sad, soggy mess. Yet, amid the chaos, a glimmer of genius appeared: a slice of lemony, chocolatey fudge that could be assembled in minutes, without an oven, and still taste like a dessert from a high‑end patisserie.
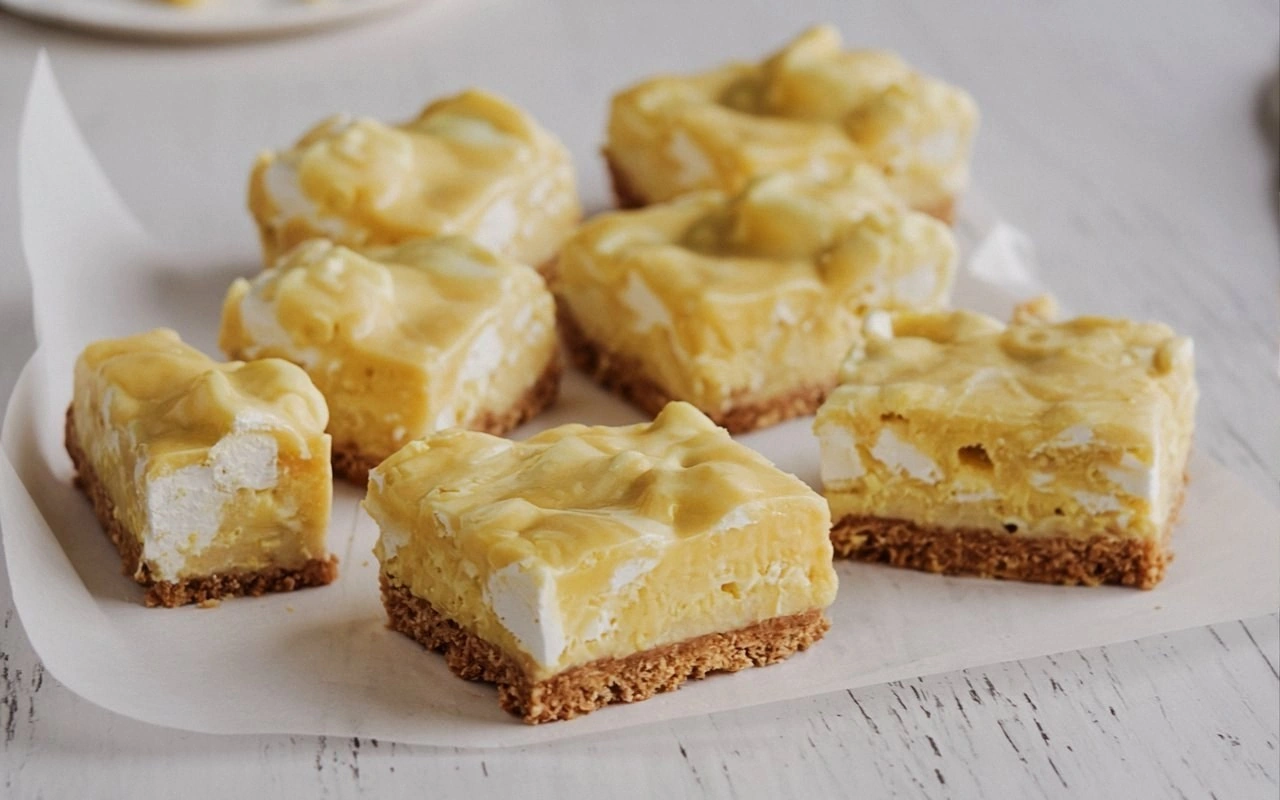
Picture the scene: the kitchen lights dim, the air is heavy with citrus and vanilla, the faint crackle of melted butter against a pan, and the sweet scent of condensed milk simmering like a caramel dream. The sound of a spoon slurping through thick, glossy fudge is almost music to my ears. The texture feels silky against the tongue, the lemon curd gives a bright, tart contrast, and the marshmallows add a cloud‑like softness that melts in your mouth. The visual is a golden, glossy surface with a glossy, almost glassy sheen that invites you to cut a slice.
What makes this version stand out from every other recipe is that it turns a simple, no‑bake process into a showstopper. It takes the classic flavors of lemon meringue pie—tangy lemon, sweet cream, buttery crust—and layers them with a decadent white chocolate fudge base. The result is a slice that feels like a dessert and a snack, a single bite that carries the citrus zing of a meringue, the smoothness of a chocolate ganache, and the airy lightness of marshmallows. This is hands down the best version you'll ever make at home.
And I dare you to taste this and not go back for seconds. If you’ve ever struggled with the delicate balance of sweet and tart in a lemon dessert, you’re not alone—this recipe has the fix. Picture yourself pulling this out of the fridge, the whole kitchen smelling incredible, and serving it to friends who will think you’re a pastry wizard. Let me walk you through every single step—by the end, you'll wonder how you ever made it any other way.
What Makes This Version Stand Out
- Flavor Layering: The combination of lemon curd, white chocolate, and marshmallows creates a multi‑dimensional taste that evolves with every bite. You start with a bright citrus punch, transition into creamy chocolate, and finish with a fluffy, sweet finish.
- Texture Contrast: The crumbly granita biscuit base provides a satisfying crunch, while the glossy fudge offers silky smoothness. The marshmallows add a cloud‑like, airy lift that breaks up the richness.
- Zero‑Bake: No oven needed—just a stovetop and a bit of patience. This makes the recipe perfect for hot summer afternoons or when you’re short on time.
- Make‑Ahead Friendly: Chill the slices in the fridge for up to 48 hours. The flavors meld beautifully, and the texture becomes even more luscious.
- Ingredient Quality: Using high‑quality white chocolate and fresh lemon curd elevates the entire dish. The granita biscuits act as a neutral base that lets the other flavors shine.
- Audience Appeal: This dessert is crowd‑pleasing; it’s sweet enough for kids, tart enough for adults, and elegant enough for dinner parties.
- Versatile Presentation: Serve the slices in a glass jar for a modern look, or arrange them on a platter for a classic dessert table.
Alright, let's break down exactly what goes into this masterpiece…
Inside the Ingredient List
The Flavor Base
First, the lemon curd. This thick, buttery sauce is the heart of the dish, providing a vibrant citrus note that cuts through the sweetness of the condensed milk and chocolate. If you skip it, the fudge will taste flat and overly sweet, lacking that bright, refreshing zing. For a more intense flavor, use freshly squeezed lemon juice and zest instead of pre‑made curd, but be prepared to whisk more to reach the right consistency.
The Texture Crew
Granita biscuits are the backbone of the crust. Their fine, buttery crumb offers a gentle crunch that contrasts with the smooth fudge. If you don’t have granita biscuits on hand, you can crumble shortbread or digestive biscuits, but keep in mind that the flavor profile will shift slightly toward a sweeter base. The marshmallows are the final textural flourish—they melt into the fudge, creating pockets of air that give each bite a light, almost ethereal feel. Skipping them will result in a denser, more chocolate‑heavy dessert.
The Unexpected Star
Condensed milk is the sweet, creamy binder that holds everything together. It’s the secret to that silky texture that feels like a chocolate ganache. If you prefer a lower sugar version, you can substitute with coconut milk sweetened with maple syrup, but the viscosity will be different and you’ll need to adjust the heat.
The Final Flourish
White chocolate is the luxurious, creamy layer that adds richness and depth. It melts into a glossy, almost glassy coating that glistens under the light. Use a high‑cocoa white chocolate for a smoother melt and a richer flavor. If you’re allergic to dairy, a dairy‑free white chocolate will work, but again, the melt might be slightly grainy.
Everything's prepped? Good. Let's get into the real action…
The Method — Step by Step
- Step 1: Create the Crust. In a medium bowl, combine the 250 g granita biscuits with the melted butter. Stir until the crumbs are evenly coated, then press the mixture into the bottom of a 9‑inch square baking pan lined with parchment. The crust should feel firm and compact; if it feels loose, add a splash of cold water to help bind it. Place the pan in the fridge to chill for 15 minutes, letting the butter set and the crumbs firm up. This resting period is crucial for preventing a soggy base when the sweet layer is poured on top.
- Step 2: Melt the White Chocolate. In a heat‑proof bowl, melt the 300 g white chocolate over a pot of simmering water. Stir constantly until the chocolate is smooth and glossy, then remove from heat. The chocolate should smell like sweet vanilla and cocoa, and its sheen should resemble melted butter. If the chocolate starts to seize, add a teaspoon of coconut oil to restore smoothness. This step is pure magic; the chocolate will later coat the fudge and give it that luxurious finish.
- Step 3: Combine Sweetness. In a separate saucepan, pour the 395 g condensed milk and heat over medium heat until it begins to bubble. Stir constantly to prevent scorching. Once it reaches a light amber color, remove from heat and whisk in the melted white chocolate until fully incorporated. The mixture should be thick, glossy, and slightly runny—like a thick glaze. This is the core of the fudge; the richer the better.
- Step 4: Add the Lemon. Stir in the 0.5 cup of lemon curd slowly, mixing until the color is a pale, translucent amber. The lemon will give the fudge a bright, zesty undertone that cuts through the sweetness. Be careful not to overmix, or the curd will break and the texture will become grainy. If you prefer a more pronounced citrus flavor, add an extra tablespoon of lemon zest.
- Step 5: Fold in the Marshmallows. Break the 200 g marshmallows into small cubes and fold them into the warm mixture. The marshmallows will melt and incorporate, creating airy pockets that add a playful texture. The mixture should look slightly lumpy at first, then smooth out as the marshmallows dissolve. This is the moment of truth; the aroma should be sweet, buttery, and slightly caramelized.
- Step 6: Pour Over the Crust. Remove the chilled crust from the fridge and pour the fudge mixture evenly over it. Use a spatula to spread the mixture so that it covers the entire surface. The top should be slightly glossy and the edges should start to pull away from the parchment. This visual cue tells you that the fudge is set enough to hold its shape.
- Step 7: Chill to Set. Return the pan to the fridge for at least 2 hours, or until the fudge is firm enough to cut cleanly. During this time, the flavors will meld, the marshmallow pockets will solidify, and the crust will absorb some of the moisture from the filling. If you’re in a hurry, you can place the pan in a warm spot for 30 minutes, but the texture will be softer.
- Step 8: Slice and Serve. Once the fudge is set, lift the whole pan with the parchment and transfer to a cutting board. Using a sharp knife, cut into 8 equal slices. Wipe the knife between cuts for clean edges. Serve immediately, or store in an airtight container in the fridge for up to 48 hours. Each slice should feel like a miniature dessert—crunchy base, creamy lemon‑chocolate middle, and a fluffy, melt‑in‑your‑mouth finish.
That's it — you did it. But hold on, I've got a few more tricks that'll take this to another level…
Insider Tricks for Flawless Results
The Temperature Rule Nobody Follows
Keep the heat low when melting the chocolate and heating the condensed milk. A temperature of 160 °F (70 °C) is ideal; anything higher risks scorching the sugar or causing the chocolate to seize. I once tried to speed things up by using high heat, and the result was a lumpy, burnt fudge that tasted like burnt sugar.
Why Your Nose Knows Best
Before adding the lemon curd, pause and sniff the mixture. A sweet, buttery aroma signals that the chocolate and milk are properly blended. If the scent is too metallic or off, the chocolate may have overheated. Trust your nose to catch subtle off‑notes before they become a problem.
The 5‑Minute Rest That Changes Everything
After pouring the fudge over the crust, let it rest at room temperature for exactly five minutes before chilling. This brief rest allows the mixture to settle, preventing air pockets from forming. It also makes the fudge easier to slice cleanly, as the surface becomes slightly firm.
Use a Silicone Baking Mat
Instead of parchment, line your pan with a silicone baking mat. It provides a non‑stick surface that makes lifting the entire slab out of the pan a breeze. I’ve had several attempts where parchment stuck to the chocolate, leaving a sticky mess.
Store in an Airtight Container
After slicing, place the pieces in a resealable plastic bag or a container with a tight seal. This prevents the fudge from absorbing fridge odors and keeps it from drying out. I once left my slices in an open container, and they became oddly dry and chalky.
Creative Twists and Variations
This recipe is a playground. Here are some of my favorite ways to switch things up:
Chocolate‑Lemon Swirl
Before pouring the fudge, swirl a tablespoon of dark chocolate into the lemon curd. The result is a marbled effect that looks stunning and adds a hint of bittersweet depth.
Nutty Crunch
Add 50 g of toasted almond slivers to the crust mixture. The almonds give a satisfying crunch and a nutty aroma that complements the lemon.
Minty Surprise
Replace half the marshmallows with crushed peppermint candies. The mint provides a cool contrast to the warm chocolate, creating a refreshing twist.
Berry Burst
Fold in 100 g of fresh raspberries into the fudge mixture just before pouring. The berries burst with juice and add a tart counterpoint to the sweet base.
Salted Caramel Touch
Drizzle a thin line of salted caramel over the top after the fudge has set. The salty-sweet finish elevates the dessert to gourmet status.
Gluten‑Free Version
Swap the granita biscuits for a gluten‑free shortbread blend. The texture remains the same, and the flavor profile stays intact.
Storing and Bringing It Back to Life
Fridge Storage
Store the slices in an airtight container at 35 °F (2 °C) for up to 48 hours. The cold keeps the fudge firm and prevents the marshmallows from melting too quickly. If you notice any condensation, blot with a paper towel to maintain crispness.
Freezer Friendly
Wrap each slice individually in plastic wrap and place them in a freezer bag. Freeze for up to 2 weeks. Thaw at room temperature for 30 minutes before serving; the texture will remain silky.
Best Reheating Method
To revive a chilled slice, place it in a microwave‑safe bowl and heat on 30 % power for 10–15 seconds. Add a tiny splash of water before reheating to create steam, which helps restore the glossy finish without drying the fudge.