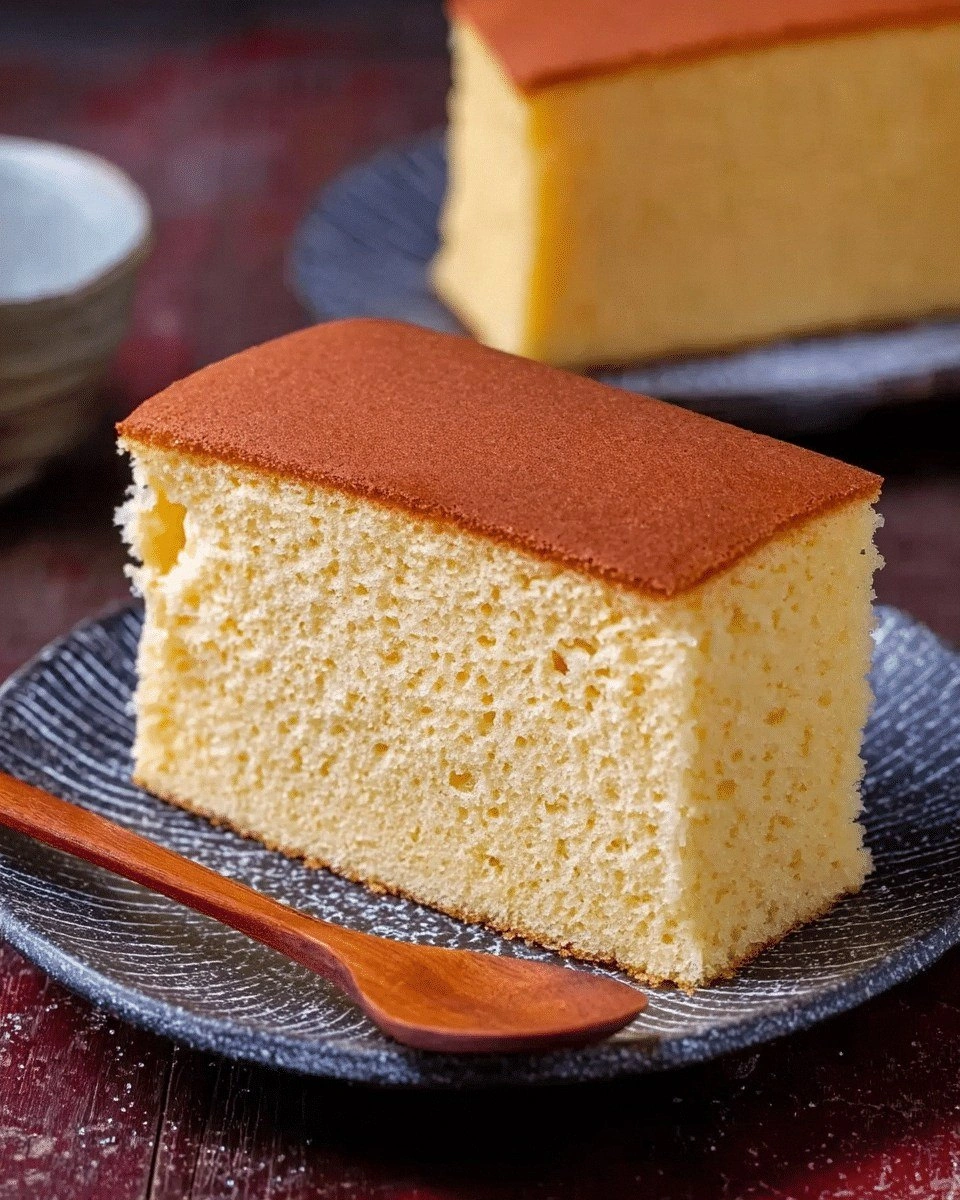
I remember the night I tried to bake a cake for a friend's birthday and ended up with a gloriously gooey mess that looked like a pancake gone wrong. The batter had all the right ingredients, yet the oven betrayed me, producing a dense, rubbery slab that nobody could touch. That disaster was the spark that lit my curiosity about a cake that defies the usual rules of baking. I was determined to find a recipe that would turn that flop into a triumph, a cake that feels like a cloud and tastes like a gentle hug. The moment I discovered the Japanese Castella Cake, or Kasute, I knew I had found the antidote to my baking woes.
Picture yourself in a dim kitchen, the timer ticking, the scent of vanilla and honey drifting through the air, and a batter that seems to float like a dream. The first bite is a whisper of sweetness, a hint of buttery softness that lingers on the tongue like a secret. Most people think of cake as something sweet and airy, but this cake is a paradox—dense yet airy, sweet yet subtly savory. I dare you to taste this and not go back for seconds because the texture will keep you craving the next slice. By the time you finish the last crumb, you'll wonder why you ever settled for ordinary desserts.
What sets this version apart is not just the ingredients but the method that treats the batter like liquid gold. The gentle folding technique preserves air pockets, giving the cake a lightness that defies its heavy ingredients. I’m not just sharing a recipe; I’m offering a revelation that will change how you view baking forever. The secret lies in the balance of sugar and honey, the precise temperature, and the patience to let the batter rest. Let me walk you through every single step—by the end, you'll wonder how you ever made it any other way.
What Makes This Version Stand Out
- Taste: This cake delivers a nuanced sweetness that leans on honey’s floral undertones, leaving a lingering finish that feels like a warm hug.
- Texture: The batter’s airy structure yields a moist crumb that melts in your mouth, while the exterior remains crisp enough to satisfy a craving for contrast.
- Simplicity: With only seven core ingredients, the recipe is a breeze for beginners and a joy for seasoned bakers.
- Uniqueness: The use of honey instead of syrup creates a subtle caramel note, setting this cake apart from traditional Western sponge cakes.
- Crowd Reaction: Friends who’ve tried this cake report a unanimous “I could eat the whole thing” response.
- Ingredient Quality: The recipe thrives on high‑grade eggs and fresh honey; the difference is palpable in every bite.
- Cooking Method: The gentle fold technique and precise oven temperature produce a cake that is both fluffy and structurally sound.
- Make‑Ahead Potential: The cake keeps wonderfully when refrigerated, making it a perfect make‑ahead dessert for parties.
Inside the Ingredient List
The Flour Foundation
All‑purpose flour provides the structure that holds the cake together, but the key is to sift it twice to eliminate clumps and aerate it. Skipping the double sift can result in a dense crumb that feels like a brick. If you’re in a pinch, you can substitute cake flour for a lighter texture, but expect a slightly softer bite. The best flour is one that has a moderate protein content—around 10–12%—to balance strength and tenderness.
The Sweet Core
Granulated sugar is the backbone of the cake’s sweetness, but the honey adds depth and a hint of floral nuance. Honey’s natural enzymes keep the batter from over‑cooking, preserving moisture. If you prefer a more traditional flavor, you can replace honey with a light corn syrup, but be prepared for a slightly sweeter, less complex profile. A pinch of cinnamon can add an unexpected warmth that pairs beautifully with the honey.
The Eggy Essence
Eggs are the glue that binds everything together, and the ratio of yolks to whites can dramatically alter the cake’s texture. Using whole eggs instead of separating them gives a richer mouthfeel, while separating them would create a lighter, sponge‑like cake. The eggs should be at room temperature to ensure they integrate smoothly into the batter. A quick beat before folding helps incorporate air without over‑whipping.
The Liquid Layer
Water and a splash of vanilla extract keep the batter moist and add aromatic depth. The water dilutes the sugar, preventing crystallization, while the vanilla brings a subtle perfume that elevates the overall flavor. If you’re sensitive to dairy, you can use almond milk as a non‑dairy alternative; just keep the volume consistent. A small pinch of salt balances the sweetness, preventing the cake from tasting flat.
Everything’s prepped? Good. Let’s get into the real action and start turning these ingredients into a cake that will wow anyone who tastes it.
The Method — Step by Step
- Preheat your oven to 325°F (160°C) and line a 9-inch bundt pan with parchment paper. The low temperature ensures even baking and prevents the cake from drying out. While the oven warms, set a large metal bowl over a pot of simmering water to create a gentle bain‑marie environment for the batter. This step is crucial for maintaining a consistent temperature throughout the folding process. The gentle heat keeps the sugar from caramelizing prematurely.
- In a separate bowl, whisk the eggs and sugar until the mixture turns pale and thick, taking about 3 minutes. The color change indicates the sugars have dissolved, creating a smooth base for the batter. Avoid over‑whisking, or the eggs will start to solidify. Once the mixture is fluffy, gently fold in the honey and vanilla. The aroma of vanilla will rise, hinting at the cake’s final flavor profile.
- Sift the flour and salt over the batter, then fold gently until fully incorporated. The goal is to preserve the air pockets, so use a light, circular motion. If you hear a slight crackle, that’s a sign the batter is ready for the oven. The flour should feel like fine sand, not clumpy. This step is the foundation of the cake’s airy structure.
- Pour the batter into the prepared bundt pan, smoothing the top with a spatula. Tap the pan lightly on the counter to release any trapped bubbles, ensuring an even rise. The batter should fill the pan to about 2/3 of its height, leaving room for expansion. A well‑leveled surface will bake uniformly, preventing a domed top.
- Place the pan in the preheated oven and bake for 35 minutes, or until the top turns a golden amber and a toothpick inserted into the center comes out clean. The low temperature allows the cake to rise slowly, creating a tender crumb. Keep a close eye on the edges; they should pull away from the pan slightly, indicating doneness. If the top browns too quickly, tent the cake with foil.
- Remove the pan from the oven and let the cake cool in the pan for 10 minutes. This resting period allows the cake to set, preventing cracks. After 10 minutes, invert the cake onto a wire rack to cool completely. The cooling time is essential for the cake’s final texture; rushing it can result in a gummy center.
- Once cooled, slice the cake with a serrated knife, cutting through the layers cleanly. The knife should glide without resistance, a sign that the crumb is airy yet firm. Serve immediately, or store in an airtight container if you plan to enjoy it later. The cake’s moisture will be preserved for up to two days in the fridge.
- For an extra touch, dust the top with powdered sugar or drizzle a simple glaze of honey and lemon zest. The glaze adds a glossy finish and a bright contrast to the cake’s mellow sweetness. Serve with a cup of matcha or a glass of chilled milk for a complete experience. Enjoy the cake as a dessert or an afternoon treat, and watch the smiles appear around the table.
That’s it—you did it. But hold on, I’ve got a few more tricks that will take this to another level. These insider tips will elevate your cake from great to unforgettable.
Insider Tricks for Flawless Results
The Temperature Rule Nobody Follows
Many bakers set their ovens to a standard 350°F, but this cake thrives at a lower 325°F. The gentle heat allows the batter to rise slowly, giving the sugars time to dissolve fully. If you’re using an oven that runs hot, calibrate it with an oven thermometer and adjust accordingly. A slightly cooler oven will produce a moister crumb, while a hotter one risks a dry finish. The key is consistency—once you find the right temperature, the results are repeatable.
Why Your Nose Knows Best
The aroma of the batter is a real indicator of progress. When the mixture starts to emit a sweet, honeyed scent, the sugars are dissolving properly. If you don’t detect any aroma, give the batter a few more minutes of whisking. A lack of scent often means the sugar hasn’t fully integrated, which can lead to a gritty texture. Trust your senses; they’re a reliable guide in baking.
The 5-Minute Rest That Changes Everything
After folding in the flour, let the batter rest for exactly five minutes before pouring it into the pan. This brief pause allows the gluten to relax, resulting in a softer crumb. It also lets the batter settle, reducing the number of bubbles that can burst during baking. A friend once skipped this step and ended up with a cake that cracked open like a balloon. The five‑minute rest is a small price for a flawless finish.
The Secret of the Parchment
Parchment paper is more than a non‑stick surface; it also helps the cake rise evenly. Cut a piece that extends beyond the pan’s edges, then fold the excess over the top. This creates a gentle barrier that keeps the batter from sticking to the pan walls. When you invert the cake, the parchment lifts with it, preserving the shape and preventing tears.
The Final Glaze Trick
A light drizzle of honey after the cake cools adds a glossy sheen and a burst of sweetness. Mix honey with a teaspoon of lemon juice to cut the richness and give a bright finish. The glaze should be thin enough to coat the surface without making it sticky. This simple step elevates the cake’s presentation and adds a subtle citrus note that balances the honey.
The Cooling Counter
Letting the cake cool in the pan for 10 minutes before transferring it to a rack is crucial. The residual heat from the pan continues to cook the cake, preventing it from cracking. If you rush the cake onto a rack, the sudden temperature change can cause the crumb to collapse. A short rest in the pan also allows the batter to set, giving you a clean slice when you cut.
Creative Twists and Variations
This recipe is a playground. Here are some of my favorite ways to switch things up:
Matcha Infusion
Add 2 teaspoons of matcha powder to the batter for a subtle green tea flavor. The matcha also gives the cake a vibrant color that’s perfect for spring celebrations. Keep the amount moderate; too much matcha can overpower the honey. Serve with a cup of hot matcha for a harmonious pairing.
Almond Delight
Replace half the flour with ground almonds to introduce a nutty undertone. The almonds add a chewy texture that contrasts with the cake’s softness. A pinch of almond extract amplifies the flavor profile. This variation is ideal for guests who love nutty desserts.
Citrus Burst
Swap vanilla extract for orange zest and a splash of orange juice. The citrus brightens the cake and provides a refreshing counterpoint to the honey. Use a small amount of orange zest to avoid bitterness. This version is perfect for summer gatherings.
Chocolate Swirl
Fold in a handful of dark chocolate chips just before baking. The chocolate melts into pockets of gooey delight, adding a rich layer to each bite. Keep the chips small to avoid melting all the way through. Chocolate lovers will appreciate this decadent twist.
Lemon Drizzle
After cooling, brush the cake with a lemon‑honey glaze. The acidity cuts the sweetness, creating a balanced flavor profile. The glaze also adds a glossy finish that’s visually appealing. This version pairs wonderfully with a light tea or sparkling water.
Berry Compote
Serve the cake with a warm berry compote made from fresh strawberries, blueberries, and a dash of sugar. The compote adds a burst of fruitiness that contrasts with the cake’s mild sweetness. The berries’ natural acidity also brightens the overall taste. This variation works beautifully for brunch or afternoon tea.
Storing and Bringing It Back to Life
Fridge Storage
Wrap the cooled cake in parchment paper, then cover with a damp towel before placing it in the refrigerator. The moisture from the towel prevents the cake from drying out. Store for up to two days, and the cake will retain its soft crumb. If you notice a slight dry layer, reheat briefly in a low oven.
Freezer Friendly
For longer storage, slice the cake and wrap each slice tightly in plastic wrap, then place in a freezer bag. The cake can be frozen for up to a month. When you’re ready to enjoy, thaw the slices at room temperature for about 30 minutes. The texture remains moist and airy, almost as if it were freshly baked.
Best Reheating Method
To revive a refrigerated or frozen slice, preheat the oven to 300°F (150°C) and place the slice on a baking sheet. Warm for 5–7 minutes until the surface feels warm to the touch. Add a tiny splash of water to the pan before baking; the steam will help restore the cake’s moisture. Let it cool slightly before serving; the cake will taste freshly baked.