The moment my kitchen turned into a chaotic symphony of burnt toast and a lingering, burnt sugar smell, I realized I needed a new dessert. I was standing in front of the stove, eyes darting between the scorched pan and the clock, when a friend texted me, “You’ve got to try something that actually works.” I didn’t even know what that “something” was until I stumbled upon a forgotten box of Arborio rice, a jar of whole milk, and a half‑cup of sugar that had been sitting in the pantry for months. I thought, “If I can’t even get a simple rice pudding right, how am I supposed to make something that tastes like a cloud of vanilla and cinnamon?” That’s when the idea of baked vanilla ric—short for rice pudding squares—was born.
Picture this: the kitchen is a stage, the oven a spotlight, and you, the chef, are about to perform a dessert that will have everyone begging for seconds. The aroma of simmering milk and vanilla bean fills the air like a warm hug. The sound of the rice gently sizzle as it cooks in the pan is a soft whisper that says, “This is going to be good.” The texture is silky, the flavor a perfect balance of sweet and buttery, and the final result is a golden square that crackles like a tiny, edible sunrise. If you’ve ever tried a standard rice pudding and felt it was missing something, I’ll be honest—this recipe is hands down the best version you’ll ever make at home.
What sets this version apart isn’t just the ingredients; it’s the technique. I use a double boiler method to ensure the rice cooks evenly, then finish it in the oven for a caramelized top that’s simply irresistible. The secret? A dash of salt and a generous splash of vanilla that together lift the flavor profile, and a light dusting of powdered sugar that turns each square into a sweet, buttery bite. I dare you to taste this and not go back for seconds. And trust me, you’ll wonder why you ever settled for anything else. If you’ve ever struggled with rice pudding, you’re not alone—and I’ve got the fix.
So grab your apron, preheat that oven, and let’s walk through every single step. By the end, you’ll wonder how you ever made it any other way. Ready? Let’s dive into the world of baked vanilla ric.
What Makes This Version Stand Out
- Texture: The double‑boiler technique creates a silky, custard‑like consistency that melts in your mouth, unlike the grainy texture of a traditional stovetop pudding.
- Flavor: A generous vanilla bean (or extract) and a pinch of salt coax the rice’s natural sweetness into a richer, more complex profile.
- Convenience: Bake it once, slice it into squares, and you have a portable dessert that’s perfect for parties, picnics, or a quick sweet fix.
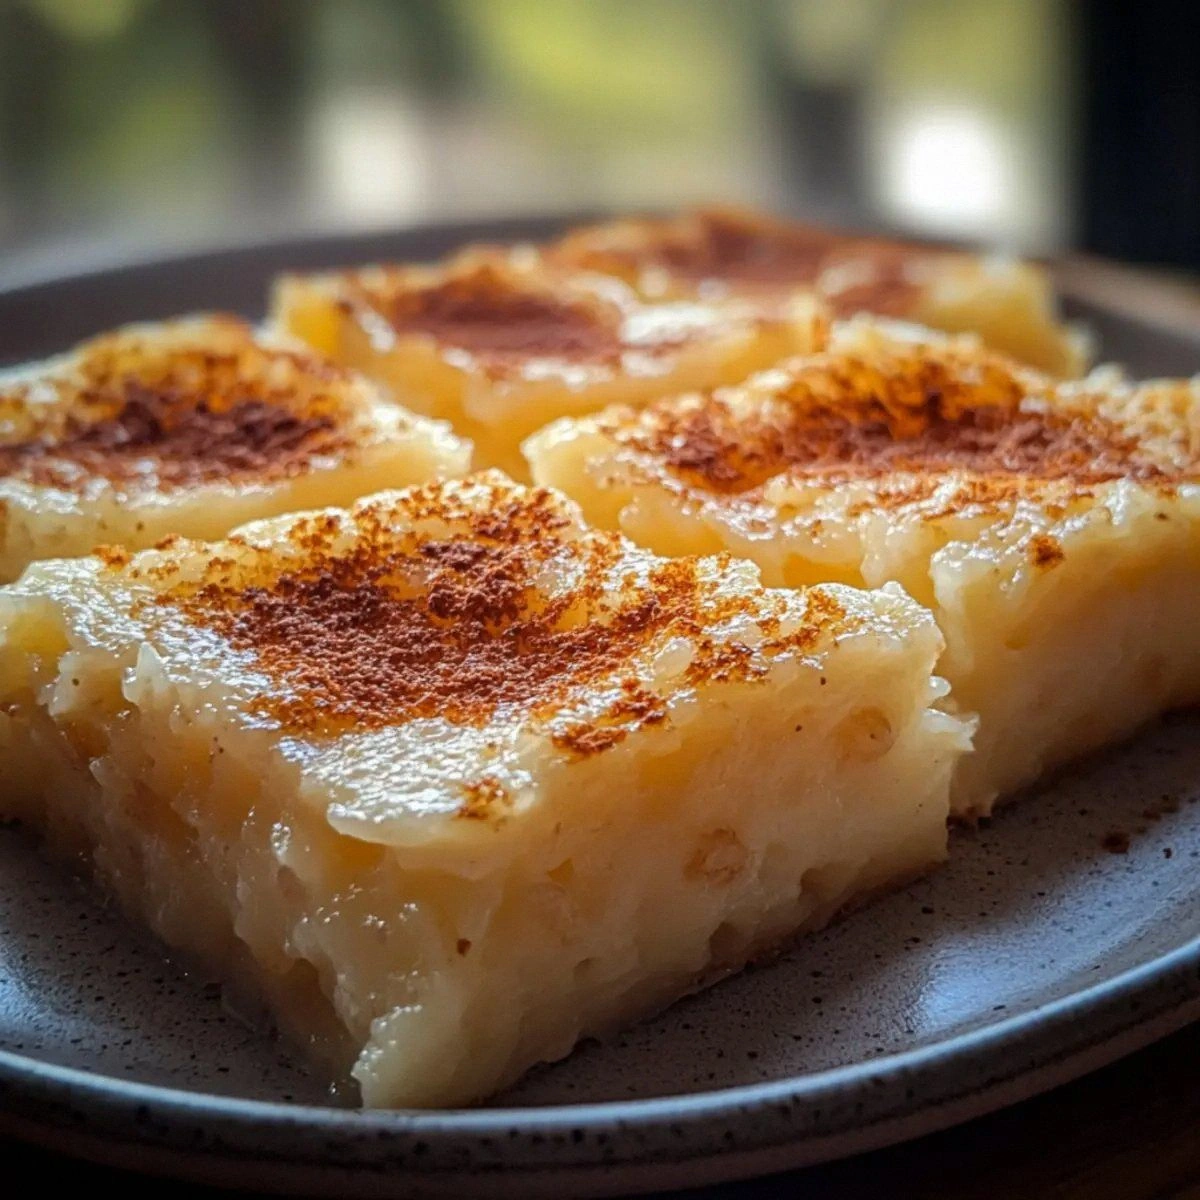
- Visual Appeal: The golden crust and dusting of powdered sugar give it a restaurant‑grade finish that looks as good as it tastes.
- Versatility: Swap Arborio for short‑grain rice, or add dried fruit or nuts for a personalized twist.
- Make‑Ahead: This dessert can be prepared ahead of time, refrigerated, and reheated with a splash of milk for a fresh, warm treat.
- Ingredient Quality: Using whole milk instead of skim or half‑and‑half gives a richer mouthfeel and deeper flavor.
- Audience: Whether you’re a novice or a seasoned baker, the clear steps and forgiving method make this a crowd‑pleaser.
Alright, let’s break down exactly what goes into this masterpiece...
Inside the Ingredient List
The Flavor Base
Arborio rice is the star of this dish. Its high starch content creates a naturally creamy custard when cooked slowly in milk. If you don’t have Arborio, short‑grain or medium‑grain rice works fine, but the texture will be slightly less silky. Don’t skip the milk—whole milk provides the fat that coats the rice grains, giving each bite a buttery finish. If you’re lactose intolerant, try a full‑fat plant‑based milk; the flavor will be a bit different but still delicious.
The Sweetness Engine
Granulated sugar is the backbone of the sweetness. A 3/4 cup measure is the sweet spot: sweet enough to satisfy, but not so much that it overwhelms the vanilla. If you’re watching your sugar intake, you can cut it in half, but you’ll need to increase the vanilla or add a splash of honey to compensate. A pinch of salt is essential; it balances the sweetness and brings out the vanilla’s depth. Without it, the dessert can taste flat.
The Vanilla Virtuoso
A tablespoon of vanilla bean or extract is the heart of this recipe. The whole bean gives a subtle, floral note that pairs beautifully with the rice’s nuttiness. If you’re using extract, choose a pure vanilla for the best flavor. Skipping vanilla turns the dessert into a plain milk‑rice combo—nice, but not unforgettable. If you’re adventurous, add a dash of almond extract for a nutty twist.
The Texture Crew
Eggs are the binder that turns the rice and milk mixture into a stable, silky custard. They also provide structure so the squares hold together when sliced. Two tablespoons of butter add richness and a glossy finish. The ground cinnamon or nutmeg is optional but highly recommended; it adds warmth and a subtle spice that lingers on the palate. If you’re gluten‑free, this recipe is naturally free of gluten, but double‑check the sugar for hidden gluten.
The Unexpected Star
Powdered sugar is the final flourish that turns each square into a sweet, delicate bite. A light dusting on top creates a contrast in texture—soft inside, slightly crunchy on the outside. It also adds a touch of visual elegance. If you’re not a fan of powdered sugar, you can skip it, but you’ll miss that classic dessert look.
Everything's prepped? Good. Let's get into the real action...
The Method — Step by Step
- Preheat the oven. Set it to 350°F (175°C). While the oven warms, line a 9×9‑inch baking pan with parchment paper or a silicone mat. This step is crucial because a sticky pan can ruin the squares’ texture. Let me walk you through the first part: you’ll want the pan ready before the rice starts cooking.
- Cook the rice. In a medium saucepan, combine 1 cup Arborio rice, 4 cups whole milk, 0.75 cups granulated sugar, and 0.25 teaspoon salt. Bring to a gentle simmer over medium heat, stirring frequently to prevent sticking. The rice should absorb the milk slowly, creating a thick, creamy base. Watch the color change from translucent to a soft amber; that’s the signal that the starches are fully released.
- Whisk the eggs. In a separate bowl, beat 3 large eggs with a pinch of salt. Slowly pour about a cup of the hot rice mixture into the eggs while whisking continuously to temper them. This prevents the eggs from scrambling. Once combined, pour the entire mixture back into the saucepan, stirring constantly. The mixture should thicken to a custard-like consistency.
- Add butter and vanilla. Reduce the heat to low and stir in 2 tablespoons butter until melted. Then add 1 tablespoon vanilla bean or extract. The butter’s fat coats the rice grains, giving that silky mouthfeel, while the vanilla infuses the custard with aroma. Let it simmer for another 5 minutes, keeping the heat low to avoid curdling.
- Finish the custard. Remove the saucepan from heat. If you’re using ground cinnamon or nutmeg, stir in 0.5 teaspoon of your chosen spice. This step is where the magic happens—spice lifts the whole dessert and adds a subtle warmth. Let the custard sit for 2 minutes; it will thicken slightly as it cools.
- Transfer to the pan. Pour the custard into the prepared baking pan. Smooth the top with a spatula. The surface should be even for a uniform bake. Place the pan in the preheated oven and bake for 30 minutes, or until the top is golden brown and a toothpick inserted near the center comes out clean.
- Cool and slice. Remove the pan from the oven and let it cool on a wire rack for at least 20 minutes. While cooling, you’ll notice the custard setting into a firm yet tender slab. Once cooled, dust the top with powdered sugar. Use a sharp knife to cut the slab into squares—each should have a crisp edge that cracks like thin ice.
- Serve or store. Serve the squares warm or at room temperature. They’re best enjoyed within a day of baking, but you can refrigerate them for up to 3 days. When reheating, add a splash of milk and warm gently on the stove or in the microwave.
That’s it—you did it. But hold on, I’ve got a few more tricks that will take this to another level...
Insider Tricks for Flawless Results
The Temperature Rule Nobody Follows
Many bakers bake at 375°F, assuming higher heat equals faster results. In reality, a gentle 350°F gives the custard enough time to set without drying out. I’ve tried 400°F once, and the top was scorched while the interior remained liquid. Keep it moderate, and you’ll get that perfect golden crust.
Why Your Nose Knows Best
When the custard starts to thicken, a sweet, milky aroma will fill the kitchen. That’s your cue to reduce heat and let it simmer. If you can’t smell that aroma, the rice hasn’t released enough starch, and the texture will be grainy. Trust your senses—your nose is the best judge of doneness.
The 5‑Minute Rest That Changes Everything
After you remove the custard from the heat, let it sit for 5 minutes before pouring it into the pan. This brief rest allows the rice to continue absorbing milk, leading to a denser, more cohesive custard. Skipping this step can result in a slightly watery texture.
Dusting Delicacy
Instead of powdered sugar, try a light dusting of ground cinnamon or a drizzle of caramel sauce for a different flavor profile. The powdered sugar is classic, but mixing things up keeps the dish exciting. I’ve added a sprinkle of toasted coconut on top for a tropical twist.
Reheating Like a Pro
Reheat leftovers with a splash of whole milk to restore moisture. Microwave on medium power for 30 seconds, then stir; repeat until warmed through. Avoid high heat, as it can dry out the custard. If you’re reheating in the oven, cover the pan with foil to trap steam.
Creative Twists and Variations
This recipe is a playground. Here are some of my favorite ways to switch things up:
Nutty Crunch
Add 1/2 cup toasted almonds or pecans to the custard before baking. The nuts add a delightful crunch and a nutty flavor that pairs beautifully with the vanilla.
Berry Burst
Fold in 1 cup fresh or frozen berries (blueberries, raspberries, or strawberries) into the custard before pouring into the pan. The berries burst with juice, creating pockets of fruity surprise in each square.
Chocolate Drizzle
Once the custard has cooled, drizzle melted dark chocolate over the top before dusting with powdered sugar. The chocolate adds richness and a slight bitterness that balances the sweetness.
Spiced Pumpkin
Replace the vanilla with 1 tablespoon pumpkin puree and add 1 teaspoon pumpkin pie spice. This gives a warm, autumnal flavor that’s perfect for fall gatherings.
Herbal Twist
Incorporate a handful of chopped fresh mint or basil into the custard. The herbs give a fresh, aromatic note that brightens the dessert.
Almond Delight
Use almond milk instead of whole milk and add 2 tablespoons almond butter to the custard. This creates a nutty, creamy texture that’s dairy‑free and delicious.
Storing and Bringing It Back to Life
Fridge Storage
Cool the custard fully, then cover the pan tightly with plastic wrap. Store in the refrigerator for up to 3 days. The custard will firm up, making slicing easier.
Freezer Friendly
After cooling, cut the custard into squares and place them in a freezer bag. Freeze for up to 2 weeks. When ready to serve, let them thaw at room temperature for 15 minutes.
Best Reheating Method
Reheat in the microwave on medium power for 30 seconds, then stir. Add a splash of milk to restore moisture and repeat until warmed. Alternatively, place the squares in a preheated oven at 300°F for 10 minutes.