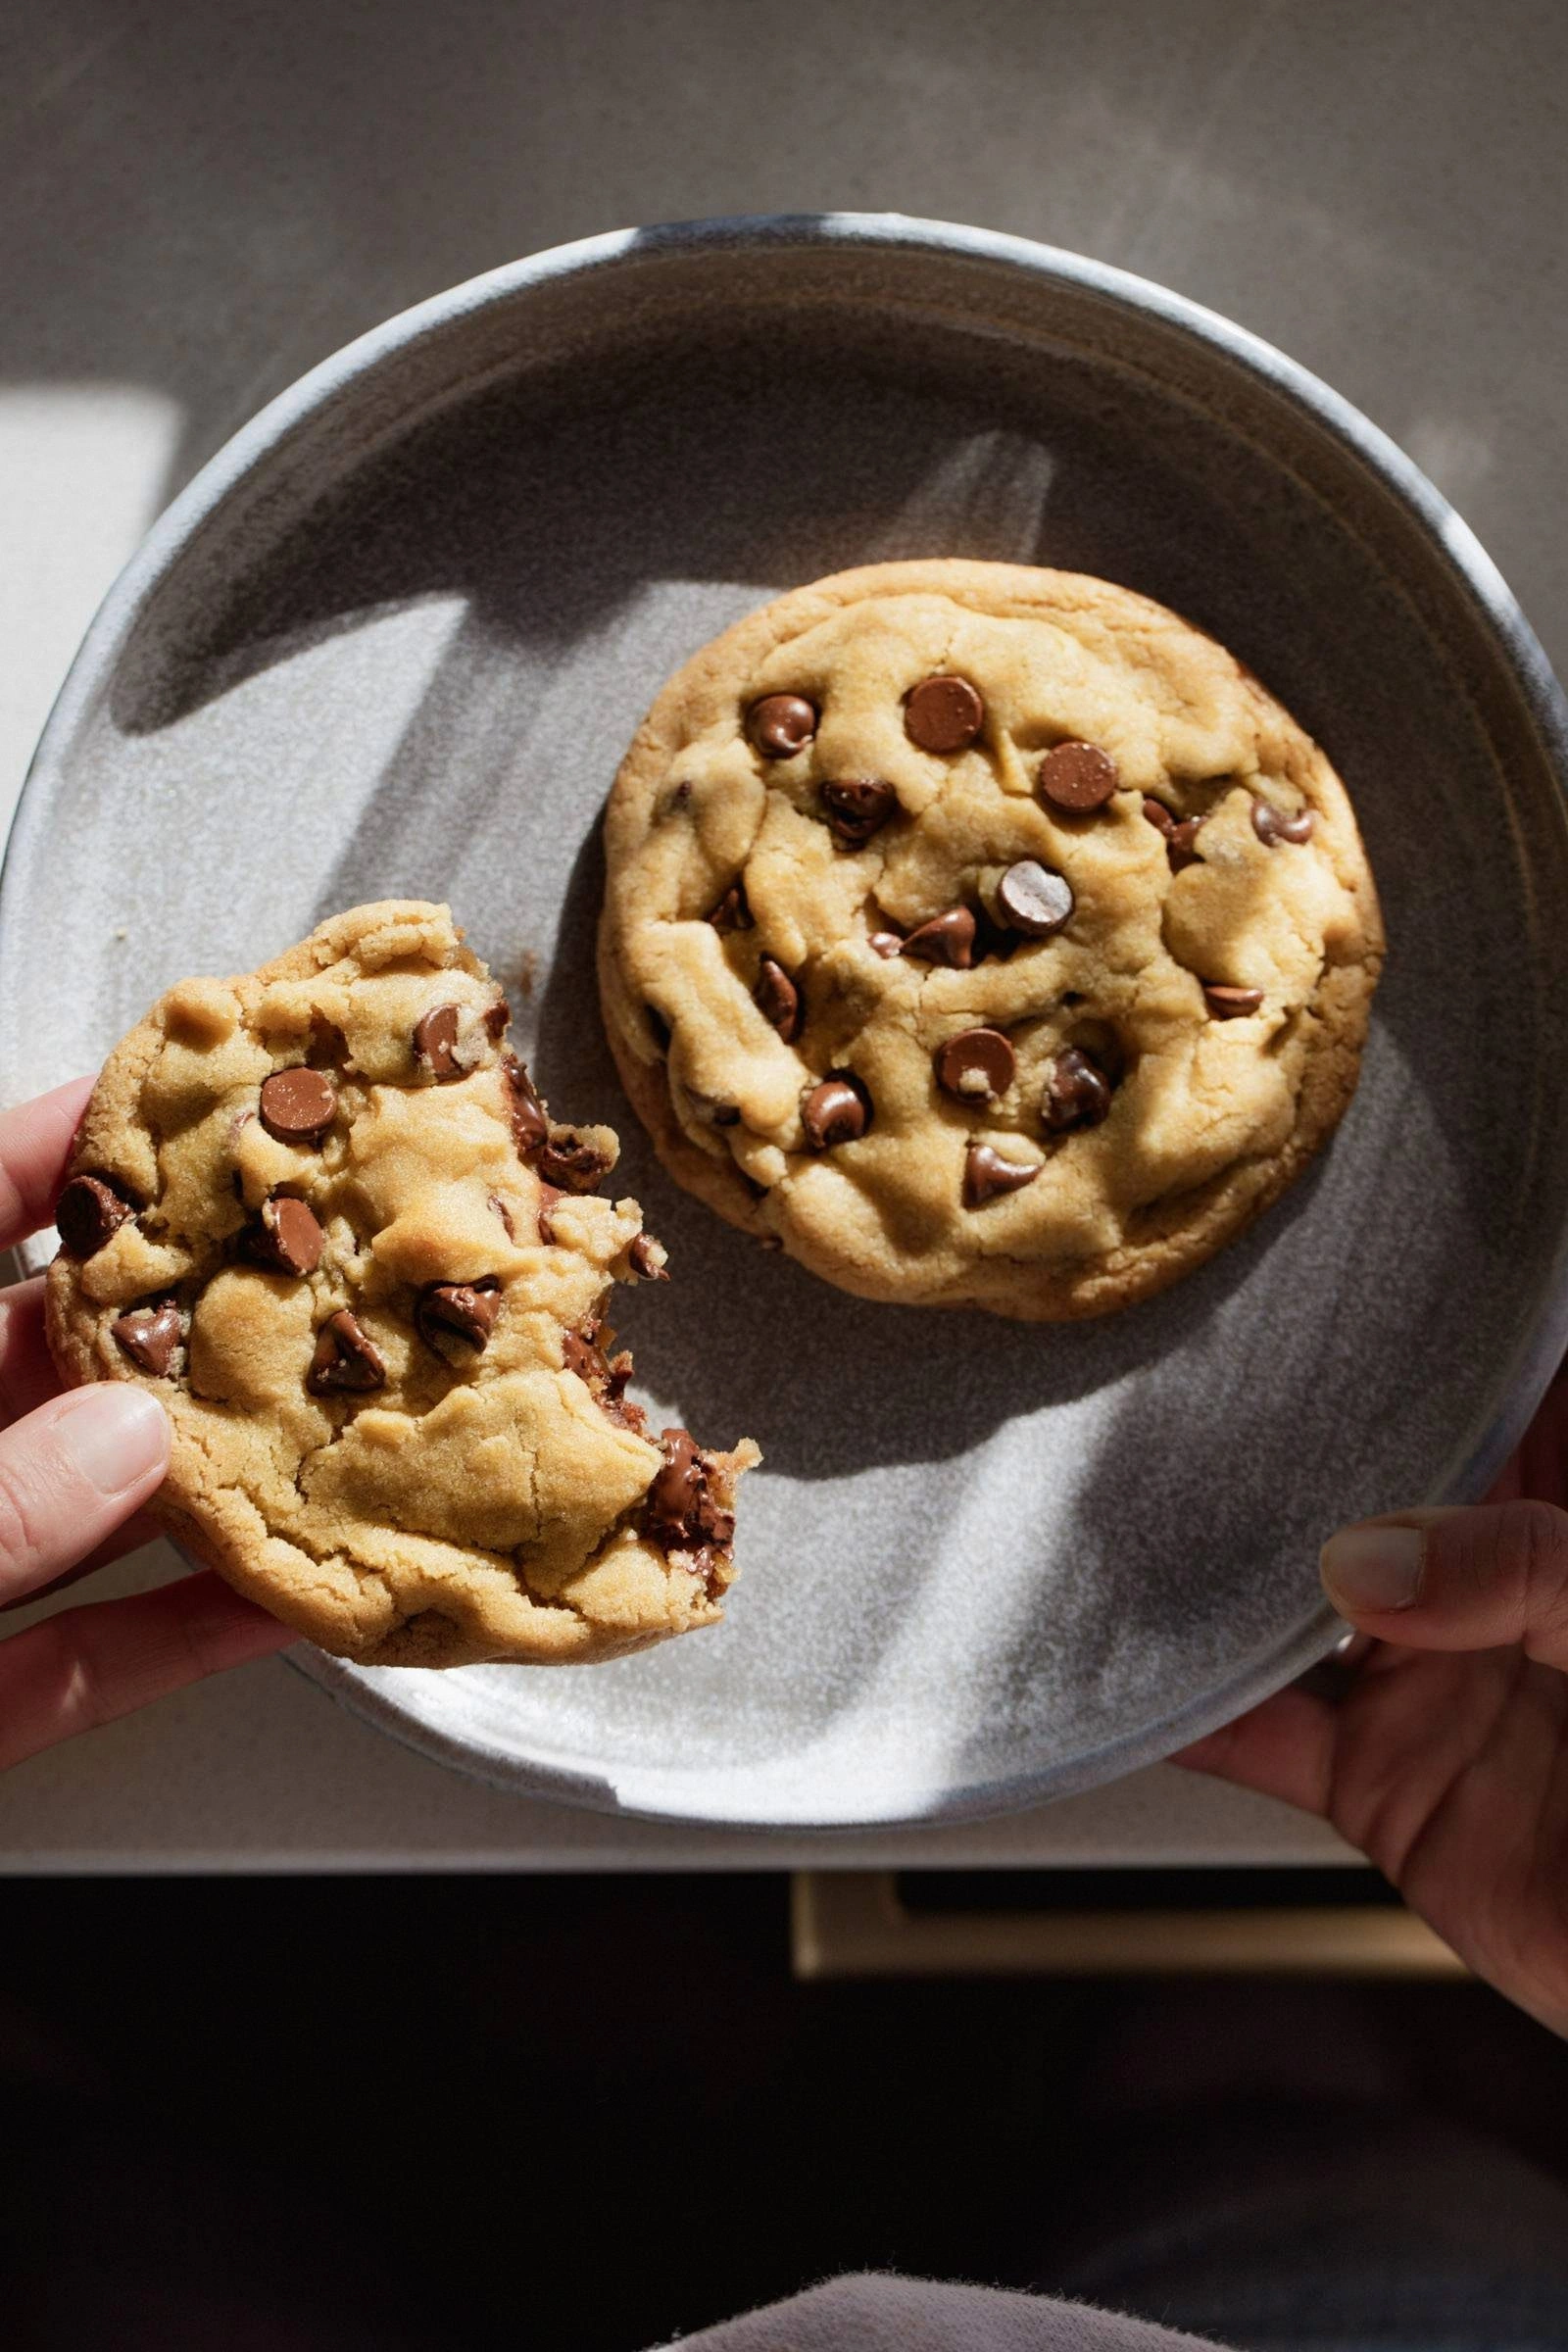
I was standing in my kitchen at three in the morning, half‑asleep, half‑hungry, when my roommate dared me to bake a cookie that could double as a doorstop. “Make something so massive it could feed a family,” she said, smirking. I laughed, but the idea stuck like caramel on a spatula. The next day I set out to create a cookie that would be both a statement piece and a comfort hug for anyone who ever craved that perfect balance of chew and crunch. The result? Two colossal chocolate chip behemoths that could easily out‑shine any store‑bought giant cookie you’ll ever see.
Picture this: the oven door opens and a wave of buttery, chocolate‑laden aroma floods the kitchen, making the whole house feel like a bakery on a Saturday morning. You hear the faint crackle of the butter melting into the sugar, the gentle whir of the mixer, and the soft thud of dough hitting the parchment. The dough feels cool and plush under your fingertips, like a pillow you’re about to flatten into a masterpiece. When the timer dings, the edges are a deep caramel‑gold, the center still soft‑chewy, and the chocolate chips are molten islands that melt in your mouth without any of that dreaded “grainy” aftertaste.
Most chocolate chip cookie recipes get this completely wrong. They either produce a flat, crispy disc that crumbles at the first bite, or a dense, cake‑like slab that feels like chewing on a brick. What makes this version stand out is a careful choreography of temperature, ingredient ratios, and a secret‑weapon technique that turns a simple batter into a cookie that practically glistens with buttery goodness. I’m talking about a chilled dough that’s rolled into two massive rounds, a short bake that locks in steam, and a finishing touch that creates that coveted “crackle” around the edges.
I’ll be honest — I ate half the batch before anyone else got a chance to try it, and I’m still not over the after‑taste of sweet, salty, and chocolatey perfection. I dare you to taste this and not go back for seconds. The secret? A splash of vanilla‑infused brown butter that adds depth you’ll swear is magical. Okay, ready for the game‑changer? Let me walk you through every single step — by the end, you’ll wonder how you ever made it any other way.
What Makes This Version Stand Out
- Texture: The outer rim is crisp, almost caramelized, while the center stays pillowy soft, creating a delightful contrast that most recipes miss.
- Flavor Depth: Brown butter and a pinch of sea salt amplify the chocolate, giving each bite a layered, almost caramel‑like richness.
- Size: Two massive cookies replace a whole tray of small ones, making serving simple and presentation impressive.
- Ease: Despite the impressive size, the method uses only one bowl and a single bake, perfect for busy cooks.
- Ingredient Quality: Using high‑quality vanilla extract and real butter turns a humble cookie into a gourmet treat.
- Make‑Ahead Potential: The dough can be refrigerated for up to 24 hours, allowing flavors to meld before the big bake.
- Crowd Reaction: One bite and you’ll hear the “wow” that makes you the hero of any gathering.
- Versatility: Swap in dark chocolate, milk chocolate, or even white chocolate chips for a personalized twist.
Inside the Ingredient List
The Flavor Base
The backbone of any great cookie is the butter‑sugar combo. I use 1 cup of softened butter that I first brown for a nutty aroma, then blend with 1 cup of packed brown sugar and ½ cup of white sugar. The brown sugar adds moisture and that subtle molasses note, while the white sugar contributes crispness to the edges. If you skip the browning step, you’ll lose the toasty depth that makes these cookies feel like a bakery secret.
The Texture Crew
All‑purpose flour at 2 cups provides structure, but the magic lies in the balance with the leavening agents. One teaspoon of baking soda reacts with the brown butter’s acidity, creating tiny air pockets that keep the interior soft. A full teaspoon of sea salt not only enhances the chocolate but also counteracts the sweetness, preventing the cookie from becoming cloying. If you drop the salt, you’ll notice a flat, overly sweet profile that never quite hits the palate.
The Unexpected Star
Two cups of semi‑sweet chocolate chips are the heart of this recipe. Using a high‑quality brand with at least 60% cocoa ensures the chips melt just enough to stay gooey without turning into a greasy puddle. For a twist, try mixing half dark and half milk chocolate; the contrast adds visual appeal and flavor complexity. If you’re allergic to dairy, dairy‑free chocolate chips work just as well, though the texture may be slightly firmer.
The Final Flourish
Two large eggs act as the binder, creating a cohesive dough that can hold its massive shape. A splash of vanilla extract (about 2 teaspoons) rounds out the flavor, giving the cookie a warm, aromatic backbone. For those who love a hint of orange, a teaspoon of orange zest can be added without overwhelming the chocolate. Skipping the vanilla is a mistake; the cookie will feel flat and miss that comforting aroma that makes you think of grandma’s kitchen.
Everything's prepped? Good. Let’s get into the real action…
The Method — Step by Step
-
Start by melting the butter in a medium saucepan over medium heat. Stir constantly until it turns a deep amber color and you catch a nutty fragrance that makes you think of toasted almonds. Immediately remove from heat and let it cool for five minutes; this prevents the eggs from scrambling later.
Kitchen Hack: Add a pinch of sea salt to the butter as it browns; it helps to bring out the toasty notes even more. -
In a large mixing bowl, whisk together the brown sugar, white sugar, and the warm browned butter until the mixture is light and fluffy. This should take about 2‑3 minutes with an electric mixer on medium speed. The color will lighten, and you’ll notice the mixture becoming glossy—signs that the sugar is starting to dissolve.
-
Add the eggs one at a time, beating well after each addition. Then stir in the vanilla extract. The dough should look smooth, slightly glossy, and a little bit thick—exactly the texture you want before the dry ingredients join the party.
-
In a separate bowl, whisk together the flour, baking soda, and sea salt. This ensures the leavening is evenly distributed, preventing pockets of bitterness. Once combined, gradually fold the dry mixture into the wet mixture using a spatula. Be gentle; over‑mixing will develop gluten and make the cookie tough.
-
Fold in the chocolate chips until they’re evenly coated with dough. The chips should look like tiny, shiny marbles ready to melt into gooey pockets. At this point, the dough will be thick and slightly sticky—perfect for shaping.
Watch Out: If the dough feels too wet, add a tablespoon of flour; too dry and the cookie will crack during baking. -
Cover the bowl with plastic wrap and place the dough in the refrigerator for at least 30 minutes, but ideally 1 hour. This chilling step firms up the butter, allowing the cookie to hold its massive shape while still spreading just enough to create those coveted edge “crackles.”
-
Preheat your oven to 350°F (175°C). Line a large baking sheet with parchment paper. While the oven heats, scoop the chilled dough into two equal portions (about 1½ cups each) and shape each into a rough circle about 4‑5 inches in diameter. Place the dough circles on the parchment, leaving plenty of space between them because they’ll spread slightly.
Kitchen Hack: Use a piece of parchment to gently flatten the dough circles to an even thickness; this ensures uniform baking. -
Bake for 12‑14 minutes, or until the edges are a deep golden brown and the centers still look slightly underbaked. The scent at this stage is intoxicating—think toasted brown butter mingling with sweet chocolate. The tops should have a faint crackle, a visual cue that the cookie’s interior will stay soft while the exterior crisps.
-
Remove the cookies from the oven and let them cool on the sheet for 5 minutes before transferring to a wire rack. This short rest lets the interior finish its set while the outer crust firmifies just enough to hold together. When you finally break a piece, you’ll hear that satisfying snap of the edge followed by a melt‑in‑your‑mouth chew.
That’s it — you did it. But hold on, I’ve got a few more tricks that’ll take this to another level…
Insider Tricks for Flawless Results
The Temperature Rule Nobody Follows
Always start with a cold butter and a chilled dough. The cooler the dough, the less it spreads, which translates into a taller, fluffier interior. I once tried to rush the process by skipping refrigeration; the result was a flat, cookie‑crisp that felt more like a wafer than a cookie. Keep your dough in the fridge for at least 30 minutes and you’ll notice a dramatic difference in height.
Why Your Nose Knows Best
Your sense of smell is a more reliable indicator than a timer. Around the 10‑minute mark, the kitchen will be filled with a sweet‑but‑toasty perfume; when you catch a faint hint of caramel, you’re almost there. If you wait until the timer dings and the scent has faded, you risk over‑baking. Trust the nose, not the clock.
The 5‑Minute Rest That Changes Everything
After you pull the cookies from the oven, let them rest on the baking sheet for exactly five minutes. This short pause lets the residual heat finish cooking the center without drying it out. I once moved a cookie to a rack immediately and the middle stayed doughy; five minutes on the sheet solves that problem.
The Double‑Layered Chocolate Secret
For an extra burst of chocolate, sprinkle a thin layer of chips on top right before baking. The top layer melts into a glossy crust while the buried chips stay softer. This creates a textural surprise: a crisp chocolate shell on the outside and a melty core inside.
The Salt Finish
A light sprinkle of flaky sea salt just after baking amplifies the sweet‑salty balance and adds a subtle crunch. It’s the same trick professional bakers use on brownies and pretzel‑chocolate combos. Don’t overdo it—just a pinch across the surface does the trick.
Creative Twists and Variations
This recipe is a playground. Here are some of my favorite ways to switch things up:
Nutty Crunch
Add ½ cup of toasted chopped walnuts or pecans to the dough. The nuts introduce a buttery crunch that pairs beautifully with the soft chocolate pockets, making each bite a surprise of texture.
Double Chocolate Delight
Replace half of the semi‑sweet chips with dark chocolate chunks and add 2 tablespoons of unsweetened cocoa powder to the dry mix. The result is a richer, more intense chocolate flavor that satisfies even the most discerning cocoa lovers.
Spiced Autumn
Stir in 1 teaspoon of pumpkin spice or cinnamon and a tablespoon of pumpkin puree for a seasonal twist. The warm spices complement the chocolate, turning the cookie into a cozy fall treat.
White Chocolate & Raspberry
Swap half the chocolate chips for white chocolate chips and fold in ¼ cup of freeze‑dried raspberry pieces. The tangy raspberries cut through the sweetness, while the white chocolate adds a creamy sweetness.
Coffee‑Infused
Dissolve 1 tablespoon of instant espresso powder in the melted butter before mixing. The coffee accent deepens the chocolate flavor, giving the cookie a subtle mocha undertone.
Storing and Bringing It Back to Life
Fridge Storage
Place the cooled cookies in an airtight container with a slice of bread on top. The bread supplies moisture, keeping the interior soft for up to five days. If you notice the edges drying out, a quick 10‑second microwave burst can revive them.
Freezer Friendly
Wrap each cookie tightly in plastic wrap, then place them in a zip‑top freezer bag. They’ll keep for up to three months. When you’re ready, thaw at room temperature for 30 minutes, then pop them in a 300°F oven for 5 minutes to re‑crisp the edges.
Best Reheating Method
A tiny splash of water (about a teaspoon) on the cookie before reheating creates steam that revives the chewy center while the oven restores the crisp edge. This trick works whether you’re using a toaster oven, a conventional oven, or even a microwave on low power for 15 seconds.